

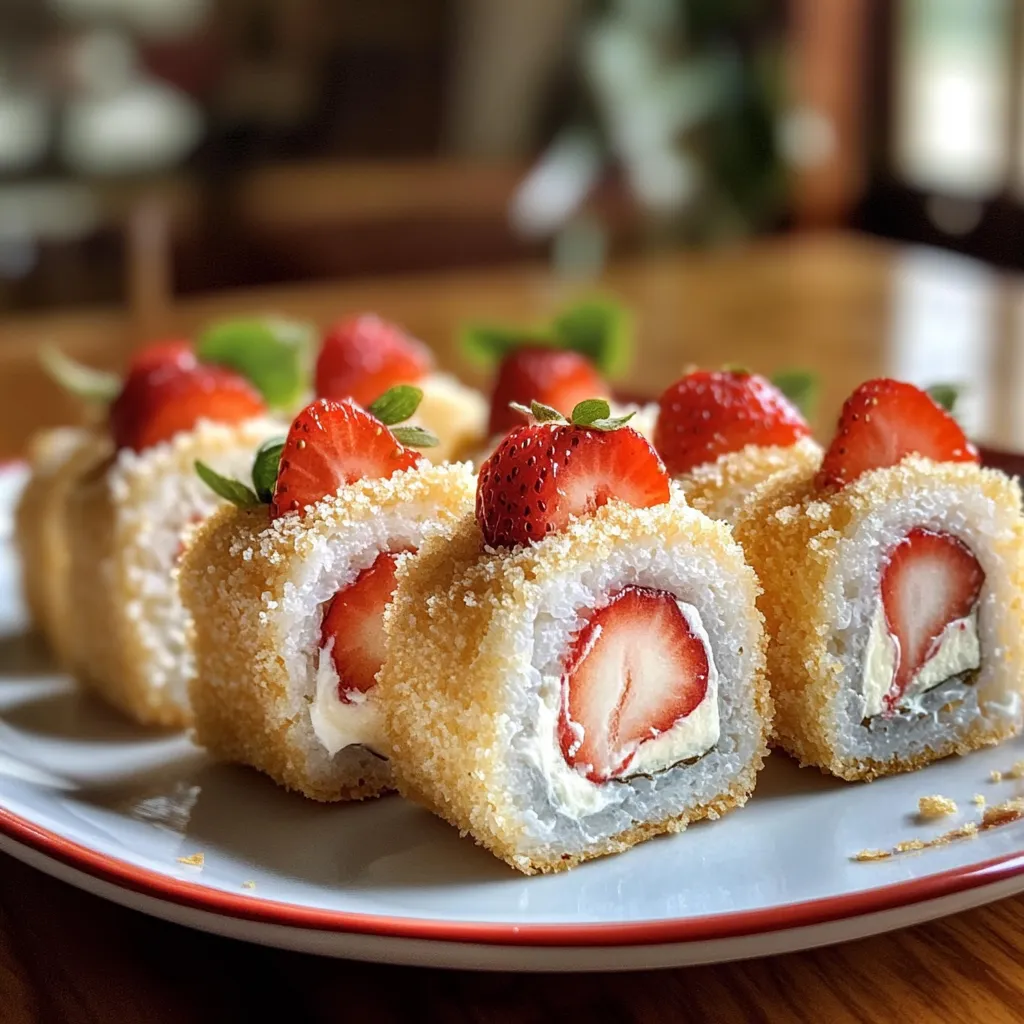
These irresistible Strawberry Shortcake Cheesecake Sushi Rolls transform classic dessert flavors into an innovative, Instagram-worthy creation with their perfect balance of tender vanilla sponge cake, creamy cheesecake filling, and fresh strawberry centers. The recipe showcases delicate cake layers wrapped around luscious cream cheese filling and vibrant strawberry pieces, all rolled into elegant sushi-style portions and coated with coconut “rice” for authentic visual appeal. Every bite delivers an exquisite harmony—the soft sponge cake provides the perfect canvas while the tangy-sweet cheesecake filling creates luxurious richness, and the fresh strawberries add natural sweetness and beautiful color contrast. The dish’s visual appeal of perfectly formed rolls garnished with fresh strawberry slices and mint leaves makes them as enticing to the eye as they are to the palate. This versatile dessert exemplifies creative pastry artistry at its finest—ideal for special celebrations, dinner party finales, creative entertaining, or anytime you want to surprise guests with an unexpected twist on beloved flavors that effortlessly brings together familiar tastes in a completely novel, show-stopping presentation.
Why You’ll Love This Recipe
- Creative presentation: Transforms familiar flavors into stunning sushi-style dessert
- Instagram-worthy appeal: Creates beautiful, unique desserts perfect for social sharing
- Make-ahead convenience: Can be prepared hours in advance for stress-free entertaining
- Interactive experience: Fun to make and impressive to serve to guests
- No-bake option: Requires no special equipment beyond basic kitchen tools
- Customizable flavors: Easily adapts to different fruits and cake combinations
- Portion control perfection: Individual servings eliminate messy cutting and serving
- Conversation starter: Unique concept sparks interest and delight at gatherings
- Fresh fruit showcase: Highlights seasonal strawberries in creative way
- Skill-building fun: Teaches rolling techniques while creating beautiful results
Ingredients
For the Vanilla Sponge Cake Base
- Store-bought pound cake or vanilla sponge – Provides tender, flexible rolling base
- Alternatively, homemade sponge cake – Creates custom texture and freshness
- Simple syrup – Keeps cake moist and adds subtle sweetness
- Vanilla extract – Enhances cake flavor and aromatic appeal
- Powdered sugar – For dusting and preventing sticking
For the Cheesecake Filling
- Cream cheese – Forms rich, tangy base for authentic cheesecake flavor
- Heavy whipping cream – Creates light, fluffy texture when whipped
- Powdered sugar – Sweetens without grittiness and stabilizes cream
- Vanilla extract – Adds classic cheesecake flavoring
- Lemon juice – Brightens flavor and adds subtle tang
- Gelatin powder – Provides stability for clean slicing (optional)
- Mascarpone cheese – Enhances richness and Italian dessert notes
For the Fresh Strawberry Component
- Fresh strawberries – Provide natural sweetness and beautiful color
- Granulated sugar – Macerates strawberries and concentrates flavor
- Lemon juice – Preserves color and enhances natural strawberry taste
- Vanilla extract – Complements strawberry flavor beautifully
For the Coconut “Rice” Coating
- Sweetened shredded coconut – Creates authentic sushi rice appearance
- Powdered sugar – Adds sweetness and helps coconut adhere
- Vanilla extract – Enhances coconut flavor subtly
- Food coloring – Optional for tinting coconut different colors
Optional Enhancements
- Fresh mint leaves – Add color contrast and aromatic freshness
- White chocolate chips – Provide textural interest and extra sweetness
- Graham cracker crumbs – Create shortcake texture elements
- Berry coulis – Add sauce for plating and extra fruit flavor
- Edible flowers – Enhance visual presentation for special occasions
- Different fruit options – Experiment with raspberries, blueberries, or peaches
- Chocolate drizzle – Add decadent finishing touch
- Toasted coconut – Create more complex coconut flavor
- Citrus zest – Brighten overall flavor profile
Step-by-Step Instructions
Preparing the Cake Base
- If using store-bought pound cake, select a high-quality loaf that’s fresh and moist. If making homemade sponge cake, prepare it a day ahead and allow it to cool completely before using, as slightly day-old cake rolls more easily without breaking.
- Using a sharp serrated knife, carefully slice the pound cake horizontally into ¼-inch thick slabs, working slowly to maintain even thickness throughout. You’ll need 6-8 slices depending on the size of your rolls.
- Lay the cake slices on a clean work surface and gently roll each slice with a rolling pin to flatten slightly and increase flexibility, which prevents cracking during the rolling process and creates more pliable cake layers.
- Prepare simple syrup by combining ¼ cup water, 2 tablespoons sugar, and 1 teaspoon vanilla extract in a small saucepan. Heat until sugar dissolves, then cool completely before using to brush cake layers.
- Lightly brush each cake slice with the cooled simple syrup using a pastry brush, ensuring even coverage without oversaturating, which could make the cake too wet and difficult to work with.
- Cover the prepared cake slices with plastic wrap and set aside while preparing the other components, keeping them moist but not soggy for optimal rolling characteristics.
Creating the Cheesecake Filling
- Remove 8 ounces of cream cheese from refrigerator 30 minutes before using to allow it to soften to room temperature, which ensures smooth mixing without lumps and creates the perfect creamy texture.
- In a large mixing bowl, beat the softened cream cheese with an electric mixer on medium speed until completely smooth and fluffy, about 2-3 minutes, scraping down sides of bowl as needed.
- Gradually add ½ cup of powdered sugar to the cream cheese, beating continuously until well incorporated and smooth. The powdered sugar dissolves more easily than granulated and won’t create grainy texture.
- Add 1 teaspoon vanilla extract and 1 tablespoon fresh lemon juice to the mixture, beating until combined. The lemon juice adds brightness and balances the richness of the cream cheese perfectly.
- In a separate clean bowl, whip ¾ cup of heavy cream to soft peaks using an electric mixer, being careful not to overwhip, which could cause the cream to become grainy and separate.
- Gently fold the whipped cream into the cream cheese mixture using a rubber spatula, working in thirds and folding just until combined to maintain the light, airy texture that makes the filling so appealing.
- If desired for extra stability, sprinkle 1 teaspoon of unflavored gelatin over 2 tablespoons of cold water, let bloom for 5 minutes, then microwave for 10 seconds and fold into the mixture while still warm.
- Transfer the finished cheesecake filling to a piping bag or zip-top bag with corner cut off for easier application to cake layers, ensuring smooth, even distribution during assembly.
Preparing the Strawberry Centers
- Select 1 pound of fresh strawberries that are ripe but still firm, avoiding overripe berries that might become mushy during preparation and assembly of the sushi rolls.
- Hull and slice the strawberries into ¼-inch thick slices, keeping pieces uniform in size for consistent rolling and attractive presentation when the rolls are cut and served.
- Place the sliced strawberries in a bowl and gently toss with 2 tablespoons of granulated sugar and 1 tablespoon of fresh lemon juice, allowing them to macerate for 15 minutes.
- The maceration process draws out natural juices while concentrating flavor and creating a light syrup that enhances the strawberry taste without making them too wet for rolling.
- Drain the strawberries lightly before using, reserving the flavorful syrup for brushing cake or serving alongside the finished sushi rolls for extra strawberry intensity.
- Pat the strawberry slices gently with paper towels to remove excess moisture, which prevents the filling from becoming watery and helps maintain the structural integrity of the completed rolls.
Creating the Coconut “Rice” Coating
- Place 2 cups of sweetened shredded coconut in a large, shallow dish or plate, spreading it evenly to create a coating station for rolling the finished sushi pieces.
- If desired, add a few drops of food coloring to portion of the coconut to create different colors that mimic various types of sushi rice, mixing gently with hands until evenly distributed.
- Lightly dust the coconut with powdered sugar and a few drops of vanilla extract, tossing gently to distribute evenly and enhance the sweet flavor that complements the strawberry shortcake theme.
- For added texture and visual interest, consider toasting a portion of the coconut in a dry skillet over medium heat for 2-3 minutes until lightly golden, stirring constantly to prevent burning.
Assembling the Sushi Rolls
- Place one prepared cake slice on a clean work surface or bamboo sushi mat if available, positioning it with the longer side facing you for easier rolling and better control during assembly.
- Using the piping bag or spoon, apply a thin, even layer of cheesecake filling across the entire surface of the cake slice, leaving a ½-inch border at the far edge for sealing.
- Arrange strawberry slices in a line about 1 inch from the near edge, creating a consistent center that will form the beautiful core of each sushi piece when sliced.
- Starting from the edge closest to you, carefully roll the cake away from yourself, keeping gentle but firm pressure to create a tight roll without squeezing out the filling or cracking the cake.
- When you reach the unfilled edge, lightly brush it with simple syrup or water to help seal the roll completely, then finish rolling and place seam-side down on a plate.
- Repeat the process with remaining cake slices and filling, creating 6-8 complete rolls depending on your cake size and desired portion amounts.
- Wrap each completed roll tightly in plastic wrap and refrigerate for at least 2 hours or overnight to firm up and set the filling, which makes slicing much cleaner and easier.
Final Assembly and Presentation
- Remove the chilled rolls from refrigerator and unwrap carefully. Using a sharp, wet knife, trim the uneven ends of each roll to create clean, uniform edges.
- Slice each roll into 6-8 pieces, approximately 1-inch thick, cleaning the knife between cuts and wetting it again to ensure clean slices that showcase the beautiful interior layers.
- Gently roll each piece in the prepared coconut “rice,” coating all sides evenly and pressing lightly to help the coconut adhere without compressing the delicate cake structure.
- Arrange the coconut-coated sushi pieces on a serving platter, cut-side up to display the beautiful strawberry and cream centers, spacing them attractively for visual impact.
- Garnish each piece with a thin slice of fresh strawberry on top and a small mint leaf for color contrast, creating an authentic sushi presentation that highlights the creative concept.
- Serve immediately or keep chilled for up to 4 hours before serving, maintaining the perfect texture and temperature that makes these dessert sushi rolls so delightful to eat.
Pro Tips
- Use day-old cake for easier rolling without breaking
- Soften cream cheese completely for smoothest filling texture
- Macerate strawberries briefly to enhance flavor without excess moisture
- Chill assembled rolls thoroughly before slicing for clean cuts
- Use sharp, wet knife for cleanest slicing results
- Work with chilled components for easier handling and assembly
- Don’t overfill rolls or they’ll be difficult to close properly
- Pat fruit dry to prevent watery filling that compromises structure
- Use piping bag for even filling distribution across cake
- Brush cake lightly with syrup to prevent drying and add flavor
- Wrap tightly in plastic to maintain shape during chilling
- Clean knife between cuts to maintain attractive presentation
- Choose firm strawberries that won’t become mushy during preparation
- Toast some coconut for varied texture and enhanced flavor
- Make filling day ahead for convenience and better flavor development
- Use bamboo mat if available for more controlled rolling
- Keep finished rolls chilled until serving to maintain structure
- Prepare garnishes ahead for quick final assembly
- Work in batches if making large quantities for easier management
- Save strawberry macerating liquid for additional flavor enhancement
Variations and Creative Ideas
Flavor Variations
- Chocolate Strawberry Delight: Replace vanilla cake with chocolate sponge cake and add cocoa powder to the cheesecake filling, creating a chocolate-covered strawberry experience in sushi form that appeals to chocolate lovers.
- Lemon Berry Fusion: Use lemon pound cake with lemon-flavored cheesecake filling and mixed berries (strawberries, blueberries, raspberries) for a bright, citrusy variation perfect for summer entertaining.
- Tropical Paradise: Incorporate coconut cake with coconut-flavored filling, fresh mango slices, and toasted coconut coating for an exotic tropical twist that transports diners to island paradise.
- Peaches and Cream: Use vanilla cake with mascarpone-enhanced filling and fresh peach slices, rolling in graham cracker crumbs instead of coconut for a sophisticated summer dessert variation.
Seasonal Adaptations
- Fall Apple Spice: Feature spice cake with cinnamon-cream cheese filling, thin apple slices, and cinnamon-sugar coating for autumn celebrations that capture the essence of apple pie in sushi form.
- Winter Cranberry Orange: Use orange-scented cake with orange-cream cheese filling, dried cranberries, and orange zest-coconut coating for holiday gatherings that celebrate winter flavors beautifully.
- Spring Strawberry Rhubarb: Incorporate vanilla cake with strawberry-rhubarb compote and traditional cheesecake filling for a classic spring combination that balances sweet and tart perfectly.
- Summer Berry Medley: Feature berry-infused cake with mixed berry filling and colorful berry-tinted coconut coatings that celebrate the abundance of summer fruit harvests.
Presentation Innovations
- Miniature Bite-Size: Create smaller, one-bite versions using thinner cake slices and less filling, perfect for cocktail parties, baby showers, or elegant afternoon tea service presentations.
- Deconstructed Style: Present components separately on individual plates—cake, filling, berries, and coconut—allowing diners to assemble their own creative combinations for interactive dining experiences.
- Layered Parfait Influence: Stack sliced sushi pieces in clear glasses with additional berries and cream, creating parfait-style presentations that showcase the beautiful interior while adding textural variety.
- Elegant Plated Dessert: Serve individual pieces on dessert plates with berry coulis drizzles, fresh fruit garnishes, and mint sprigs for upscale restaurant-style presentation perfect for dinner parties.
Creative Coating Alternatives
- Graham Cracker Crumb Coating: Roll finished pieces in finely crushed graham crackers mixed with cinnamon and sugar for authentic shortcake texture that enhances the theme perfectly.
- White Chocolate Shavings: Coat rolls in white chocolate shavings or curls for elegant, sophisticated presentation that adds richness and beautiful visual texture to each piece.
- Chopped Nut Coating: Use finely chopped almonds, pecans, or pistachios for textural contrast and nutty flavor that complements the fruit and cream components beautifully.
- Colorful Sugar Crystals: Roll in colored sanding sugar or crystal sugar for sparkling, festive presentation perfect for celebrations, birthdays, or special occasion entertaining.
Frequently Asked Questions
How far in advance can I make these sushi rolls?
The assembled rolls can be made up to 24 hours in advance and stored covered in the refrigerator. However, don’t slice them until ready to serve, and add the coconut coating just before serving to maintain the best texture. The individual components can be prepared even further ahead—cake can be sliced and syrup-brushed 2 days ahead, filling can be made 2 days ahead, and strawberries can be prepared the morning of serving.
Why do my rolls fall apart when I try to slice them?
Rolling issues usually stem from insufficient chilling time or dull knife technique. Make sure rolls are chilled for at least 2 hours before slicing, and use a very sharp knife that you wet and clean between each cut. Also check that you’re not overfilling the rolls, which makes them difficult to seal properly, and ensure the cake isn’t too moist from excess syrup application.
Can I make these without gelatin in the filling?
Yes, the gelatin is optional and mainly helps with clean slicing. Without it, the filling will be softer but still delicious. To compensate, make sure to chill the rolls thoroughly and work quickly when slicing. You can also add a bit more cream cheese or reduce the whipped cream slightly for a firmer texture that holds its shape better during assembly and serving.

Ingredients
For the Vanilla Sponge Cake Base:
1 store-bought pound cake (or homemade sponge cake)
¼ cup water
2 tablespoons granulated sugar
1 teaspoon vanilla extract
Powdered sugar for dusting
For the Cheesecake Filling:
8 ounces cream cheese, softened
½ cup powdered sugar
1 teaspoon vanilla extract
1 tablespoon fresh lemon juice
¾ cup heavy whipping cream
1 teaspoon unflavored gelatin (optional)
2 tablespoons cold water (if using gelatin)
For the Fresh Strawberry Component:
1 pound fresh strawberries, hulled and sliced
2 tablespoons granulated sugar
1 tablespoon fresh lemon juice
For the Coconut "Rice" Coating:
2 cups sweetened shredded coconut
2 tablespoons powdered sugar
½ teaspoon vanilla extract
Food coloring (optional)
For Garnish:
Additional fresh strawberry slices
Fresh mint leaves
Extra coconut for serving
Berry coulis (optional)
Instructions
Slice pound cake horizontally into ¼-inch thick slabs. Roll lightly to flatten and increase flexibility.
Make simple syrup with water, sugar, and vanilla. Cool completely, then brush cake slices lightly.
Beat softened cream cheese until smooth. Add powdered sugar, vanilla, and lemon juice.
Whip heavy cream to soft peaks. Gently fold into cream cheese mixture.
Macerate sliced strawberries with sugar and lemon juice for 15 minutes. Drain lightly.
Prepare coconut coating by mixing coconut, powdered sugar, and vanilla in shallow dish.
For each roll: spread filling on cake slice, add strawberry line, roll tightly from near edge.
Wrap completed rolls in plastic wrap. Chill at least 2 hours until firm.
Slice chilled rolls into 1-inch pieces with sharp, wet knife, cleaning between cuts.
Roll each piece in coconut coating. Arrange on serving platter and garnish with strawberry slices and mint.
Notes
Use day-old cake for easier rolling without breaking or tearing
Soften cream cheese completely for smoothest, lump-free filling texture
Macerate strawberries briefly to enhance flavor without excess moisture
Chill assembled rolls thoroughly before slicing for cleanest cuts
Use sharp, wet knife and clean between cuts for best presentation
Don't overfill rolls or they'll be difficult to close and seal properly
Pat fruit dry after macerating to prevent watery filling
Use piping bag for even, controlled filling distribution across cake
Work with chilled components for easier handling during assembly
Wrap tightly in plastic wrap to maintain roll shape during chilling
Choose firm, ripe strawberries that won't become mushy
Toast portion of coconut for varied texture and enhanced flavor
Make filling day ahead for convenience and better flavor development
Keep finished rolls chilled until serving to maintain proper structure
Prepare all garnishes ahead of time for quick final assembly
Work in small batches if making large quantities for easier management
Save strawberry macerating liquid for additional serving sauce
Use food coloring sparingly in coconut for authentic sushi appearance
Position rolls seam-side down during chilling to maintain shape
Serve within 4 hours of final assembly for optimal texture and flavor