
")
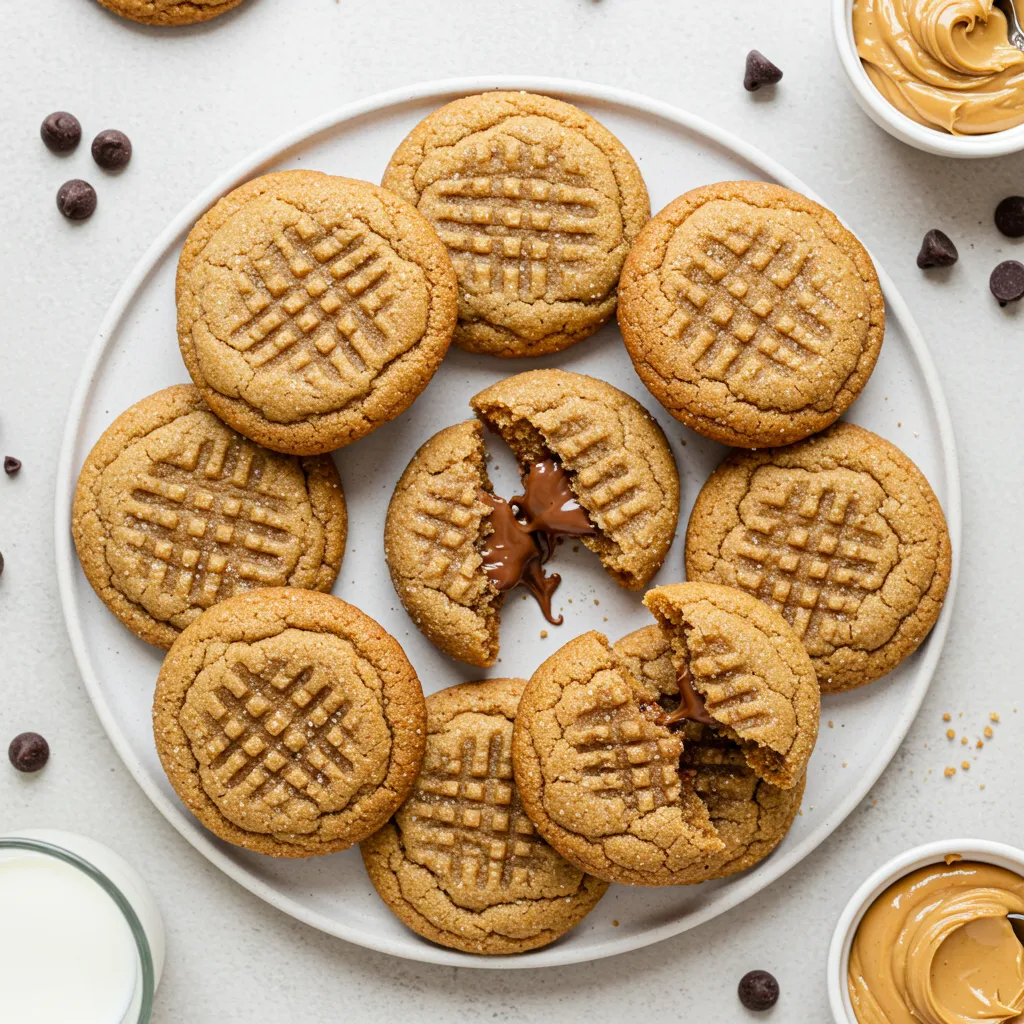
These irresistible Peanut Butter Cup Cookies feature a soft, sugar-coated peanut butter cookie filled with a decadent combination of chocolate and creamy peanut butter. When bitten into, these cookies reveal their hidden treasure – a molten center that mimics the beloved peanut butter cup candy. Perfect for bake sales, holiday cookie exchanges, or weekend treats for the family, these cookies offer the perfect balance of sweet and salty flavors in one delicious package.
Why You’ll Love This Recipe
- Show-stopping presentation: Cookies with a surprise filling inside
- Perfect flavor combination: Classic peanut butter and chocolate pairing
- Texture contrast: Soft cookie exterior with creamy, gooey filling
- Crowd-pleaser: Appeals to both kids and adults
- Make-ahead friendly: Dough can be prepared in advance
- Customizable: Can adjust sweetness and filling options
- Freezer-friendly: Excellent for batch baking
Ingredients
For the Cookie Dough
- All-purpose flour – Creates the base structure for the cookies
- Baking soda – Provides the perfect rise and texture
- Salt – Enhances the peanut butter flavor
- Unsalted butter – Adds richness and proper cookie texture
- Creamy peanut butter – The star flavor component
- Granulated sugar – Sweetens the dough
- Light brown sugar – Adds moisture and caramel notes
- Vanilla extract – Enhances overall flavor
- Large egg – Binds the dough together
- Additional sugar for rolling – Creates a sparkly, slightly crunchy exterior
For the Filling
- Chocolate spread or chocolate hazelnut spread – Forms part of the gooey center
- Creamy peanut butter – Creates the iconic PB cup filling
- Semi-sweet chocolate chips – Melts into the filling for added richness
- Powdered sugar (optional) – Balances and sweetens the filling
Step-by-Step Instructions
Preparing the Cookie Dough
Begin by gathering all your ingredients and allowing butter and egg to come to room temperature for the best results. This ensures proper incorporation and the ideal cookie texture.
In a medium bowl, whisk together 1¾ cups all-purpose flour, ½ teaspoon baking soda, and ¼ teaspoon salt. Whisking the dry ingredients separately ensures they are evenly distributed throughout the dough, which is essential for proper leavening and texture.
In a large mixing bowl, beat ½ cup (1 stick) unsalted butter and ¾ cup creamy peanut butter until well combined and smooth, about 2 minutes on medium speed. The peanut butter should be the conventional, smooth variety rather than natural peanut butter that separates, as this could affect the cookie’s texture and spread.
Add ½ cup granulated sugar and ½ cup light brown sugar to the peanut butter mixture and cream together until light and fluffy, about 2-3 minutes. This step is crucial for incorporating air into the batter, which helps create that perfect cookie texture.
Beat in 1 large egg and 1 teaspoon vanilla extract until fully incorporated and the mixture looks smooth and glossy. Scrape down the sides of the bowl to ensure everything is well mixed.
Gradually add the dry ingredients to the wet ingredients, mixing on low speed just until combined. Overmixing at this stage can develop too much gluten, resulting in tough cookies rather than the tender, soft texture we’re aiming for.
Cover the dough and refrigerate for at least 1 hour or up to overnight. This chilling step is non-negotiable – it firms up the dough, which prevents excessive spreading during baking and intensifies the flavors as they meld together in the refrigerator.
Creating the Filling
While the dough is chilling, prepare the filling by combining ½ cup chocolate spread (like Nutella) and ¼ cup creamy peanut butter in a small bowl. Mix until smooth and well combined.
For an even more authentic peanut butter cup center, add ¼ cup semi-sweet chocolate chips to the mixture. The residual heat from stirring will help soften them, but they’ll still maintain some structure for that perfect bite.
If you prefer a sweeter filling, add 2 tablespoons of powdered sugar and stir until completely incorporated. This is optional and can be adjusted based on your sweetness preference.
Spoon small portions (about 1 teaspoon each) of the filling onto a parchment-lined baking sheet and place in the freezer for 20-30 minutes to firm up. This makes the filling easier to handle when assembling the cookies and helps it maintain its position in the center of the cookie during baking.
Assembling and Baking the Cookies
Preheat your oven to 350°F (175°C) and line baking sheets with parchment paper or silicone baking mats. The parchment prevents sticking and makes cleanup easier, while also ensuring even heat distribution.
Place about ⅓ cup granulated sugar in a small bowl for rolling the cookies. This sugar coating adds a slight crunch to the exterior and a beautiful sparkle to the finished cookies.
Remove the chilled dough from the refrigerator and scoop out about 1½ tablespoons of dough for each cookie. Roll into a ball between your palms, then flatten slightly into a disc shape.
Take one of the frozen filling portions and place it in the center of the dough disc. Fold the edges of the dough up and around the filling, completely enclosing it and sealing well to prevent leakage during baking. Roll the filled dough between your palms again to form a smooth ball.
Roll each filled dough ball in the bowl of granulated sugar until completely coated, then place on the prepared baking sheet, spacing cookies about 2 inches apart. The sugar coating not only adds sweetness but also helps create those characteristic crinkles on the surface as the cookies bake.
Optional: For the classic peanut butter cookie look, gently press the tines of a fork in a crisscross pattern on top of each cookie, being careful not to press too deeply and expose the filling.
Bake in the preheated oven for 10-12 minutes, until the edges are set but the centers still look slightly underdone. This is key for achieving that soft, chewy texture that makes these cookies irresistible. The cookies will continue to firm up as they cool.
Allow the cookies to cool on the baking sheet for 5 minutes before transferring to a wire rack to cool completely. If transferred too soon, the soft cookies might break or lose their shape.
Serving Suggestions
These cookies are at their most spectacular when served slightly warm, when the centers are still gooey and reminiscent of a freshly opened peanut butter cup. To achieve this effect with cooled cookies, microwave them for 5-10 seconds before serving.
Pair these indulgent cookies with:
- A cold glass of milk for the classic cookie experience
- Hot coffee or espresso for a sophisticated afternoon treat
- Vanilla ice cream for an over-the-top dessert
- Hot chocolate for a double chocolate delight
For special occasions, create an ice cream sandwich by placing a scoop of vanilla or chocolate ice cream between two completely cooled cookies.
Pro Tips
- Use a cookie scoop for uniform cookie size and even baking
- If the dough becomes too soft while working with it, return it to the refrigerator for 15 minutes
- Freezing the filling is crucial – don’t skip this step or you’ll have filling that melts too quickly and leaks out
- For perfectly round cookies, use a round cookie cutter slightly larger than the cookie to gently shape each one immediately after removing from the oven
- Make sure to completely seal the filling inside the dough to prevent leakage
- Allow the baking sheets to cool completely before starting a new batch to prevent premature spreading
Variations and Creative Ideas
Flavor Variations
Chocolate Peanut Butter Cup Cookies: Add 2 tablespoons of cocoa powder to the cookie dough for a chocolate cookie base that complements the filling.
Salted Peanut Butter Cup Cookies: Sprinkle flaky sea salt on top of cookies just before baking for a sophisticated sweet-salty balance that enhances the peanut butter flavor.
White Chocolate Peanut Butter Cookies: Use white chocolate spread or white chocolate chips mixed with peanut butter for the filling, creating a different but equally delicious flavor profile.
Honey Roasted Peanut Butter Cookies: Use honey roasted peanut butter in the dough for a more complex flavor with subtle notes of honey and a slight crunch from the roasted peanut pieces.
Dietary Adaptations
Gluten-Free Version: Substitute the all-purpose flour with a quality gluten-free flour blend that contains xanthan gum for proper binding. The rest of the recipe remains the same.
Vegan Option: Replace butter with vegan butter, use flax eggs (1 tablespoon ground flaxseed mixed with 3 tablespoons water, allowed to gel for 15 minutes) instead of regular eggs, and ensure your chocolate products are vegan-friendly.
Reduced Sugar Option: Cut the sugar in the cookie dough by 25% and use a dark chocolate filling with no added sugar in the peanut butter mixture for a less sweet but still satisfying treat.
Presentation Variations
Mini Peanut Butter Cup Cookies: Make smaller versions using just 1 tablespoon of dough and a smaller amount of filling for bite-sized treats perfect for parties.
Double Stuffed Cookies: For serious peanut butter cup enthusiasts, double the amount of filling in each cookie for an even more dramatic reveal when bitten into.
Chocolate Drizzled Cookies: After the cookies are completely cooled, drizzle melted chocolate over the tops for an elegant finishing touch and hint of what’s inside.
Storage and Make-Ahead Advice
Room Temperature Storage: Store fully cooled cookies in an airtight container at room temperature for up to 5 days. Place parchment paper between layers to prevent sticking.
Refrigerator Storage: For a firmer filling texture, similar to actual peanut butter cups, store cookies in the refrigerator in an airtight container for up to 1 week.
Freezer Storage: Baked cookies can be frozen for up to 3 months. Thaw at room temperature for 1-2 hours before serving, or microwave individual cookies for 10-15 seconds for that fresh-baked warmth.
Make-Ahead Options:
- Prepare the dough up to 3 days in advance and keep refrigerated until ready to assemble and bake
- Freeze shaped balls of dough with filling enclosed for up to 3 months – no need to thaw before baking, just add 2-3 minutes to the baking time
- The filling can be made up to 1 week in advance and kept refrigerated, or frozen for up to 1 month
Kid-Friendly Involvement
This recipe offers multiple opportunities to get children involved in the kitchen:
Dough Rolling Station: Kids can help roll the cookie dough into balls – a great activity for developing fine motor skills.
Sugar Coating: Children love rolling the dough balls in sugar, watching as the dough becomes sparkly and festive.
Filling Preparation: Older kids can help measure and mix the chocolate and peanut butter filling, with supervision for younger helpers.
Cookie Detective: Make it a game to ensure all cookies have their filling completely sealed inside, assigning children as the “Cookie Detectives” who check for any openings.
Taste Testers: The most popular job – kids can help evaluate the finished product (once cooled to a safe temperature) and provide their expert opinions.
Frequently Asked Questions
Why did my filling leak out during baking? The most common reason is that the dough wasn’t sealed completely around the filling. Make sure there are no cracks or thin spots in your dough ball. Also, ensure your filling was properly frozen before assembling.
Can I use natural peanut butter in this recipe? It’s not recommended for the cookie dough, as the natural oils can separate and affect the texture. However, it can work in the filling if well-mixed. For best results, use conventional creamy peanut butter in both components.
My cookies spread too much and look flat. What went wrong? The dough likely wasn’t chilled enough, or your butter was too warm. Make sure to refrigerate the dough for at least an hour, and if your kitchen is warm, work quickly or return the dough to the refrigerator periodically.
Can I use peanut butter chips instead of peanut butter in the filling? Yes, you can melt peanut butter chips with the chocolate for the filling, but you might need to add a teaspoon of vegetable oil to achieve the proper creamy consistency.
How do I know when the cookies are done if I can’t see the centers? Look for cookies that are lightly golden at the edges but still soft-looking in the middle. They might seem underdone, but will continue to set as they cool. The cookies should be just set enough to hold their shape when moved.
")
Ingredients
- 1¾ cups all-purpose flour
- ½ teaspoon baking soda
- ¼ teaspoon salt
- ½ cup (1 stick) unsalted butter, room temperature
- ¾ cup creamy peanut butter
- ½ cup granulated sugar, plus extra for rolling
- ½ cup packed light brown sugar
- 1 teaspoon vanilla extract
- 1 large egg, room temperature
- ½ cup chocolate spread (such as Nutella)
- ¼ cup creamy peanut butter (for filling)
- ¼ cup semi-sweet chocolate chips
- 2 tablespoons powdered sugar (optional)
Instructions
- Whisk together flour, baking soda, and salt in a medium bowl.
- Cream butter and peanut butter together until smooth.
- Add sugars and beat until light and fluffy.
- Mix in egg and vanilla extract.
- Gradually add dry ingredients until just combined.
- Refrigerate dough for at least 1 hour.
- Meanwhile, mix chocolate spread, peanut butter, and chocolate chips for filling.
- Freeze small portions of filling for 20-30 minutes.
- Preheat oven to 350°F and line baking sheets with parchment paper.
- Enclose frozen filling portions in cookie dough balls, seal well.
- Roll cookies in granulated sugar and place on baking sheets.
- Optional: Create crisscross pattern with fork.
- Bake for 10-12 minutes until edges are set.
- Cool on baking sheet for 5 minutes before transferring to wire rack.
Notes
- For the most accurate measurements, especially with flour, use the spoon and level method
- The cookies will look puffy when first removed from the oven but will settle as they cool
- To test if your oven temperature is accurate, use an oven thermometer
- For picture-perfect cookies, use a round cookie cutter to shape them immediately after baking
- If you don't have parchment paper, lightly greased foil works as an alternative
- For cleaner slicing when checking the filling, refrigerate cookies for 30 minutes first