

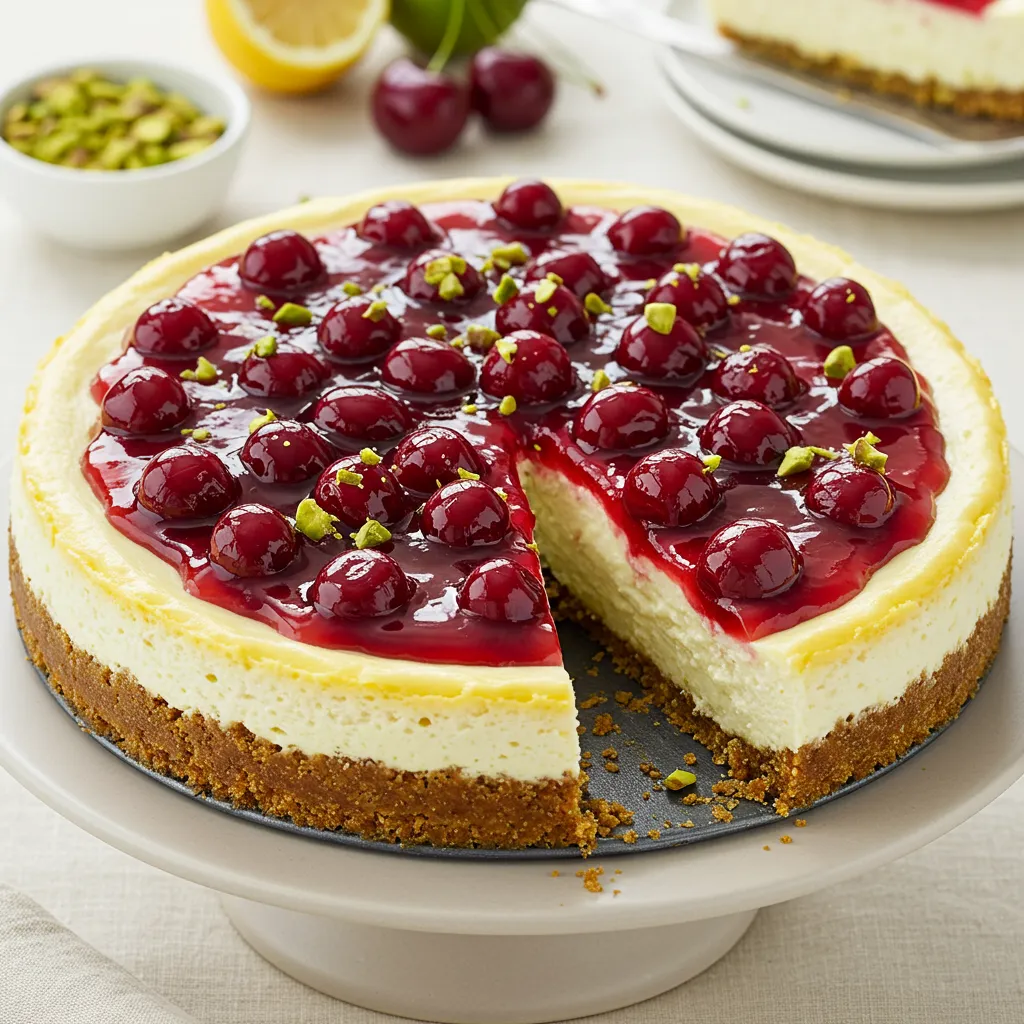
This stunning Lemon-Lime Cherry Pistachio Cheesecake combines vibrant citrus flavors with the sweet-tart punch of cherries and the nutty crunch of pistachios. The creamy, velvety cheesecake filling, infused with fresh lemon and lime zest, provides a perfect backdrop for the jewel-like cherries that are both folded inside and dramatically arranged on top. The buttery graham cracker crust, enhanced with crushed pistachios, adds a delicate green hue and complex flavor foundation. Each slice reveals beautiful ruby cherry swirls throughout the pale citrus filling, topped with glossy whole cherries and vibrant green pistachio pieces. This show-stopping dessert balances tangy brightness, natural sweetness, and nutty depth—creating an unforgettable finale for special occasions or an indulgent weekend treat that’s worth every minute of preparation.
Why You’ll Love This Recipe
- Perfect balance of flavors: Tangy citrus, sweet-tart cherries, and nutty pistachios create a sophisticated flavor profile
- Stunning presentation: The ruby-red cherry topping against the pale cheesecake creates a dramatic visual impact
- Make-ahead friendly: Can be prepared 1-2 days before serving for stress-free entertaining
- No water bath required: Uses a lower temperature baking method to prevent cracking without the fuss
- Textural contrast: Smooth creamy filling against crunchy nuts and juicy cherries provides sensory delight
- Seasonal adaptability: Works with fresh cherries in summer or frozen/preserved cherries year-round
- Versatile serving options: Elegant enough for special occasions yet approachable for family gatherings
- Customizable components: Each element can be adjusted to suit your taste preferences
- Impressive without difficulty: Achieves professional-looking results with straightforward techniques
Ingredients
For the Pistachio Crust
- Graham crackers – Create a sweet, crumbly foundation that complements the creamy filling
- Pistachios – Add nutty flavor, vibrant color, and textural contrast to the traditional crust
- Butter – Binds the crust ingredients and adds rich flavor
- Sugar – Enhances sweetness and helps the crust caramelize slightly
- Salt – Balances sweetness and amplifies the pistachio flavor
For the Lemon-Lime Cheesecake Filling
- Cream cheese – Provides the creamy, tangy base essential for classic cheesecake texture
- Sugar – Balances the tang of cream cheese and citrus with perfect sweetness
- Eggs – Bind the filling and create the perfect custard-like consistency
- Sour cream – Adds silkiness and subtle tang to the filling
- Heavy cream – Creates an ultra-smooth, luxurious texture
- Lemons and limes – Contribute bright, vibrant flavor through both juice and zest
- Vanilla extract – Enhances and rounds out all the flavors with aromatic warmth
- Cornstarch – Stabilizes the filling for a perfect slice every time
For the Cherry Swirl and Topping
- Fresh or frozen cherries – Provide sweet-tart flavor and stunning color throughout
- Sugar – Balances the natural tartness of cherries
- Lemon juice – Brightens and intensifies the cherry flavor
- Cornstarch – Thickens the cherry mixture for perfect swirling and topping
- Almond extract – Complements and elevates the natural cherry flavor
For the Garnish
- Whole cherries – Create a stunning visual impact on the finished cheesecake
- Chopped pistachios – Add color contrast and crunchy texture
- Honey or cherry syrup – Provides a glossy finish and subtle sweetness
- Lemon and lime zest – Adds bright color and reinforces the citrus flavor
Step-by-Step Instructions
Preparing the Pistachio Crust
Begin by preheating your oven to 325°F (165°C). This moderate temperature will help prevent the cheesecake from cracking during baking.
In a food processor, pulse 1½ cups graham crackers (about 10 full sheets) until they become fine crumbs. Add ½ cup shelled pistachios and pulse until the pistachios are finely chopped but still visible as small green flecks throughout the crumbs.
Transfer the graham cracker-pistachio mixture to a medium bowl. Add ¼ cup granulated sugar and ¼ teaspoon salt, then stir to combine thoroughly.
Pour in 6 tablespoons of melted unsalted butter and mix until the mixture resembles wet sand. The crumbs should hold together when pressed between your fingers without being overly greasy.
Press the mixture firmly into the bottom and about 1½ inches up the sides of a 9-inch springform pan. Use the bottom of a measuring cup or flat-bottomed glass to compress the crust evenly, creating a smooth surface.
Bake the crust for 10-12 minutes until it’s lightly golden and fragrant with a toasted nut aroma. Remove from the oven and allow to cool completely on a wire rack while preparing the filling. Maintaining the 325°F oven temperature for the next steps.
Preparing the Cherry Swirl Mixture
While the crust cools, prepare the cherry mixture that will create beautiful swirls throughout the cheesecake and serve as the topping.
In a medium saucepan, combine 2 cups pitted fresh cherries (or thawed frozen cherries), ¼ cup granulated sugar, 1 tablespoon lemon juice, and 1 tablespoon water. Bring to a simmer over medium heat.
Cook for about 5 minutes, stirring occasionally, until the cherries begin to break down and release their juices. Use the back of a wooden spoon to gently crush some of the cherries, leaving others whole for textural contrast.
In a small bowl, mix 1 tablespoon cornstarch with 2 tablespoons cold water until smooth. Add this slurry to the simmering cherry mixture, stirring constantly.
Continue cooking for 1-2 minutes until the mixture thickens noticeably and coats the back of a spoon. Remove from heat and stir in ¼ teaspoon almond extract, which enhances the natural cherry flavor.
Transfer about two-thirds of the cherry mixture to a bowl and allow it to cool completely. Reserve the remaining third in a separate container for the topping, refrigerating both portions while preparing the cheesecake filling.
Making the Lemon-Lime Cheesecake Filling
Before beginning the filling, ensure all refrigerated ingredients have come to room temperature, which is crucial for achieving a smooth, lump-free cheesecake.
In the bowl of a stand mixer fitted with the paddle attachment, beat 32 ounces (four 8-ounce blocks) of cream cheese on medium-low speed until completely smooth, about 2 minutes. Scrape down the sides of the bowl frequently to ensure no lumps remain.
With the mixer running on low, gradually add 1¼ cups granulated sugar and continue beating until the mixture is smooth and creamy, about 2 minutes more.
Add 4 large eggs, one at a time, beating just until each is incorporated before adding the next. Overbeating after adding eggs can incorporate too much air, leading to cracks during baking.
Add 1 cup sour cream and ¼ cup heavy cream, mixing until just combined. The additional dairy creates an exceptionally silky texture.
In a small bowl, combine 2 tablespoons fresh lemon juice, 1 tablespoon fresh lime juice, 1 tablespoon lemon zest, 1 tablespoon lime zest, and 2 teaspoons vanilla extract. Add this mixture to the cream cheese batter along with 2 tablespoons cornstarch, folding gently with a spatula until fully incorporated. The cornstarch helps stabilize the filling.
Assembling and Baking the Cheesecake
Wrap the outside of your springform pan (with the cooled crust) in a double layer of aluminum foil to prevent any butter from leaking out during baking.
Pour half of the cheesecake filling into the prepared crust, smoothing it into an even layer with a spatula.
Dollop spoonfuls of half the cooled cherry mixture (not the reserved topping portion) over the filling, then use a knife or skewer to gently swirl the cherry mixture into the filling, creating a marbled effect. Be careful not to overmix—you want distinct swirls rather than a uniform pink color.
Pour the remaining cheesecake filling on top, then repeat the dolloping and swirling process with the remaining half of the cherry mixture intended for the interior.
Place the springform pan on a baking sheet and bake at 325°F for 60-70 minutes. The cheesecake is done when the edges are set but the center still has a slight jiggle—it should move as one unit rather than appearing liquid.
Turn off the oven, crack the door open about 1 inch, and allow the cheesecake to cool slowly in the oven for 1 hour. This gradual cooling helps prevent the surface from cracking.
After cooling in the oven, remove the cheesecake and run a thin knife around the edge to loosen it from the pan. Allow it to cool completely at room temperature, then refrigerate for at least 6 hours or overnight to fully set.
Creating the Cherry Pistachio Topping
When ready to serve, carefully remove the sides of the springform pan. Transfer the cheesecake to a serving plate if desired.
Warm the reserved cherry topping slightly if it has become too thick in the refrigerator. It should be spreadable but not hot (which would melt the cheesecake).
Spoon the cherry topping onto the center of the cheesecake, spreading it to within 1 inch of the edge to create a dramatic color contrast.
Arrange fresh whole cherries (with stems for an elegant look, if available) on top of the cherry layer. For the most professional presentation, start from the center and work outward in a circular pattern.
Sprinkle ¼ cup chopped pistachios around and between the cherries, focusing primarily on the edges for visual appeal.
For a glossy finish, brush the cherries lightly with 1 tablespoon warmed honey or cherry syrup.
As a final touch, grate a small amount of fresh lemon and lime zest over the top for bright pops of color and enhanced citrus aroma.
Refrigerate until ready to serve, removing from the refrigerator about 20-30 minutes before serving to take the chill off and allow flavors to fully bloom.
Pro Tips
- Allow cream cheese to fully soften at room temperature for at least 2 hours to avoid lumps in your filling
- Toast pistachios before adding to the crust for enhanced flavor and aroma
- Use a mixture of Eureka lemons (more acidic) and Meyer lemons (sweeter) for complex citrus notes
- For the most vibrant green pistachios, look for those labeled “natural” rather than roasted and salted
- Press cherry pits out using a chopstick pushed through the stem end to keep berries intact for garnish
- Freeze the cheesecake for 20 minutes before slicing for perfect restaurant-quality slices
- Warm your knife in hot water between each slice for the cleanest edges
- Add a drop of green food coloring to the filling for a subtle hint of color if desired
- Strain your lemon and lime juice to remove any seeds or pulp before adding to the filling
- For the perfect texture, stop mixing as soon as ingredients are incorporated—overmixing incorporates air that can cause cracks
- Place a pan of water on the lower oven rack during baking to add humidity without the hassle of a water bath
- Cool the cheesecake gradually to prevent cracks—never rush the cooling process
- Add 1/4 teaspoon of citric acid to the filling for extra tanginess without additional liquid
- Use a kitchen torch to lightly toast the pistachio garnish for enhanced visual appeal and flavor
- For perfectly smooth sides, run a hot offset spatula around the edge after removing the springform pan
Variations and Creative Ideas
Flavor Variations
White Chocolate Infusion: Add 6 ounces of melted white chocolate to the cheesecake batter for added richness and creaminess that complements the citrus and cherry flavors beautifully.
Cardamom Spice Accent: Incorporate 1 teaspoon of ground cardamom into the crust and ¼ teaspoon into the filling for an aromatic twist that pairs exquisitely with the pistachios and cherries.
Coconut Lime Version: Replace half the pistachios with toasted coconut in the crust, increase the lime components, and add 1 teaspoon of coconut extract to the filling for a tropical variation.
Amaretto Cherry: Add 2 tablespoons of Amaretto liqueur to the cherry mixture and 1 tablespoon to the cheesecake filling for a sophisticated almond-forward flavor profile that enhances the natural cherry taste.
Structural Variations
Mini Cheesecakes: Portion the recipe into a muffin tin lined with cupcake liners for individual servings that are perfect for parties or buffets. Reduce baking time to about 20-25 minutes.
Layered Approach: Instead of swirling, create distinct layers by pouring half the filling, adding a layer of set cherry mixture, then topping with remaining filling for a striking striped appearance when sliced.
Cheesecake Bars: Prepare in a 9×13 rectangular pan with the same crust and filling, then cut into elegant rectangles or diamonds. Reduce baking time to about 45 minutes.
Pistachio Rim Design: Create a decorative rim by pressing chopped pistachios onto the sides of the finished cheesecake for a stunning green border that frames the cherry topping.
Dietary Adaptations
Gluten-Free Crust: Substitute gluten-free graham crackers or cookies in the crust, ensuring all other ingredients are certified gluten-free.
Lower Sugar Option: Reduce sugar in the filling by ¼ cup and use monk fruit sweetener in the cherry topping. The natural sweetness of cherries and tartness of citrus help maintain flavor balance.
Dairy-Free Variation: Use dairy-free cream cheese, coconut cream instead of sour cream, and coconut oil instead of butter in the crust. Note that texture will be slightly different but still delicious.
Vegan Adaptation: Replace cream cheese with dairy-free alternatives, use silken tofu and coconut cream for body, and prepare with a flax egg mixture as a binder. Agar-agar can help achieve the proper set.
Storage and Make-Ahead Advice
Cheesecake Storage: This cheesecake can be stored in the refrigerator, covered with plastic wrap or in an airtight container, for up to 5 days. The flavor actually improves after 24 hours as the citrus notes mellow and harmonize.
Freezing Instructions:
- The cheesecake can be frozen for up to 2 months without the cherry topping and garnishes.
- To freeze, allow the baked cheesecake to cool completely and set in the refrigerator overnight.
- Remove the sides of the springform pan and place the cheesecake (still on the pan bottom) on a flat surface in the freezer until solid, about 4 hours.
- Once frozen, wrap tightly in a double layer of plastic wrap followed by aluminum foil.
- Label with the date and contents before storing in the freezer.
- Thaw overnight in the refrigerator before adding the cherry topping and garnishes.
Make-Ahead Timeline:
- The pistachio crust can be prepared and baked up to 2 days ahead, wrapped tightly, and stored at room temperature.
- The cherry mixture can be prepared up to 3 days ahead and stored in the refrigerator.
- The entire cheesecake (without topping) can be made 2-3 days before serving and stored in the refrigerator.
- Add the cherry topping and garnishes within 24 hours of serving for the best visual appeal.
- If using fresh cherries for garnish, add them just before serving to prevent bleeding onto the cheesecake surface.
Serving from Frozen:
- Individual slices can be frozen for portion control. Wrap each slice individually and freeze on a baking sheet before transferring to a freezer bag.
- Thaw individual slices in the refrigerator for 3-4 hours or at room temperature for about 30 minutes.
- For best texture, never microwave cheesecake to thaw it, as this will create a gummy consistency.
Topping Storage:
- If preparing components separately, store the cherry topping in an airtight container in the refrigerator for up to 5 days.
- Chopped pistachios can be stored in an airtight container at room temperature for up to 2 weeks or refrigerated for up to 1 month.
- If making the cheesecake in advance but adding toppings later, wait until the cheesecake has fully set and chilled before adding the cherry topping.
Kid-Friendly Involvement
This sophisticated dessert offers several opportunities for children to participate in the kitchen:
Measuring Ingredients: Kids can help measure the dry ingredients for the crust and filling, practicing their math skills while contributing to the recipe.
Crushing Graham Crackers: Placing graham crackers in a sealed plastic bag and allowing children to crush them with a rolling pin is both fun and helpful in preparing the crust.
Mixing the Crust: Children can help mix the graham cracker crumbs with butter and press the mixture into the pan, using their hands or a measuring cup.
Zesting Citrus: With supervision, older children can help zest lemons and limes using a microplane, learning about aromatic oils and flavor extraction.
Creating Cherry Swirls: Kids can help dollop spoonfuls of the cherry mixture onto the filling and create beautiful swirls with a skewer, expressing creativity while contributing to the dessert’s appearance.
Arranging Toppings: Children can help arrange whole cherries and sprinkle pistachios on top of the finished cheesecake, practicing fine motor skills and artistic arrangement.
Learning Opportunity: Use this recipe to teach about the science of cheesecake—how acids (citrus) interact with proteins (cream cheese) and how heat transforms the structure from liquid to solid.
Frequently Asked Questions
Why did my cheesecake crack and how can I prevent this? Cracks usually form when a cheesecake is baked at too high a temperature or cooled too quickly. Prevent cracks by: 1) ensuring all ingredients are at room temperature, 2) not overmixing after adding eggs, 3) baking at a moderate temperature (325°F), 4) cooling gradually in the turned-off oven, and 5) running a knife around the edge immediately after baking. If cracks do form, the cherry topping will conveniently cover them!
Can I use frozen cherries if fresh aren’t available? Absolutely! Frozen cherries work wonderfully in this recipe, especially for the swirl and topping components. Thaw completely and drain excess liquid before using. For the garnish, consider using preserved cherries in syrup if fresh aren’t available.
How do I know when the cheesecake is done baking? The perfect cheesecake should still wobble slightly in the center when the pan is gently shaken—about a 2-3 inch diameter circle in the middle should jiggle as one unit (not appear liquid). The edges should be slightly puffed and set. Remember that the cheesecake continues cooking from residual heat after being removed from the oven.
Can I make this recipe without a springform pan? Yes, though a springform makes removal easier. Alternatives include: 1) a regular cake pan lined with parchment paper with excess hanging over the sides as handles, 2) a deep-dish pie plate (though this will yield a different shape), or 3) a cake pan with a removable bottom. Adjust baking times for different pan sizes.
Is there a way to speed up the cooling process safely? While gradual cooling is best for texture and preventing cracks, you can speed up the final refrigeration phase by placing the completely room-temperature cheesecake (after its 1-hour in-oven cooling) in the freezer for 1-2 hours before transferring to the refrigerator. Never place a hot or warm cheesecake in the refrigerator or freezer, as this causes condensation that will make the crust soggy.

Ingredients
For the Pistachio Crust:
- 1½ cups graham cracker crumbs (about 10 full sheets)
- ½ cup shelled pistachios, finely chopped
- ¼ cup granulated sugar
- ¼ teaspoon salt
- 6 tablespoons unsalted butter, melted
For the Lemon-Lime Cheesecake Filling:
- 4 packages (8 oz each) cream cheese, softened
- 1¼ cups granulated sugar
- 4 large eggs, room temperature
- 1 cup sour cream, room temperature
- ¼ cup heavy cream
- 2 tablespoons fresh lemon juice
- 1 tablespoon fresh lime juice
- 1 tablespoon lemon zest
- 1 tablespoon lime zest
- 2 teaspoons vanilla extract
- 2 tablespoons cornstarch
For the Cherry Swirl and Topping:
- 3 cups fresh or frozen cherries, pitted (divided use)
- ⅓ cup granulated sugar
- 1 tablespoon lemon juice
- 1 tablespoon cornstarch
- 2 tablespoons cold water
- ¼ teaspoon almond extract
For Garnish:
- 8-10 whole fresh cherries, with stems if possible
- ¼ cup chopped pistachios
- 1 tablespoon honey or cherry syrup
- Fresh lemon and lime zest for sprinkling
Instructions
- Combine graham cracker crumbs, pistachios, sugar, salt, and melted butter; press into springform pan and bake at 325°F for 10-12 minutes.
- Cook cherries with sugar and lemon juice until softened; thicken with cornstarch slurry and add almond extract.
- Beat cream cheese and sugar until smooth; add eggs one at a time, then sour cream and heavy cream.
- Fold in citrus juices, zests, vanilla, and cornstarch until just combined.
- Pour half the filling into cooled crust; dollop and swirl half the cherry mixture into it.
- Add remaining filling and swirl in more cherry mixture; bake at 325°F for 60-70 minutes.
- Cool gradually in turned-off oven for 1 hour, then completely at room temperature.
- Refrigerate 6+ hours until fully set; top with reserved cherry mixture, whole cherries, and pistachios.
- Brush with honey or syrup for shine; garnish with fresh zest before serving.
Notes
- Line the bottom of your springform pan with parchment paper for easy removal
- Sift powdered sugar over fingerprints on the pan's rim before photographing for a professional look
- Add a pinch of salt to the cherry mixture to enhance its natural sweetness
- Use room temperature lemons and limes for maximum juice extraction
- Roll citrus fruits firmly on the counter before juicing to break internal membranes
- For the cleanest cuts, dip your knife in hot water and wipe clean between each slice
- Add a small amount of white food coloring to the cheesecake filling for an opaque, professional look
- Place a few drops of almond extract on a cotton ball in an airtight container with the cheesecake to infuse subtle flavor without altering the texture
- Use a bench scraper to smooth the sides of the unmolded cheesecake for a pristine presentation
- Roll a thin strip of parchment paper and place it around the inside of the springform ring before adding the filling to create perfect sides
- Add a pinch of cream of tartar to help stabilize the filling if you live at high altitude
- For even finer pistachio pieces in the crust, freeze them before processing
- Strain the cherry mixture if you prefer no fruit chunks in your swirl
- Thoroughly chill the cheesecake before attempting to remove it from the springform pan
- For perfect slicing, cut with dental floss pulled taut for the cleanest edges
- Allow the cheesecake to stand at room temperature for 20-30 minutes before serving for the richest flavor experience
- Use European-style butter in the crust for a richer flavor
- Apply a thin layer of white chocolate between the crust and filling to prevent sogginess if making several days ahead
- Light a match and quickly run it over the surface of the cheesecake to pop any small air bubbles before baking
- Tap the filled pan gently on the counter several times to remove trapped air bubbles