

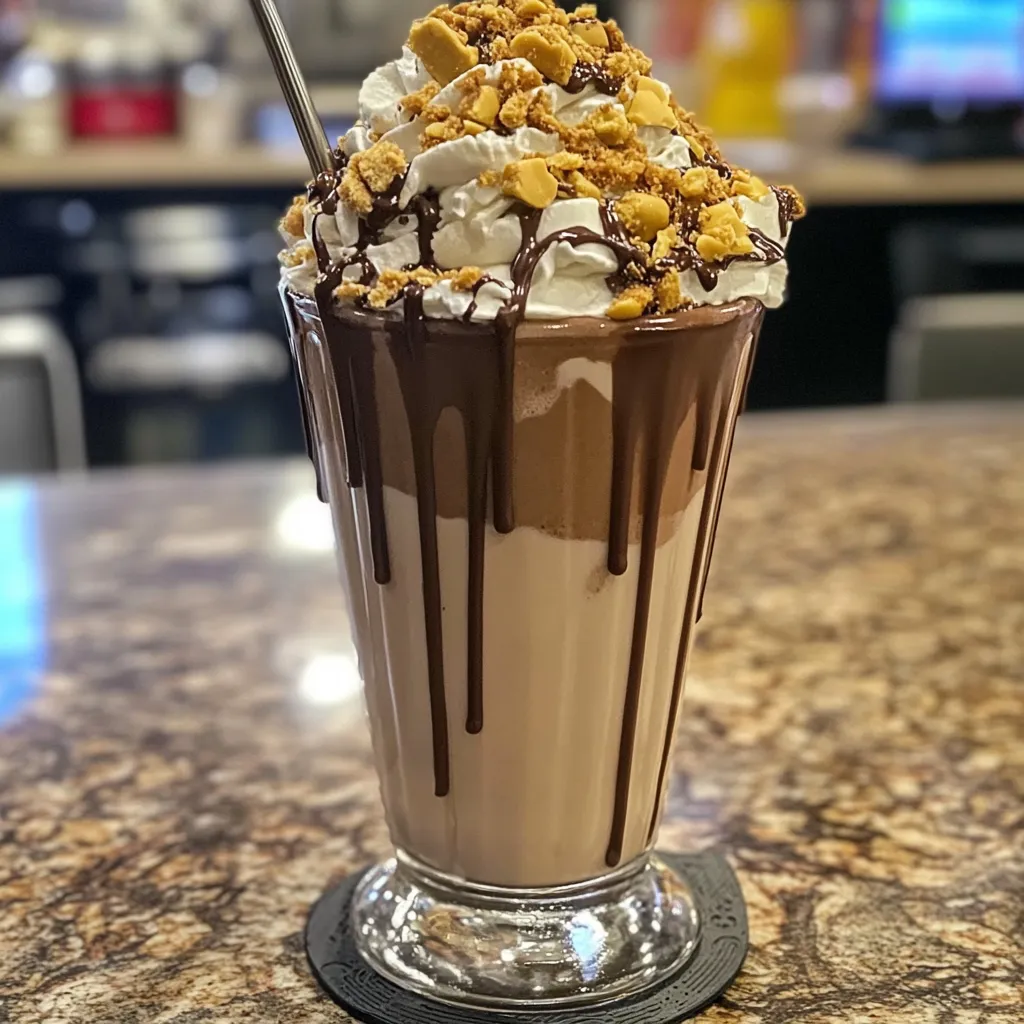
These irresistible Epic Peanut Butter Chocolate Milkshakes transform the beloved flavor combination into the ultimate dessert experience with their perfect balance of rich chocolate ice cream, creamy peanut butter, and extravagant toppings that create pure indulgent bliss. The recipe showcases the classic pairing of chocolate and peanut butter in milkshake form, enhanced with billowy whipped cream, chocolate drizzle, and crushed peanut butter cookies that create a towering masterpiece of flavor and visual impact. Every sip delivers an exquisite harmony—the rich chocolate base perfectly complements the nutty peanut butter while maintaining that ideal thick consistency, and the elaborate toppings provide textural contrast and Instagram-worthy presentation. The drink’s visual appeal of dramatic dripping chocolate, towering whipped cream, and abundant toppings makes it as spectacular to look at as it is to consume. This versatile dessert beverage exemplifies over-the-top indulgence at its finest—ideal for special celebrations, date nights, birthday treats, or anytime you want to create an unforgettable dessert experience that effortlessly brings together America’s favorite flavor combination in the most spectacular, share-worthy presentation possible.
Why You’ll Love This Recipe
- Ultimate indulgence: Combines beloved PB-chocolate flavors in spectacular presentation
- Instagram-worthy appeal: Creates stunning, shareable dessert perfect for social media
- Customizable toppings: Easy to personalize with favorite candies and treats
- Special occasion perfect: Ideal for birthdays, celebrations, or romantic treats
- Comfort food luxury: Elevates simple milkshake into gourmet dessert experience
- Kid and adult appeal: Satisfies chocolate-peanut butter lovers of all ages
- Make-ahead components: Toppings and garnishes can be prepared in advance
- Restaurant-quality results: Achieves professional dessert presentation at home
- Textural variety: Combines smooth, creamy, crunchy, and chewy elements
- Portion flexibility: Can be made smaller or larger depending on occasion
Ingredients
For the Milkshake Base
- Chocolate ice cream – Provides rich, decadent foundation for PB-chocolate combination
- Peanut butter – Creates signature nutty flavor and creamy texture
- Whole milk – Adjusts consistency while maintaining richness
- Vanilla extract – Enhances overall flavor complexity
- Chocolate syrup – Adds extra chocolate depth and visual appeal
- Malted milk powder – Optional for old-fashioned malt shop flavor
- Pinch of salt – Enhances peanut butter and chocolate flavors
For the Whipped Cream Topping
- Heavy whipping cream – Creates stable, billowy topping
- Powdered sugar – Sweetens without grittiness
- Vanilla extract – Adds aromatic depth
- Peanut butter – For peanut butter whipped cream variation
For the Epic Toppings
- Chocolate sauce or hot fudge – For dramatic dripping effect
- Peanut butter cups – Iconic candy that reinforces flavor theme
- Crushed peanut butter cookies – Add textural contrast and extra PB flavor
- Chocolate chips or chunks – Provide chocolatey bite-sized pieces
- Chopped peanuts – Add natural peanut crunch and visual appeal
- Mini marshmallows – Create fun, playful textural element
- Pretzel pieces – Add salty crunch that complements sweet flavors
Optional Enhancements
- Caramel sauce – Add sweet, buttery complexity
- Sea salt flakes – Enhance sweet-salty flavor balance
- Chocolate shavings – Create elegant garnish element
- Whipped peanut butter – For rim decoration
- Graham cracker crumbs – Add s’mores-inspired element
- Banana slices – Classic pairing with peanut butter
- Espresso shot – Create mocha-PB adult variation
- Different ice cream flavors – Experiment with vanilla or cookies & cream
- Nut alternatives – Accommodate allergies with sunflower seed butter
Step-by-Step Instructions
Preparing the Glass Presentation
- Select tall, clear glasses that showcase the milkshake’s layers and toppings, choosing glasses with wide mouths that accommodate generous topping portions and allow for dramatic presentation effects.
- Chill the glasses in the freezer for 15-20 minutes before assembly to help maintain the milkshake’s temperature and prevent rapid melting of the elaborate toppings you’ll be adding.
- Prepare the rim decoration by spreading a thin layer of peanut butter around the glass rim, then rolling in crushed peanut butter cookies or chopped peanuts for an impressive finishing touch.
- Drizzle chocolate sauce down the inside walls of the chilled glasses, creating dramatic dripping effects that will be visible through the glass and add to the epic presentation.
- Place the prepared glasses back in the refrigerator while you prepare the milkshake base, ensuring they stay cold and the chocolate drizzle sets properly for the best visual impact.
Creating the Perfect Milkshake Base
- Remove chocolate ice cream from freezer 5-10 minutes before blending to soften slightly, which makes blending easier while maintaining the thick consistency essential for supporting elaborate toppings.
- Measure 4 generous scoops (about 2 cups) of high-quality chocolate ice cream into your blender, choosing premium brands with rich chocolate flavor that will stand up to the peanut butter addition.
- Add 3 tablespoons of creamy peanut butter to the ice cream, using natural peanut butter for the most authentic flavor, or regular peanut butter for smoother consistency and sweeter taste.
- Pour in ⅓ cup of cold whole milk, 1 teaspoon vanilla extract, 2 tablespoons chocolate syrup, and a pinch of salt, which enhances both the chocolate and peanut butter flavors beautifully.
- If desired, add 1 tablespoon of malted milk powder for authentic malt shop flavor that adds nostalgic appeal and extra richness to the already indulgent combination.
- Blend on low speed initially to combine ingredients without incorporating too much air, then gradually increase to medium speed, pulsing occasionally to maintain thick consistency.
- Stop frequently to scrape down the sides with a rubber spatula, ensuring the peanut butter is completely incorporated and the mixture maintains that perfect spoonable yet pourable consistency.
- Taste and adjust flavors as needed—add more peanut butter for nuttier flavor, chocolate syrup for extra chocolate intensity, or milk for thinner consistency, remembering the toppings will add additional flavors.
Preparing the Epic Toppings
- Create fresh whipped cream by beating 1 cup of cold heavy cream with 3 tablespoons powdered sugar and 1 teaspoon vanilla extract until medium peaks form that hold their shape.
- For peanut butter whipped cream variation, fold 2 tablespoons of smooth peanut butter into half the whipped cream, creating two different topping options for extra flavor complexity.
- Prepare your candy and cookie toppings by roughly chopping peanut butter cups into bite-sized pieces, crushing peanut butter cookies into varied chunk sizes, and gathering chocolate chips or chunks.
- Toast chopped peanuts in a dry skillet for 2-3 minutes to enhance their flavor and add extra crunch that contrasts beautifully with the creamy milkshake base.
- Warm chocolate sauce or hot fudge slightly for easier drizzling, but not so hot that it melts the whipped cream, aiming for a pourable consistency that creates dramatic drips.
- Arrange all toppings in small bowls for easy assembly, creating an attractive display that allows for quick and efficient construction of the epic milkshakes.
Assembling the Epic Presentation
- Remove the prepared glasses from the refrigerator and give the milkshake mixture a final gentle pulse or stir to recombine any separated ingredients.
- Pour the milkshake into the prepared glasses, filling them about two-thirds full to leave ample room for the generous toppings that will create the epic, over-the-top presentation.
- Top each milkshake with an enormous dollop of whipped cream, creating height and drama that extends well above the rim of the glass for maximum visual impact.
- Drizzle warm chocolate sauce generously over the whipped cream, allowing it to cascade down the sides and create those Instagram-worthy dripping effects that make the presentation so spectacular.
- Sprinkle crushed peanut butter cookies over the whipped cream, followed by chopped peanut butter cups, chocolate chips, and toasted peanuts, creating layers of texture and flavor.
- Add final garnishes like whole peanut butter cups balanced on top, pretzel pieces for salty crunch, and a few mini marshmallows for playful appeal that completes the epic presentation.
- Insert thick straws or provide long spoons for eating, as these milkshakes are as much about the experience of consuming all the toppings as they are about drinking the base.
Serving and Enjoyment Tips
- Serve the epic milkshakes immediately after assembly while the whipped cream is fresh and the milkshake base is at optimal temperature for the best texture contrast.
- Provide both straws and spoons to guests, as the elaborate toppings require spoon work while the milkshake base can be enjoyed through a straw for the complete experience.
- Consider serving on small plates or trays to catch any drips from the generous toppings, making the eating experience more comfortable and less messy for guests.
- Take photos immediately after assembly while the presentation is at its peak, as the toppings will shift and the whipped cream will begin to settle over time.
- Encourage guests to mix some toppings into the milkshake as they drink to create new flavor combinations and extend the enjoyment throughout the entire experience.
- For sharing, provide multiple spoons and encourage communal enjoyment, as these epic milkshakes are often too generous for one person and are designed for sharing and socializing.
Pro Tips
- Soften ice cream slightly before blending for smoother consistency
- Use high-quality chocolate ice cream for richest flavor foundation
- Incorporate peanut butter gradually to prevent clumping during blending
- Chill glasses beforehand to maintain temperature and set chocolate drizzle
- Create rim decorations before adding milkshake for cleanest presentation
- Whip cream to medium peaks for stability under heavy toppings
- Warm chocolate sauce slightly for better drizzling consistency
- Prepare all toppings in advance for quick assembly
- Toast nuts for enhanced flavor and extra crunch texture
- Work quickly during assembly to prevent melting
- Use thick straws that can handle the rich consistency
- Provide spoons for enjoying elaborate toppings properly
- Take photos immediately after assembly for best visual appeal
- Layer toppings strategically for maximum visual impact
- Taste milkshake base before adding toppings and adjust as needed
- Keep components cold until final assembly
- Create height with whipped cream for dramatic presentation
- Use varied textures in toppings for interesting contrast
- Consider portion size—these are very rich and filling
- Have napkins and small plates ready for serving
Variations and Creative Ideas
Flavor Variations
- White Chocolate Peanut Butter: Use vanilla ice cream with white chocolate chips and peanut butter, creating a lighter colored but equally indulgent version topped with white chocolate drizzle and vanilla wafers.
- Dark Chocolate Intensity: Feature dark chocolate ice cream with natural peanut butter for sophisticated, less sweet variation that appeals to adult palates while maintaining the epic presentation style.
- Cookies & Cream PB: Combine cookies and cream ice cream with peanut butter, adding Oreo pieces to the toppings for triple flavor combination that satisfies multiple dessert cravings.
- Banana Peanut Butter Chocolate: Add fresh banana to the base and include banana chips in the toppings for classic flavor trio that adds natural sweetness and potassium boost.
Seasonal Adaptations
- Halloween Candy Explosion: Feature orange and black themed toppings using Reese’s pumpkins, chocolate-covered pretzels, and orange sprinkles for festive October celebration that maintains the PB-chocolate theme.
- Holiday Peppermint Twist: Add peppermint extract and crushed candy canes to create winter holiday version that combines Christmas flavors with beloved peanut butter chocolate combination.
- Summer S’mores Style: Include graham cracker crumbs, mini marshmallows, and chocolate pieces for campfire-inspired variation perfect for summer entertaining and outdoor gatherings.
- Valentine’s Heart Attack: Use heart-shaped chocolates, pink whipped cream, and romantic presentation for February celebration that showcases love through indulgent dessert sharing.
Dietary Modifications
- Allergy-Friendly Alternative: Replace peanut butter with sunflower seed butter or almond butter, using corresponding nut-free candies and cookies for those with peanut allergies who still want epic indulgence.
- Dairy-Free Epic: Use coconut or oat milk ice cream with coconut whipped cream, ensuring all toppings are dairy-free while maintaining the over-the-top presentation and satisfying flavors.
- Lower Sugar Option: Reduce added sweeteners and use sugar-free ice cream and chocolate, focusing on natural peanut butter sweetness and fewer candy toppings for lighter indulgence.
- Protein-Packed Version: Add vanilla or chocolate protein powder to boost nutrition while maintaining indulgent appeal, perfect for post-workout treats that satisfy cravings.
Creative Presentation Ideas
- Tableside Assembly: Set up ingredients and let guests build their own epic milkshakes, creating interactive dessert experience perfect for parties and special occasions.
- Mini Epic Versions: Create smaller portions in shot glasses for tasting parties or when serving multiple dessert options, maintaining the epic concept in bite-sized portions.
- Layered Glass Showcase: Build layers visibly in clear glasses, alternating milkshake, whipped cream, and toppings for stunning visual presentation that showcases each component.
- Themed Character Creations: Design specific topping combinations and presentations to represent favorite characters or themes, perfect for children’s parties and themed celebrations.
Frequently Asked Questions
How do I prevent the toppings from falling off?
Topping stability depends on proper whipped cream consistency and strategic layering. Whip cream to medium peaks that hold their shape but aren’t stiff. Build toppings gradually, pressing lighter items gently into the whipped cream. Heavier items like candy pieces should be placed strategically and supported by the cream structure. Some settling is natural and part of the epic experience—provide spoons for guests to enjoy fallen toppings.
Can I make components ahead of time?
Yes, many components can be prepared in advance. Whipped cream can be made up to 4 hours ahead and stored covered in the refrigerator. Chopped toppings can be prepared the day before. However, assemble the complete milkshakes just before serving for best texture and appearance. The milkshake base can be blended and stored in the freezer for up to 2 hours, then re-blended briefly before serving.
How do I achieve the perfect milkshake consistency with peanut butter?
Peanut butter can make milkshakes thick quickly. Start with softened ice cream and add peanut butter gradually while blending. Use room temperature peanut butter for easier incorporation. If the mixture becomes too thick, add milk one tablespoon at a time. Natural peanut butter creates different consistency than regular—adjust liquid accordingly. The final consistency should coat a spoon but still be drinkable through a thick straw.

Ingredients
For the Milkshake Base:
2 cups chocolate ice cream (4 generous scoops)
3 tablespoons creamy peanut butter
⅓ cup whole milk
1 teaspoon vanilla extract
2 tablespoons chocolate syrup
1 tablespoon malted milk powder (optional)
Pinch of salt
For the Whipped Cream Topping:
1 cup heavy whipping cream
3 tablespoons powdered sugar
1 teaspoon vanilla extract
2 tablespoons peanut butter (for PB whipped cream)
For the Epic Toppings:
¼ cup chocolate sauce or hot fudge
4-6 peanut butter cups, chopped
½ cup peanut butter cookies, crushed
¼ cup chocolate chips
¼ cup peanuts, chopped and toasted
2 tablespoons mini marshmallows
2 tablespoons pretzel pieces
For Glass Decoration:
2 tablespoons peanut butter for rim
¼ cup crushed cookies for rim coating
Extra chocolate sauce for glass drizzle
Instructions
Chill glasses in freezer 15-20 minutes. Prepare rims with peanut butter and crushed cookies.
Drizzle chocolate sauce inside chilled glasses for dramatic effect. Return to refrigerator.
Soften ice cream 5-10 minutes. Add to blender with peanut butter, milk, vanilla, chocolate syrup, and salt.
Blend on low, then medium speed until smooth and thick. Adjust consistency with milk if needed.
Whip cream with powdered sugar and vanilla to medium peaks. Fold peanut butter into half for variation.
Prepare toppings: chop candy, crush cookies, toast nuts. Warm chocolate sauce slightly.
Pour milkshake into prepared glasses, filling two-thirds full.
Top with enormous dollop of whipped cream, extending above rim.
Drizzle chocolate sauce over cream, allowing dramatic drips down sides.
Layer toppings: cookies, candy, chips, nuts, marshmallows, pretzels for epic presentation.
Insert thick straws and provide spoons. Serve immediately while presentation is perfect.
Notes
Soften ice cream slightly before blending for smoother consistency
Add peanut butter gradually to prevent clumping during blending process
Chill glasses beforehand to maintain temperature and set chocolate drizzle
Create rim decorations before adding milkshake for cleanest presentation
Whip cream to medium peaks for stability under heavy topping weight
Warm chocolate sauce slightly for better drizzling and visual effect
Prepare all toppings in advance for quick, efficient assembly
Toast nuts for enhanced flavor and superior crunch texture
Work quickly during assembly to prevent melting and maintain structure
Use thick straws that can handle the rich, dense consistency
Provide spoons for properly enjoying the elaborate topping collection
Take photos immediately after assembly for optimal visual appeal
Layer toppings strategically for maximum visual impact and stability
Taste milkshake base before final assembly and adjust flavors
Keep all components cold until final assembly moment
Create dramatic height with whipped cream for impressive presentation
Use varied textures in toppings for interesting sensory contrast
Consider generous portion size—these are very rich and filling
Have napkins and small plates ready for comfortable serving experience
Encourage mixing toppings into milkshake for evolving flavor combinations