

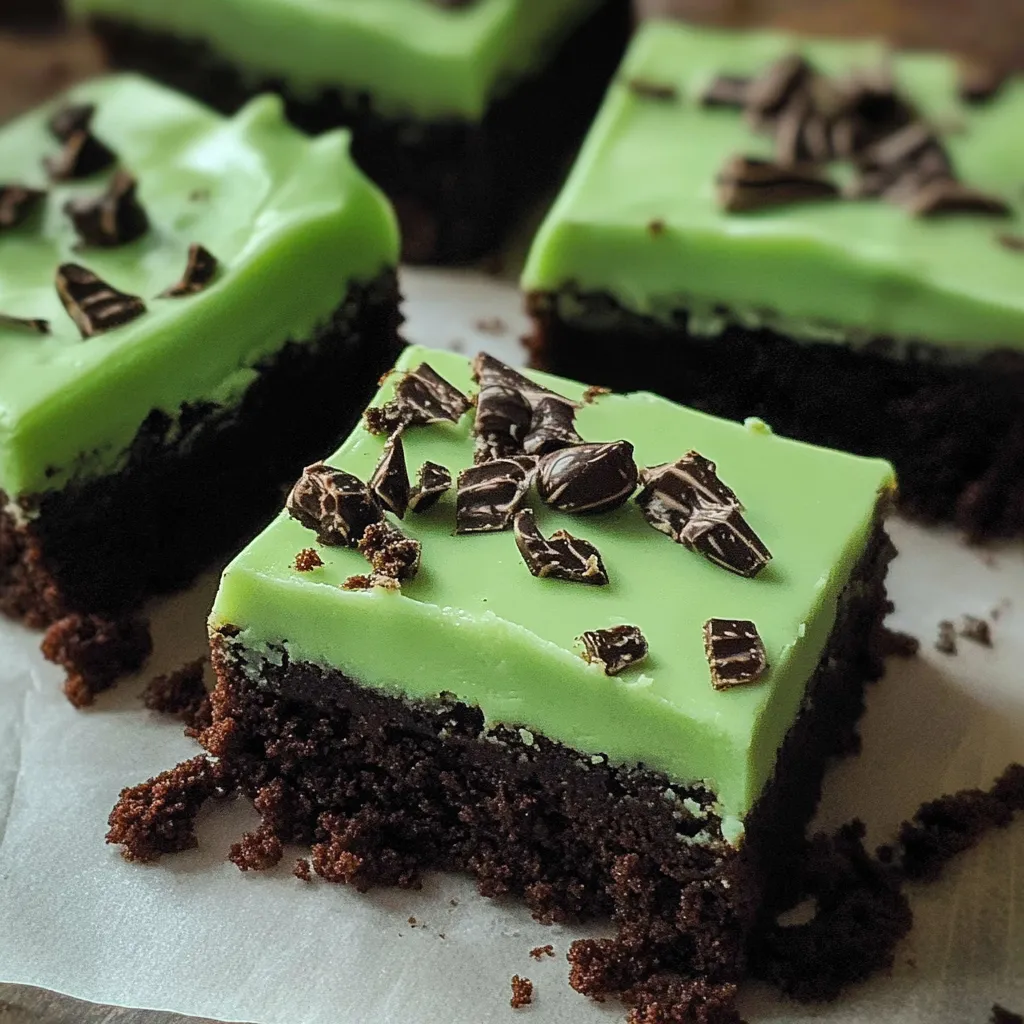
These spectacular Decadent Grasshopper Brownies represent the ultimate fusion of rich chocolate indulgence and refreshing mint sophistication, transforming classic fudgy brownies into an elegant dessert masterpiece that combines dense, chocolatey brownie base with silky mint buttercream frosting and dark chocolate shavings, creating a treat so irresistibly luxurious it captures the essence of the beloved grasshopper cocktail while delivering bakery-quality results that make every special occasion feel extraordinary. The recipe masterfully layers complementary flavors and textures that create perfect harmony—the intensely chocolatey brownie foundation provides rich, fudgy satisfaction that forms the perfect canvas for the bright, creamy mint frosting that adds cooling refreshment and beautiful color contrast, while delicate chocolate shavings contribute elegant visual appeal and extra chocolate intensity that completes this sophisticated dessert experience. Every bite delivers an explosion of complementary sensations—the dense, chewy brownie melts on your tongue while releasing deep chocolate flavors, followed by the smooth, refreshing mint frosting that provides cooling balance and creamy richness, finished with the satisfying crunch of chocolate shavings that adds textural interest and reinforces the chocolate-mint flavor combination that defines this classic pairing. The visual appeal showcases vibrant mint-green frosting against dark chocolate brownies, topped with artistic chocolate curls and creating an Instagram-worthy presentation that proves homemade desserts can be as beautiful as they are delicious. This show-stopping recipe embodies dessert perfection—ideal for holiday entertaining, special celebrations, potluck contributions, or anytime you want to serve something that guarantees impressed guests and requests for the recipe while delivering the kind of memorable sweet experience that creates lasting food memories.
Why You’ll Love This Recipe
- Classic flavor combination: Timeless mint-chocolate pairing that never goes out of style
- Elegant presentation: Beautiful color contrast creates stunning visual impact
- Make-ahead friendly: Perfect for stress-free entertaining and party planning
- Crowd-pleasing appeal: Universally loved flavors that satisfy all taste preferences
- Bakery-quality results: Professional-looking dessert achieved with home techniques
- Special occasion perfect: Ideal for holidays, celebrations, and impressive gatherings
- Textural variety: Combines fudgy, creamy, and crunchy elements in perfect harmony
- Refreshing indulgence: Mint provides cooling balance to rich chocolate decadence
- Easy customization: Simple to adjust mint intensity and chocolate garnish preferences
- Conversation starter: Unique dessert that creates memorable dining experiences
Ingredients
For the Brownie Foundation
- Unsweetened chocolate – Provides intense chocolate flavor and rich foundation
- Butter – Creates tender texture and adds richness to brownie base
- Granulated sugar – Sweetens and helps create proper brownie texture
- Large eggs – Bind ingredients and contribute to fudgy consistency
- All-purpose flour – Provides structure without making brownies too cakey
- Vanilla extract – Enhances chocolate flavor and adds aromatic complexity
For the Mint Buttercream Frosting
- Butter – Forms creamy base and provides rich, smooth texture
- Powdered sugar – Creates proper sweetness and smooth frosting consistency
- Heavy cream – Adds richness and helps achieve perfect spreading texture
- Mint extract – Provides authentic mint flavor and cooling sensation
- Green food coloring – Creates beautiful grasshopper-inspired color
- Vanilla extract – Balances mint and adds depth to frosting flavor
For the Chocolate Garnish
- Semi-sweet chocolate – Perfect for shaving and provides ideal sweetness balance
- Dark chocolate alternative – Offers more intense flavor for sophisticated palates
- Chocolate chips – Convenient option for easier preparation and consistent results
- Cocoa powder – Optional dusting for additional chocolate appearance
For Enhanced Flavor Development
- Espresso powder – Intensifies chocolate flavor without adding coffee taste
- Salt – Enhances all flavors and balances sweetness perfectly
- Corn syrup – Optional addition for extra fudgy texture and shine
- Crème de menthe – Optional alcohol enhancement for adult audiences
Optional Gourmet Enhancements
- Mint chocolate chips – Mixed into brownie batter for extra mint-chocolate flavor
- Crushed peppermint candies – Added to frosting for textural interest and visual appeal
- White chocolate – For drizzling or additional garnish variety and color contrast
- Fresh mint leaves – Natural garnish that adds aromatic appeal and authenticity
- Andes mints – Chopped and sprinkled on top for convenient mint-chocolate topping
- Oreo cookies – Crushed into frosting for cookies-and-cream variation
Step-by-Step Instructions
Creating the Perfect Brownie Base
- Preheat oven to 350°F and line 9×13-inch baking pan with parchment paper, leaving overhang for easy removal, and grease lightly for optimal release.
- In double boiler or microwave-safe bowl, melt 4 ounces chopped unsweetened chocolate with ½ cup butter, stirring until smooth and completely combined.
- In large mixing bowl, whisk together 1½ cups granulated sugar with melted chocolate mixture until well combined and slightly cooled to prevent cooking eggs.
- Beat in 3 large eggs one at a time, mixing well after each addition, then add 1 teaspoon vanilla extract for enhanced flavor development.
- In separate bowl, whisk together 1 cup all-purpose flour, ¼ teaspoon salt, and 1 teaspoon espresso powder for enhanced chocolate intensity.
- Gradually fold dry ingredients into chocolate mixture until just combined, avoiding overmixing which can create tough, cakey texture instead of fudgy result.
Baking to Fudgy Perfection
- Pour brownie batter into prepared pan, spreading evenly to corners and smoothing top with offset spatula for uniform thickness and appearance.
- Bake for 25-30 minutes until toothpick inserted 2 inches from edge comes out with few moist crumbs—center should still be slightly underdone.
- Avoid overbaking as brownies continue cooking from residual heat, and perfectly fudgy texture requires slightly underdone center when removed from oven.
- Cool completely in pan on wire rack before frosting, allowing brownies to set properly and reach optimal texture for supporting mint layer.
- For extra fudgy results, refrigerate cooled brownies for 1 hour before frosting, which firms texture and makes frosting application easier and neater.
- Remove from pan using parchment overhang only after completely cooled to prevent breaking or crumbling during handling and preparation.
Preparing the Silky Mint Buttercream
- In large mixing bowl, beat 1 cup softened butter with electric mixer until light and fluffy, approximately 3-4 minutes for optimal texture development.
- Gradually add 3-4 cups powdered sugar, one cup at a time, beating well after each addition to create smooth, lump-free consistency.
- Add 2-3 tablespoons heavy cream, 1 teaspoon mint extract, and ½ teaspoon vanilla extract, beating until smooth and spreadable consistency is achieved.
- Add green food coloring drop by drop, mixing until desired grasshopper-green color is reached—start with less as color intensifies upon mixing.
- Taste frosting and adjust mint extract as needed, remembering that mint flavor will develop and intensify after application and resting time.
- If frosting is too thick, add cream 1 tablespoon at a time; if too thin, add powdered sugar gradually until perfect spreading consistency.
Achieving Professional Frosting Application
- Using offset spatula, spread mint buttercream evenly over cooled brownie surface, working from center outward for smooth, professional appearance.
- Create smooth, even layer approximately ½-inch thick, ensuring complete coverage while maintaining consistent thickness throughout entire surface area.
- For extra-smooth finish, dip spatula in warm water and gently smooth frosting surface, creating bakery-quality appearance with minimal effort.
- Work efficiently as buttercream can become difficult to spread if it warms too much from handling during application process.
- For decorative effect, use fork or piping bag to create swirls, rosettes, or other patterns that add visual interest and professional presentation.
- Refrigerate frosted brownies for 30 minutes to set frosting before adding chocolate garnish for optimal results and easier cutting.
Creating Beautiful Chocolate Garnish
- Using vegetable peeler or sharp knife, create chocolate shavings from room-temperature chocolate bar, working over clean surface for easy collection.
- For larger curls, warm chocolate slightly with hands or brief exposure to warm room temperature before shaving for more dramatic effect.
- Alternatively, finely chop chocolate or use mini chocolate chips for easier preparation and consistent results throughout entire dessert surface.
- Sprinkle chocolate garnish evenly over set frosting, concentrating slightly more around edges for professional bakery-style presentation and visual appeal.
- For extra elegance, dust lightly with cocoa powder using fine-mesh sieve for sophisticated finish that enhances chocolate appearance.
- Gently press garnish into frosting if desired to ensure adherence, though light sprinkling typically provides adequate attachment for serving.
Perfect Cutting and Serving Technique
- Using sharp knife dipped in warm water and wiped clean between cuts, slice brownies into uniform squares for professional presentation.
- Cut slowly and deliberately, applying gentle downward pressure to avoid dragging frosting or creating messy edges during serving preparation.
- For cleanest cuts, refrigerate assembled brownies for 1-2 hours before cutting, which firms both brownie and frosting for neat, bakery-quality squares.
- Wipe knife blade clean after each cut to prevent frosting buildup that can create messy appearance and uneven cutting results.
- Arrange cut brownies on serving platter with space between pieces for elegant presentation that showcases individual portions attractively.
- Store covered at room temperature for up to 3 days, or refrigerate for longer storage while maintaining optimal texture and flavor quality.
Pro Tips
- Use room temperature eggs for better mixing and smoother brownie texture
- Don’t overbake brownies—slightly underdone center creates perfect fudgy texture
- Soften butter properly for frosting to achieve smooth, lump-free consistency
- Start with less food coloring and add gradually for perfect mint-green color
- Cool brownies completely before frosting to prevent melting and sliding
- Dip knife in warm water for cleaner cuts through frosting layers
- Refrigerate briefly to set frosting before adding chocolate garnish
- Taste-test frosting and adjust mint extract to personal preference
- Use parchment paper overhang for easy removal from baking pan
- Work quickly when spreading frosting to maintain smooth, workable texture
- Quality chocolate makes significant difference in both brownies and garnish
- Store at room temperature unless weather is very warm and humid
- Fresh mint extract provides better flavor than older, stale extract
- Level brownie surface if needed before frosting for professional appearance
- Practice chocolate shaving technique for most attractive garnish results
- Allow flavors to meld by resting assembled brownies before serving
- Cut with gentle sawing motion rather than pressing straight down
- Keep frosting covered while not in use to prevent forming skin
- Adjust mint intensity based on intended audience and personal preferences
- Plan assembly time to account for cooling and setting periods
Variations and Creative Ideas
Seasonal Holiday Adaptations
- Christmas Version: Use red and green swirled frosting with crushed candy canes for festive holiday appeal and traditional color scheme.
- St. Patrick’s Day: Intensify green color and add shamrock decorations or green sprinkles for Irish-themed celebration and cultural appeal.
- Easter Special: Create pastel green frosting with white chocolate drizzle and mini chocolate eggs for spring celebration and seasonal charm.
- Valentine’s Day: Make pink frosting with chocolate hearts for romantic variation that celebrates love with chocolate-mint luxury.
International Flavor Profiles
- French Mint: Use crème de menthe in both brownie and frosting for sophisticated European variation with authentic liqueur enhancement.
- Moroccan Mint: Add hint of rose water to frosting for exotic Middle Eastern twist that creates unique and sophisticated flavor profile.
- British After-Eight: Incorporate dark chocolate and intense mint for variation inspired by classic British after-dinner mints and elegance.
- Italian Gelato: Create layered effect with pistachio and mint for Italian-inspired variation that mimics beloved gelato flavor combinations.
Dietary Modification Options
- Gluten-Free Version: Substitute almond flour or gluten-free flour blend for wheat flour to accommodate celiac dietary needs without sacrificing taste.
- Vegan Adaptation: Use plant-based butter and aquafaba for egg replacement to create dairy-free version that maintains rich flavor and texture.
- Sugar-Free Option: Replace sugars with erythritol or stevia blend for diabetic-friendly variation that preserves sweetness and satisfaction.
- Lower-Fat Version: Use applesauce to replace some butter and create lighter variation while maintaining moist texture and chocolate flavor.
Creative Flavor Combinations
- Cookies and Cream: Add crushed Oreos to frosting for popular flavor combination that creates textural interest and familiar appeal.
- Peppermint Bark: Top with white chocolate drizzle and crushed peppermint for holiday variation that mimics beloved seasonal confection.
- Chocolate Chip Mint: Add mini chocolate chips to both brownie and frosting for extra chocolate intensity and textural variety.
- Mocha Mint: Add coffee to brownie base for sophisticated adult variation that combines three beloved flavors in harmonious balance.
Frequently Asked Questions
How do I prevent my brownies from being too cakey?
The key to fudgy brownies is proper mixing and timing. Don’t overmix the batter once you add the flour—fold just until combined. Also, slightly underbake them; the center should still look slightly underdone when you remove them from the oven. Using the right ratio of fat to flour and not adding too much flour also helps maintain that dense, fudgy texture.
Can I make the frosting ahead of time?
Yes! You can make the buttercream frosting up to 3 days ahead and store it covered in the refrigerator. Before using, let it come to room temperature and re-whip it briefly to restore the smooth, spreadable consistency. This actually allows the mint flavor to develop and intensify, often resulting in better-tasting frosting.
How do I get the perfect mint-green color?
Start with just one drop of green food coloring and mix thoroughly before adding more. The color will appear more vibrant as you mix, and it’s easier to add more than to tone down an overly bright result. Gel food coloring works better than liquid for achieving intense colors without thinning the frosting too much.
What’s the best way to store these brownies?
Store the finished brownies covered at room temperature for up to 3 days, or refrigerate for up to a week. If your kitchen is very warm, refrigeration is recommended to prevent the frosting from becoming too soft. For longer storage, you can freeze the unfrosted brownies for up to 3 months and add the frosting after thawing.

Ingredients
For the Brownie Base:
- 4 ounces unsweetened chocolate, chopped
- ½ cup butter
- 1½ cups granulated sugar
- 3 large eggs
- 1 teaspoon vanilla extract
- 1 cup all-purpose flour
- ¼ teaspoon salt
- 1 teaspoon espresso powder (optional)
For the Mint Buttercream:
- 1 cup butter, softened
- 3-4 cups powdered sugar
- 2-3 tablespoons heavy cream
- 1 teaspoon mint extract
- ½ teaspoon vanilla extract
- Green food coloring
For the Chocolate Garnish:
- 2 ounces semi-sweet chocolate for shaving
- Optional: cocoa powder for dusting
Instructions
- Preheat oven to 350°F and line 9x13-inch pan with parchment paper, leaving overhang.
- Melt chocolate and butter together until smooth, then cool slightly before proceeding.
- Whisk melted chocolate mixture with sugar, then beat in eggs one at a time and vanilla.
- Combine flour, salt, and espresso powder, then fold into chocolate mixture until just combined.
- Pour into prepared pan and bake 25-30 minutes until slightly underdone in center.
- Cool completely in pan before removing and proceeding with frosting application.
- Beat softened butter until fluffy, gradually add powdered sugar and remaining frosting ingredients.
- Adjust consistency with cream and color with food coloring until desired shade achieved.
- Spread frosting evenly over cooled brownies using offset spatula for smooth finish.
- Top with chocolate shavings and refrigerate briefly to set before cutting and serving.
Notes
- Use room temperature eggs for better mixing and smoother brownie texture development
- Don't overbake brownies—slightly underdone center creates perfect fudgy texture and prevents dryness
- Soften butter properly for frosting to achieve smooth, lump-free consistency and professional appearance
- Start with less food coloring and add gradually for perfect mint-green color without oversaturation
- Cool brownies completely before frosting to prevent melting and sliding during application
- Dip knife in warm water for cleaner cuts through frosting layers and professional presentation
- Refrigerate briefly to set frosting before adding chocolate garnish for optimal adherence
- Taste-test frosting and adjust mint extract to personal preference and intended audience
- Use parchment paper overhang for easy removal from baking pan without breaking
- Work quickly when spreading frosting to maintain smooth, workable texture before it sets
- Quality chocolate makes significant difference in both brownies and garnish appearance and taste
- Store at room temperature unless weather is very warm and humid for optimal texture
- Fresh mint extract provides better flavor than older, stale extract that may taste artificial
- Level brownie surface if needed before frosting for professional appearance and even layers
- Practice chocolate shaving technique for most attractive garnish results and visual appeal
- Allow flavors to meld by resting assembled brownies before serving for best taste development
- Cut with gentle sawing motion rather than pressing straight down to prevent frosting smearing
- Keep frosting covered while not in use to prevent forming skin that affects smoothness
- Adjust mint intensity based on intended audience and personal preferences for optimal enjoyment
- Plan assembly time to account for cooling and setting periods for stress-free preparation