

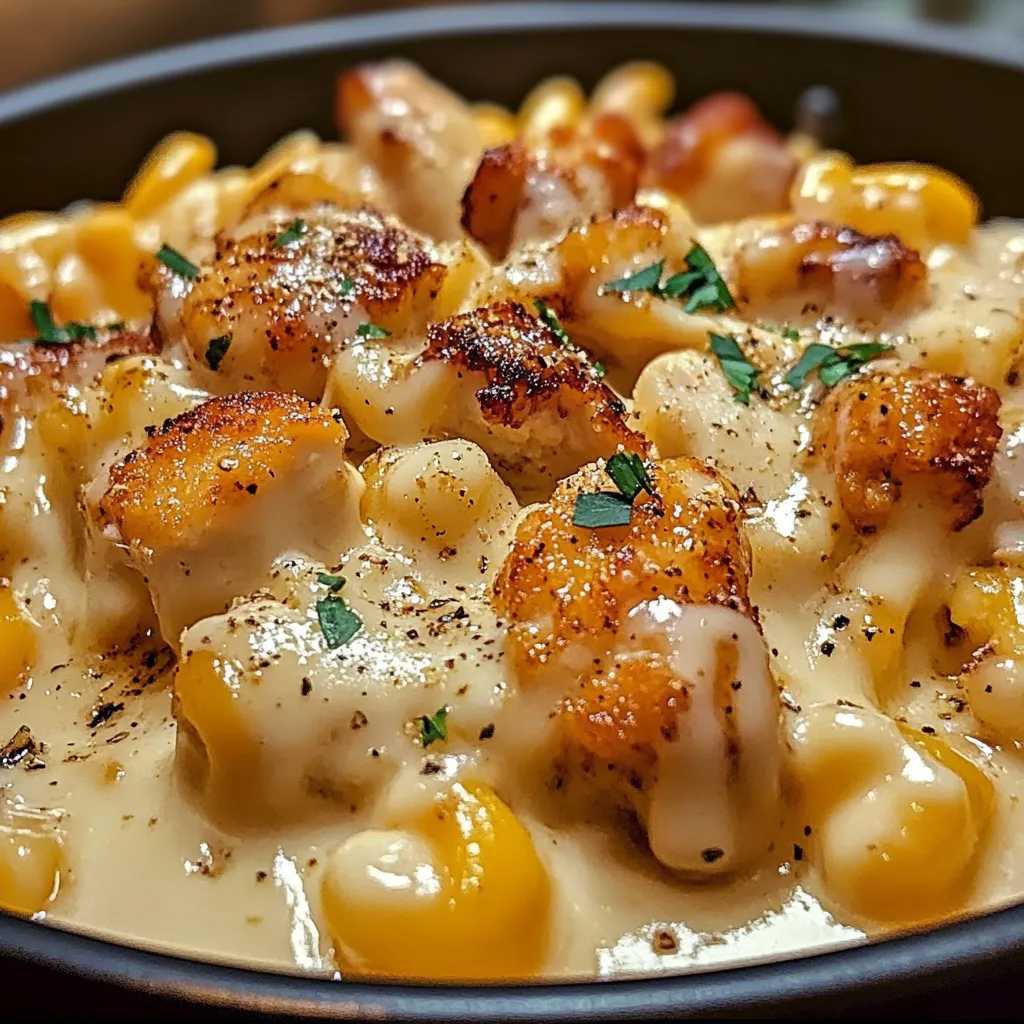
This indulgent Creamy Honey Pepper Chicken Mac and Cheese elevates traditional macaroni and cheese to a gourmet experience by combining tender, seasoned chicken with a luxuriously creamy cheese sauce infused with the perfect balance of sweet honey and bold black pepper. The dish features al dente pasta enveloped in a velvety blend of sharp cheddar, smooth Monterey Jack, and creamy mozzarella, punctuated by juicy chunks of golden-brown chicken that’s been caramelized with honey and seasoned with an aromatic black pepper crust. Each forkful delivers an exquisite contrast of flavors—the subtle sweetness of honey harmonizing with the gentle heat of freshly cracked pepper, while the rich cheese sauce provides a comforting backdrop that ties everything together. The stunning presentation features crispy-edged chicken nestled among glistening pasta, with the amber-colored sauce creating appetizing pools around golden pasta tubes, all topped with a sprinkle of fresh herbs or crispy breadcrumbs for textural contrast. This sophisticated comfort food masterpiece satisfies deep cravings while introducing unexpected flavor combinations that transform an everyday pasta dish into a memorable dining experience worth savoring.
Why You’ll Love This Recipe
- Perfect flavor balance: Combines sweet honey, spicy black pepper, and rich cheese in harmonious proportion
- Innovative twist: Reimagines classic mac and cheese with exciting new flavor dimensions
- Textural complexity: Contrasts creamy sauce with tender pasta and caramelized chicken pieces
- Make-ahead friendly: Components can be prepared separately and assembled before serving
- Crowd-pleasing appeal: Satisfies both traditional comfort food lovers and culinary adventurers
- One-dish complete meal: Incorporates protein, dairy, and carbohydrates in a single dish
- Versatile foundation: Easily customized with additional vegetables or spice adjustments
- Rich, luxurious mouthfeel: Creates restaurant-quality satisfaction with accessible ingredients
- Kid-friendly composition: Despite sophisticated flavors, appeals to younger eaters
- Elegant presentation: Delivers impressive visual impact despite straightforward preparation
Ingredients
For the Honey Pepper Chicken
- Boneless, skinless chicken thighs – Offer juicy tenderness and rich flavor that holds up to caramelization
- Honey – Provides natural sweetness and helps create a beautiful golden crust
- Black pepper (freshly cracked) – Delivers aromatic heat that balances the honey’s sweetness
- Garlic powder – Adds savory depth that enhances the chicken’s natural flavor
- Smoked paprika – Contributes subtle smokiness and beautiful color
- Salt – Enhances and balances all flavors throughout the dish
- Olive oil – Facilitates proper browning and caramelization of the chicken
- Butter – Creates richness and helps develop a flavorful fond in the pan
- Red pepper flakes (optional) – Adds additional heat dimension for those who enjoy spice
For the Creamy Cheese Sauce
- Butter – Forms the base of the roux that thickens the sauce properly
- All-purpose flour – Works with butter to create a smooth, thickening roux
- Whole milk – Provides the liquid base with sufficient fat for proper sauce texture
- Heavy cream – Adds luxurious richness and helps prevent sauce separation
- Sharp cheddar cheese – Contributes bold, tangy flavor and classic orange color
- Monterey Jack cheese – Melts beautifully and adds mild creaminess
- Mozzarella cheese – Creates that coveted cheese pull and silky texture
- Dijon mustard – Enhances cheese flavor without adding obvious mustard taste
- Nutmeg (freshly grated) – Adds subtle warmth that complements creamy sauces
- Garlic powder – Provides aromatic depth without texture of fresh garlic
- Onion powder – Contributes savory foundation without chunks
- Salt and white pepper – Seasons the sauce without visible black specks
For the Pasta Base
- Elbow macaroni or cavatappi – Hollow shapes capture maximum sauce in each bite
- Salt (for pasta water) – Properly seasons pasta from within during cooking
- Olive oil (for pasta water) – Prevents sticking and adds subtle richness
For the Topping (Optional)
- Panko breadcrumbs – Create crispy textural contrast to the creamy pasta
- Butter – Helps breadcrumbs achieve golden brown perfection
- Parmesan cheese – Adds salty, umami notes to the crunchy topping
- Fresh parsley – Provides bright color contrast and fresh herbaceous notes
- Chives – Add mild onion flavor and appealing green color accent
Optional Enhancements
- Caramelized onions – Add sweet depth and sophisticated flavor
- Bacon crumbles – Introduce smoky, salty dimension
- Roasted red peppers – Provide sweet, tangy counterpoints and vibrant color
- Spinach – Incorporates nutritional boost with minimal preparation
- Sautéed mushrooms – Add earthy umami and meaty texture
- Toasted pecans – Create unexpected crunch and nutty depth
- Diced jalapeños – Increase heat level with fresh, bright spice
- Fresh corn kernels – Add sweet pops of texture and color
- Smoked gouda cheese – Introduces complex smoky notes to the cheese blend
- Fresh thyme leaves – Enhance with aromatic herbaceous notes
Step-by-Step Instructions
Preparing the Chicken
- Begin by patting 1.5 pounds of boneless, skinless chicken thighs dry with paper towels. This crucial step removes excess moisture, ensuring proper caramelization rather than steaming. Cut chicken into 1-inch cubes for optimal bite-sized pieces that cook quickly and evenly.
- In a medium bowl, prepare the honey pepper marinade by whisking together 3 tablespoons of honey, 1 tablespoon of freshly cracked black pepper, 1 teaspoon of garlic powder, 1 teaspoon of smoked paprika, 1 teaspoon of salt, and ½ teaspoon of red pepper flakes (if using). The honey should be fully incorporated, creating a thick, glossy coating that will adhere to the chicken and caramelize beautifully during cooking.
- Add the cubed chicken to the marinade, tossing thoroughly to ensure each piece is well-coated. Cover the bowl and allow the chicken to marinate for at least 30 minutes at room temperature, or up to 4 hours refrigerated. This resting period allows the flavors to penetrate the meat while the honey begins to tenderize the protein.
- When ready to cook, heat 1 tablespoon of olive oil and 1 tablespoon of butter in a large skillet over medium-high heat. The combination of oil and butter prevents the butter from burning while still imparting rich flavor. Wait until the fat is shimmering but not smoking to ensure proper temperature for searing.
- Working in batches to avoid overcrowding (which would cause steaming rather than caramelization), add chicken pieces to the hot skillet in a single layer, leaving space between each piece. Depending on your skillet size, you’ll likely need 2-3 batches for 1.5 pounds of chicken.
- Allow chicken to cook undisturbed for 3-4 minutes until a deep golden crust forms on the bottom. This patience is essential for developing the caramelized exterior that provides both flavor and texture. Resist the urge to move the chicken prematurely.
- Using tongs, flip each piece and cook for another 2-3 minutes until all sides are golden brown and chicken is cooked through to an internal temperature of 165°F. The honey in the marinade will create a beautiful caramelized exterior with complex sweet and savory notes.
- Transfer cooked chicken to a clean plate and tent loosely with foil to keep warm while preparing the remaining components. The chicken will release some flavorful juices as it rests—reserve these to add to your cheese sauce later for an extra layer of flavor.
Preparing the Pasta
- Bring a large pot of water to a rolling boil. Add 1 tablespoon of salt—this significant amount properly seasons the pasta from within as it cooks. The pasta water should taste noticeably salty, similar to sea water.
- Add 1 pound of elbow macaroni or cavatappi pasta to the boiling water, stirring immediately to prevent sticking. These hollow, tubular shapes are ideal for capturing maximum sauce in each bite while providing satisfying chewiness.
- Cook pasta according to package directions, but stop 1-2 minutes before the suggested cooking time to achieve al dente texture—the pasta will continue cooking slightly when combined with the hot sauce. For most elbow macaroni, this will be around 6-7 minutes of cooking time.
- Before draining, reserve 1 cup of starchy pasta cooking water—this liquid gold contains dissolved starches that help emulsify your sauce and adjust consistency if needed. The reserved water can be added in small amounts if your final dish seems too thick.
- Drain pasta in a colander but do not rinse—the starchy exterior helps the sauce adhere properly. Toss immediately with 1 teaspoon of olive oil to prevent sticking while you prepare the sauce. Set aside, occasionally tossing to maintain separation.
Creating the Cheese Sauce
- In a large, heavy-bottomed saucepan or Dutch oven, melt 4 tablespoons of butter over medium heat until foaming subsides but before it begins to brown. This stage provides optimal condition for flour incorporation without burning.
- Add 4 tablespoons of all-purpose flour to the melted butter, whisking constantly to form a smooth roux without lumps. Continue cooking and whisking for 1-2 minutes until the mixture turns a light golden color and emits a nutty aroma. This cooking process eliminates the raw flour taste while developing flavor.
- Slowly pour in 2 cups of whole milk followed by 1 cup of heavy cream, whisking continuously to prevent lumps from forming. The gradual addition and constant whisking are crucial for achieving a silky-smooth sauce base without flour clumps.
- Bring the mixture to a gentle simmer, adjusting heat as necessary to maintain delicate bubbling without boiling over. Simmer for 3-5 minutes, whisking frequently, until the sauce has thickened enough to coat the back of a spoon and a finger drawn through it leaves a clear path.
- Reduce heat to low before adding cheese to prevent the sauce from breaking. Add 8 ounces of freshly grated sharp cheddar, 4 ounces of Monterey Jack, and 4 ounces of mozzarella cheese in small handfuls, whisking after each addition until completely melted before adding more. Using freshly grated cheese rather than pre-packaged shredded varieties ensures smoother melting without anti-caking agents.
- Once all cheese has been incorporated, add 1 teaspoon of Dijon mustard, ¼ teaspoon of freshly grated nutmeg, ½ teaspoon of garlic powder, ½ teaspoon of onion powder, 1 teaspoon of salt, and ¼ teaspoon of white pepper. Whisk until seasonings are completely incorporated and sauce is velvety smooth.
- If available, add any accumulated juices from the resting chicken to the sauce, stirring to incorporate these concentrated flavor essences. Taste the sauce and adjust seasoning if necessary, noting that the final dish will be mellowed slightly by the addition of pasta.
- If the sauce becomes too thick at any point, thin it with small amounts of the reserved pasta water, adding just a tablespoon or two at a time while whisking until desired consistency is reached. The ideal texture should be thick enough to coat pasta but still flow gently—similar to the consistency of warm honey.
Assembling the Dish
- Return the drained pasta to its cooking pot or a large mixing bowl. Pour about three-quarters of the cheese sauce over the pasta, stirring gently with a wooden spoon or silicone spatula to coat each piece thoroughly. The pasta should be generously coated but not swimming in sauce, as more will be added as a final layer.
- Add about two-thirds of the honey pepper chicken to the pasta mixture, folding gently to distribute the chicken pieces throughout without breaking them apart or making the pasta mushy. This integration ensures balanced flavor in every bite while reserving some chicken for the top presentation.
- Transfer the pasta and chicken mixture to a 9×13-inch baking dish or large cast-iron skillet, spreading it evenly with a spatula. If using a skillet that was used to cook the chicken, the residual flavors will further enhance the final dish.
- Pour the remaining cheese sauce over the top of the pasta, allowing it to drizzle down and create rich pockets throughout the dish. The exposed pasta surfaces will develop appealing texture contrasts during the final heating.
- Arrange the reserved honey pepper chicken pieces decoratively across the top of the casserole, pressing them lightly into the surface. This ensures beautiful presentation with visible chunks of caramelized chicken that hint at the flavors within.
Optional Topping and Finishing
- For an optional crispy topping, combine 1 cup of panko breadcrumbs with 2 tablespoons of melted butter and ¼ cup of grated Parmesan cheese in a small bowl, stirring until the crumbs are evenly moistened. This creates a crunchy, golden topping that provides excellent textural contrast to the creamy pasta beneath.
- Sprinkle the breadcrumb mixture evenly over the top of the casserole, focusing on good distribution rather than complete coverage to allow glimpses of the cheese and chicken beneath.
- Place the assembled dish in a preheated 375°F oven and bake for 20-25 minutes until the edges are bubbling and the top is golden brown. If using the breadcrumb topping, you may want to place under the broiler for the final 1-2 minutes to achieve optimal crispness, watching carefully to prevent burning.
- Remove from the oven and allow to rest for 5 minutes before serving. This brief resting period allows the sauce to set slightly while reaching the perfect serving temperature.
- Just before serving, sprinkle with 2 tablespoons of freshly chopped parsley and 1 tablespoon of snipped chives, which add bright color contrast and fresh flavor that complements the rich dish. For an additional touch of sophistication, offer freshly cracked black pepper at the table for those who enjoy more pronounced pepper flavor.
Serving Suggestions
- Serve generous portions while still hot, ensuring each serving includes both the creamy pasta and several pieces of the honey pepper chicken from the top layer.
- Accompany with a crisp green salad dressed with a light vinaigrette to provide refreshing contrast to the rich pasta. A simple arugula salad with lemon dressing works particularly well.
- Consider offering additional condiments at the table such as honey for drizzling, red pepper flakes for heat adjustment, or even a small dish of hot honey for those who enjoy the sweet-heat combination.
- For a complete meal, pair with simple steamed vegetables such as broccoli or green beans that can be lightly dressed with lemon juice or a touch of the same honey used in the chicken preparation.
Make-Ahead Options
- To prepare this dish in advance, the components can be made separately and assembled just before baking:
- Prepare the honey pepper chicken up to 24 hours ahead, store refrigerated in an airtight container
- Cook pasta until slightly underdone, toss with a small amount of oil, and refrigerate for up to 24 hours
- Make cheese sauce up to 2 days ahead, allow to cool, place plastic wrap directly on surface to prevent skin formation, and refrigerate
- Assemble up to 24 hours before baking, cover tightly, and refrigerate
- When ready to bake, allow dish to sit at room temperature for 30 minutes, then bake as directed, adding 10-15 minutes to the baking time
- If preparing breadcrumb topping in advance, store it uncooked in a separate container at room temperature and add just before baking to maintain optimal crispness.
Pro Tips
- Use block cheese and grate it yourself for superior melting and texture
- Allow marinaded chicken to come to room temperature before cooking for more even cooking
- Cook pasta 1-2 minutes shy of al dente as it will continue cooking in the sauce
- Reserve pasta cooking water to adjust sauce consistency if needed
- Add cheese to sauce off heat to prevent separation and graininess
- Test chicken doneness with an instant-read thermometer (165°F)
- For deeper flavor, use chicken thighs rather than breasts
- Let the chicken develop a good sear before flipping for best caramelization
- Warm milk before adding to roux to prevent lumps in the sauce
- Use a combination of cheeses for the most complex flavor profile
- For creamier sauce, never let it reach a full boil after adding cheese
- Add a splash of white wine to the pan after cooking chicken for deglazing
- Rest the finished dish 5 minutes before serving for optimal texture
- If sauce breaks or becomes grainy, a splash of cream and gentle reheating can rescue it
- For spicier version, add cayenne pepper to both chicken marinade and cheese sauce
- Balance the honey’s sweetness with adequate salt throughout the dish
- Use freshly cracked black pepper rather than pre-ground for superior flavor
- For silkier sauce, add cream cheese or American cheese to the cheese blend
- Garnish just before serving for brightest color and flavor
- For make-ahead preparation, slightly increase sauce volume to account for absorption
Variations and Creative Ideas
Flavor Adaptations
- BBQ Twist: Replace honey with your favorite barbecue sauce in the chicken marinade, add a tablespoon of liquid smoke to the cheese sauce, and top with crispy fried onions instead of breadcrumbs for a smoky, tangy variation that evokes summer cookouts while maintaining the creamy comfort of the original.
- Buffalo Style: Incorporate ¼ cup of buffalo sauce into the cheese mixture, use blue cheese instead of Monterey Jack, marinate the chicken in hot sauce instead of honey, and garnish with thinly sliced celery and a drizzle of ranch dressing for a game-day favorite that combines the creamy richness of mac and cheese with the signature buffalo heat.
- Mediterranean Fusion: Add sun-dried tomatoes, kalamata olives, and artichoke hearts to the pasta, substitute feta for some of the cheddar, use oregano and lemon zest in place of traditional seasonings, and marinate the chicken in Greek yogurt with honey and herbs for a vacation-inspired variation with bright, tangy notes.
- Maple Bacon Infusion: Substitute maple syrup for honey in the chicken marinade, fold crispy bacon pieces throughout the pasta, use smoked gouda in place of Monterey Jack, and top with a maple-bacon breadcrumb mixture for a decadent breakfast-inspired twist that combines sweet and savory notes in each bite.
Add-In Options
- Roasted Vegetable Boost: Enhance nutritional value by adding 2 cups of roasted seasonal vegetables such as butternut squash, bell peppers, zucchini, and cherry tomatoes to create a garden-fresh twist that maintains comfort food appeal while incorporating colorful produce and fiber.
- Caramelized Onion Enhancement: Slowly cook 2 large onions until deeply caramelized, then fold into the cheese sauce for an earthy sweetness that complements both the honey-glazed chicken and the rich cheese, adding sophisticated depth without overwhelming the dish’s comfort food character.
- Fruit and Nut Accent: Add ¼ cup of dried cranberries or cherries along with ¼ cup of toasted pecans or walnuts for unexpected bursts of sweetness and texture that highlight the honey notes in the chicken while creating a more complex, gourmet flavor profile perfect for special occasions.
- Spicy Corn Complement: Incorporate 1 cup of charred corn kernels and ¼ cup of diced poblano peppers for a Southwestern-inspired variation that adds sweet pops of texture and mild heat, creating a more complex flavor experience while maintaining the dish’s approachable comfort food status.
Dietary Modifications
- Gluten-Free Adaptation: Substitute gluten-free pasta (preferably corn-rice blend for best texture) and replace all-purpose flour with a gluten-free flour blend or cornstarch in the sauce, maintaining all other ingredients and techniques for a celiac-friendly version that doesn’t compromise on creamy texture or rich flavor.
- Lighter Version: Create a more calorie-conscious variation by using reduced-fat cheese, substituting half-and-half for heavy cream, incorporating Greek yogurt for some of the dairy, using chicken breast instead of thighs, and adding extra vegetables like cauliflower or broccoli to maintain volume and satisfaction with fewer calories.
- Dairy-Free Alternative: Employ cashew cream as the base for a plant-based sauce, using nutritional yeast and dairy-free cheese alternatives designed for melting, while maintaining the honey-pepper chicken preparation for a compromised approach that accommodates those with dairy sensitivities while preserving the dish’s protein component.
- Lower-Carb Option: Replace half or all of the pasta with blanched cauliflower florets or spiralized zucchini, increase the protein content with additional chicken, and maintain the rich cheese sauce for a ketogenic-friendly approach that preserves the dish’s indulgent character while significantly reducing carbohydrate content.
Serving Variations
- Individual Ramekins: Portion the mixture into individual oven-safe ramekins or cocottes before the final baking stage, creating elegant personal servings perfect for dinner parties while also maximizing the coveted crispy edge-to-creamy center ratio that makes baked mac and cheese so appealing.
- Stuffed Pepper Vessels: Use the mac and cheese mixture to stuff halved bell peppers, topping each with additional cheese and breadcrumbs before baking, creating a colorful, portion-controlled presentation that incorporates additional vegetables while making an impressive visual impact.
- Waffle Iron Mac and Cheese: Allow leftover mac and cheese to cool completely, form into patties, then cook in a well-greased waffle iron until crispy on the outside while remaining creamy within, creating a playful brunch option or innovative appetizer with maximum textural contrast.
- Mac and Cheese Burger Topping: Serve a generous spoonful of the honey pepper mac and cheese atop burger patties on toasted brioche buns, creating an indulgent fusion dish that combines two comfort food favorites in one over-the-top creation perfect for special occasions or restaurant-style home dining experiences.
Storage and Make-Ahead Advice
Short-Term Storage
- Store leftover casserole in airtight containers in the refrigerator for up to 4 days.
- For best quality, use glass storage containers which prevent staining from the cheese sauce and don’t absorb flavors as plastic might.
- Cover the surface with plastic wrap pressed directly onto the pasta before adding the container lid to minimize moisture loss and prevent a skin from forming on the sauce.
- Keep refrigerated at 40°F (4°C) or below at all times to maintain food safety with dairy-based dishes.
- Consider portioning leftovers into individual containers for convenient reheating of single servings rather than repeatedly reheating the entire dish.
Reheating Guidelines
- Reheat individual portions in the microwave at 60% power for 2-3 minutes, stirring halfway through for even heating, until the center reaches 165°F (74°C).
- For best texture when reheating larger portions, place in an oven-safe dish, add 1-2 tablespoons of milk or cream to refresh the sauce, cover with aluminum foil, and heat in a 325°F (165°C) oven for 15-20 minutes until thoroughly heated.
- If the dish seems dry when reheating, add a splash of milk, cream, or chicken broth (1-2 tablespoons per serving) before heating to rejuvenate the creamy texture.
- For crispier topping when reheating in the oven, remove the foil covering for the last 5 minutes of heating time, or prepare a small amount of fresh buttered breadcrumb mixture to add before the final heating.
- When reheating on the stovetop, use low heat and add small amounts of liquid while stirring gently to prevent the sauce from breaking or the pasta from becoming mushy.
Freezing Instructions
- This dish can be frozen either before or after baking, though the texture is best when frozen before the final baking stage.
- To freeze unbaked casserole, assemble completely excluding any breadcrumb topping, cover tightly with a layer of plastic wrap followed by aluminum foil, and freeze for up to 2 months.
- When ready to bake from frozen, thaw completely in refrigerator (24-36 hours), remove plastic wrap but replace foil, bake at 350°F for 30 minutes, then uncover, add fresh breadcrumb topping if desired, and bake an additional 15-20 minutes until bubbly and golden.
- For baked leftovers, cool completely before freezing in airtight, freezer-safe containers for up to 1 month.
- Freeze in portion sizes appropriate for future needs—either family-sized containers or individual servings—for maximum convenience.
- For individual portions, consider freezing in oven-safe containers for easiest reheating without transferring.
Make-Ahead Strategy
- This dish is ideal for make-ahead preparation with several timing options:
- Prepare 1 day ahead: Assemble completely through topping, cover tightly, and refrigerate. Bake as directed, adding 10-15 minutes to cooking time.
- Prepare 2-3 days ahead: Prepare the chicken and pasta separately, store in refrigerator, then assemble and bake when needed.
- Prepare weeks ahead: Assemble without breadcrumb topping, freeze, then thaw overnight in refrigerator, add fresh topping, and bake.
- For optimal make-ahead results, slightly increase the sauce ingredients by about 25% as some absorption occurs during refrigeration or freezing.
- When making ahead, cook the pasta even more al dente than usual, as it will continue to absorb moisture as it sits in the refrigerator.
- Always add breadcrumb toppings just before baking rather than during initial assembly to ensure they remain crispy.
- When making ahead, ensure all ingredients are as fresh as possible to maintain quality during storage periods.
Portion and Menu Planning
- This recipe yields approximately 8-10 servings as a main course, making it ideal for family gatherings or meal prep.
- For a complete meal, pair with lighter side dishes that complement the casserole’s richness:
- Crisp green salad with acidic vinaigrette
- Steamed green vegetables like asparagus or broccoli
- Roasted Brussels sprouts with balsamic glaze
- Simple tomato and cucumber salad
- When serving for guests with varying dietary needs, consider preparing a small separate dish with appropriate substitutions rather than adapting the entire recipe.
- For meal prep purposes, portion into individual containers along with a side of vegetables for complete grab-and-go lunches or dinners throughout the week.
Entertainment Value and Presentation
This impressive dish offers many opportunities for elevated presentation:
- Serving Vessel: Present in an attractive oven-to-table dish—cast iron skillets, decorative ceramic casseroles, or individual cocottes create rustic elegance. White serving dishes particularly showcase the golden chicken and amber sauce to advantage.
- Garnish Strategy: Create visual appeal just before serving with strategic garnishing—arrange micro greens in one corner, a small drizzle of honey across another section, and a scattering of freshly cracked black pepper to create balanced visual interest without covering the beautiful main components.
- Serving Technique: Use a large serving spoon to deliver generous portions that showcase both the creamy pasta beneath and the caramelized chicken on top, allowing guests to see the different textural elements as you serve.
- Height and Dimension: Create visual interest by serving with components at different heights—place the mac and cheese alongside a small stack of roasted vegetables or a vertical salad composition for dynamic plating that enhances the overall presentation.
- Sauce Presentation: Reserve a small amount of extra cheese sauce to drizzle over each portion at the table, creating a restaurant-quality presentation technique that emphasizes the dish’s rich, creamy nature.
- Bread Accompaniment: Offer artisanal bread slices arranged vertically in a decorative holder alongside the casserole, providing both textural contrast for eating and vertical visual interest on the table.
- Herb Oil Accent: Create a quick herb oil by blending fresh herbs with olive oil, then place in a small pitcher for guests to drizzle over their portions as desired, adding both visual appeal and custom flavor adjustment.
- Lighting Consideration: Position serving area to take advantage of good lighting that highlights the golden, bubbling top—one of the most appetizing features of this dish.
- Individual Customization: For entertaining, consider setting out small dishes of additional toppings—crispy fried shallots, toasted breadcrumbs, different hot sauces, or fresh herbs—allowing guests to customize their portions.
- Service Temperature: Serve hot but not scalding to showcase the optimal cheese stretch when portions are lifted from the dish—a visual element that enhances perception of richness and quality.
Frequently Asked Questions
Why is my cheese sauce grainy instead of smooth?
A grainy cheese sauce typically results from one of several common issues. First, cooking the sauce at too high a temperature can cause proteins to seize and separate; always keep the heat at medium-low when adding cheese and never let the sauce boil once cheese is added. Second, adding cheese too quickly or all at once overwhelms the liquid’s ability to emulsify properly; instead, add cheese in small handfuls, waiting for each to melt completely before adding more. Third, pre-shredded cheese contains anti-caking agents that can inhibit smooth melting; always grate cheese fresh from blocks for best results. If your sauce has already broken, you may be able to rescue it by removing from heat, adding a splash of cream, and whisking vigorously, or by blending with an immersion blender. For future preparations, consider adding 1-2 slices of American cheese or 2 ounces of cream cheese to your sauce—these contain emulsifiers that help maintain a smooth texture even with temperature fluctuations.
Can I use chicken breasts instead of thighs?
Yes, boneless, skinless chicken breasts can certainly be substituted for thighs in this recipe, though some adjustments will help maintain the dish’s moisture and flavor. Since breast meat is leaner than thigh meat, it benefits from a shorter marination time (15-30 minutes rather than hours) to prevent the acids in the marinade from making the meat tough. When cooking chicken breasts, reduce the cooking time by about 1-2 minutes per side and be especially vigilant with temperature monitoring—breast meat becomes dry when cooked beyond 165°F. For added protection against dryness, consider brining the breast meat first (in a solution of 4 cups water and 3 tablespoons salt for 30 minutes) before patting dry and applying the honey pepper marinade. You might also increase the honey in the marinade by 1 tablespoon to provide extra moisture and caramelization. If using larger chicken breasts, butterfly them to create thinner pieces that cook more quickly and evenly before cutting into cubes.
My sauce is too thick/thin. How do I fix it?
For sauce that’s too thick, several effective adjustments are available. The easiest solution is to gradually incorporate reserved pasta water, adding just a tablespoon at a time while stirring constantly until reaching desired consistency. The starchy pasta water helps maintain the sauce’s integrity better than plain milk or cream. Alternatively, warm milk can be added in small increments to thin the sauce. For sauce that’s too thin, continue simmering gently while stirring frequently—the extra cooking time will reduce moisture through evaporation. If more immediate correction is needed, make a slurry of 1 teaspoon cornstarch dissolved in 1 tablespoon cold water for each cup of sauce, then whisk this mixture into the simmering sauce and cook for 1-2 minutes until thickened. Another approach is to add additional freshly grated cheese, which both thickens the sauce and enriches flavor. Remember that the sauce will naturally thicken somewhat as it cools and when combined with pasta, so aim for a consistency slightly thinner than your desired final result.
Can I make this dish vegetarian?
This dish adapts beautifully to vegetarian preparation with thoughtful substitutions that maintain its signature honey-pepper character. For the protein component, consider these flavourful alternatives: 1) Extra-firm tofu, pressed, cubed, and marinated in the honey-pepper mixture before sautéing until caramelized; 2) Portobello mushrooms, cut into hearty chunks and treated with the same honey-pepper marinade, then roasted until edges are crisp; 3) Cauliflower florets, which caramelize beautifully with the honey coating when roasted at high heat; or 4) Plant-based chicken alternatives, which work well with the bold honey-pepper flavoring. To enhance the umami depth that chicken naturally provides, add nutritional yeast to the cheese sauce (2-3 tablespoons) and consider incorporating smoked paprika or a few drops of liquid smoke. For additional protein and textural interest, consider adding roasted chickpeas tossed in the honey-pepper mixture during the final assembly. The cheese components remain unchanged unless you wish to make the dish fully vegan, in which case plant-based cheese alternatives designed specifically for melting should be used along with unsweetened plant milk and plant-based butter. For the honey component, agave nectar or maple syrup provides comparable sweetness and caramelization properties while keeping the dish vegan-friendly.
How can I add more vegetables to this dish without compromising texture?
Incorporating vegetables into this creamy pasta dish enhances nutrition and adds color, but requires careful technique to prevent excess moisture from diluting the sauce. For hearty vegetables like broccoli, cauliflower, or Brussels sprouts, roast them separately until they’re slightly caramelized but still firm before folding into the final mixture. This pre-cooking removes excess moisture while concentrating flavor. For quick-cooking vegetables like spinach or kale, wilt them in a separate pan, then press firmly between paper towels to remove liquid before adding to the pasta. Bell peppers and zucchini benefit from quick sautéing to release their moisture and enhance sweetness. When using frozen vegetables, thaw completely and pat thoroughly dry before incorporating. Vegetables with high water content like tomatoes work best when roasted or sun-dried to intensify flavor while eliminating excess moisture. Consider adding vegetables in layers rather than mixing throughout—place a layer of cheese sauce and pasta on the bottom, add a middle layer of well-prepared vegetables, then top with more pasta and sauce. This layering technique prevents vegetables from making the entire dish watery while still providing nutritional benefits and color contrast in every serving.
What’s the secret to getting that perfect cheese pull when serving?
Achieving that Instagram-worthy cheese pull depends on several key factors. First, cheese selection is crucial—mozzarella creates the longest strands due to its high moisture content and protein structure, so ensure it comprises at least 25% of your cheese blend. Fontina and Monterey Jack also perform exceptionally well. Second, temperature matters significantly—serve the dish when hot (160-170°F) but not scalding, as cheese becomes more elastic at this optimal temperature range. If the dish has cooled slightly, a brief reheating can restore the perfect pulling temperature. Third, don’t overbake, as extended cooking can cause proteins to tighten too much and fats to separate. Aim for just-melted perfection rather than extended bubbling. Fourth, add a small amount (1-2 tablespoons) of cream cheese to the sauce, as its stabilizing properties help maintain the ideal texture. When serving, use a large spoon to lift portions upward rather than cutting straight down, allowing the cheese to stretch dramatically. For presentation, lift the portion slowly about 8-10 inches above the dish before placing on plates. Finally, consider finishing the dish under the broiler for 1-2 minutes before serving to create that perfect just-melted cheese surface that yields the most impressive stretchy results.
How do I prevent the chicken from becoming tough or dry?
Achieving perfectly tender, juicy chicken in this dish depends on several critical techniques. First, select chicken thighs rather than breasts when possible—their higher fat content provides natural insurance against dryness. If using breasts, consider brining them first (in a solution of 4 cups water and 3 tablespoons salt for 30 minutes) to increase moisture retention. The honey in the marinade acts as both flavor and protection, creating a sweet shield that helps lock in juices during cooking. Regardless of cut, avoid overcooking—remove chicken from heat once it reaches 165°F at its thickest point, as cooking beyond this will cause proteins to contract and expel moisture. Always allow meat to rest for 5 minutes after cooking before cutting, allowing juices to redistribute throughout the meat rather than escaping. Cook chicken in batches to prevent overcrowding in the pan, which leads to steaming rather than proper searing. The caramelized exterior created by the honey marinade forms a barrier that helps retain moisture. Finally, cutting chicken into bite-sized pieces after cooking rather than before (if time permits) can significantly improve moisture retention, though this requires adjusting the recipe workflow. When reheating leftovers, add a tablespoon of chicken broth to the dish and cover while warming to create a moisture-rich environment that prevents further drying.

Ingredients
For the Honey Pepper Chicken:
1.5 pounds boneless, skinless chicken thighs, cut into 1-inch pieces
3 tablespoons honey
1 tablespoon freshly cracked black pepper
1 teaspoon garlic powder
1 teaspoon smoked paprika
1 teaspoon salt
½ teaspoon red pepper flakes (optional)
1 tablespoon olive oil
1 tablespoon butter
For the Pasta and Cheese Sauce:
1 pound elbow macaroni or cavatappi pasta
4 tablespoons butter
4 tablespoons all-purpose flour
2 cups whole milk
1 cup heavy cream
8 ounces sharp cheddar cheese, freshly grated
4 ounces Monterey Jack cheese, freshly grated
4 ounces mozzarella cheese, freshly grated
1 teaspoon Dijon mustard
¼ teaspoon freshly grated nutmeg
½ teaspoon garlic powder
½ teaspoon onion powder
1 teaspoon salt
¼ teaspoon white pepper
For the Optional Topping:
1 cup panko breadcrumbs
2 tablespoons butter, melted
¼ cup grated Parmesan cheese
2 tablespoons fresh parsley, chopped
1 tablespoon chives, snipped
Instructions
Prepare the Chicken:
In a medium bowl, combine honey, black pepper, garlic powder, smoked paprika, salt, and red pepper flakes if using.
Add chicken pieces and toss to coat thoroughly. Let marinate for at least 30 minutes.
Heat olive oil and butter in a large skillet over medium-high heat.
Cook chicken in batches until golden brown on all sides and cooked through (165°F), about 3-4 minutes per side.
Transfer to a plate and tent with foil to keep warm.
Cook the Pasta:
Bring a large pot of salted water to a boil.
Cook pasta 1-2 minutes less than package directions for al dente.
Reserve 1 cup of pasta water before draining.
Drain pasta but do not rinse; toss with a teaspoon of olive oil to prevent sticking.
Make the Cheese Sauce:
In a large, heavy-bottomed saucepan, melt butter over medium heat.
Add flour and whisk constantly for 1-2 minutes until light golden.
Gradually whisk in milk and cream until smooth.
Bring to a gentle simmer, stirring frequently until thickened enough to coat the back of a spoon, about 3-5 minutes.
Reduce heat to low and add cheeses in small handfuls, whisking until completely melted before adding more.
Stir in Dijon mustard, nutmeg, garlic powder, onion powder, salt, and white pepper.
If sauce is too thick, add reserved pasta water a tablespoon at a time.
Assemble the Dish:
Combine pasta with about three-quarters of the cheese sauce.
Fold in two-thirds of the honey pepper chicken.
Transfer to a 9x13-inch baking dish or large cast-iron skillet.
Pour remaining cheese sauce over top.
Arrange reserved chicken pieces decoratively on top.
Prepare Optional Topping:
Combine panko breadcrumbs with melted butter and Parmesan cheese.
Sprinkle evenly over the casserole.
Bake and Serve:
Bake in preheated 375°F oven for 20-25 minutes until edges are bubbling and top is golden.
Let rest 5 minutes before serving.
Garnish with chopped parsley and chives.
Notes
Use block cheese and grate it yourself for best melting
Allow marinaded chicken to come to room temperature before cooking
Cook pasta slightly underdone as it will continue cooking in the oven
For extra flavor, deglaze the chicken pan with a splash of white wine or broth
Add cheese to sauce off heat to prevent graininess
Let the chicken develop a good sear before flipping for best caramelization
For spicier version, increase black pepper and add cayenne
For make-ahead option, prepare components separately and assemble before baking
Use a combination of cheeses for most complex flavor
Test chicken with instant-read thermometer to prevent overcooking
For creamier sauce, never let it reach a full boil after adding cheese
Warm milk before adding to roux to prevent lumps
Season each component properly rather than just the final dish
Reserve some chicken for topping to showcase the honey-pepper glaze
Let rest before serving for best texture and easier portioning
For crispy topping, place under broiler for final 1-2 minutes
Use freshly cracked black pepper for best aromatic quality
Balance sweetness with adequate salt throughout
For silkier sauce, add a small amount of cream cheese
Rest casserole 5 minutes before serving for best consistency