

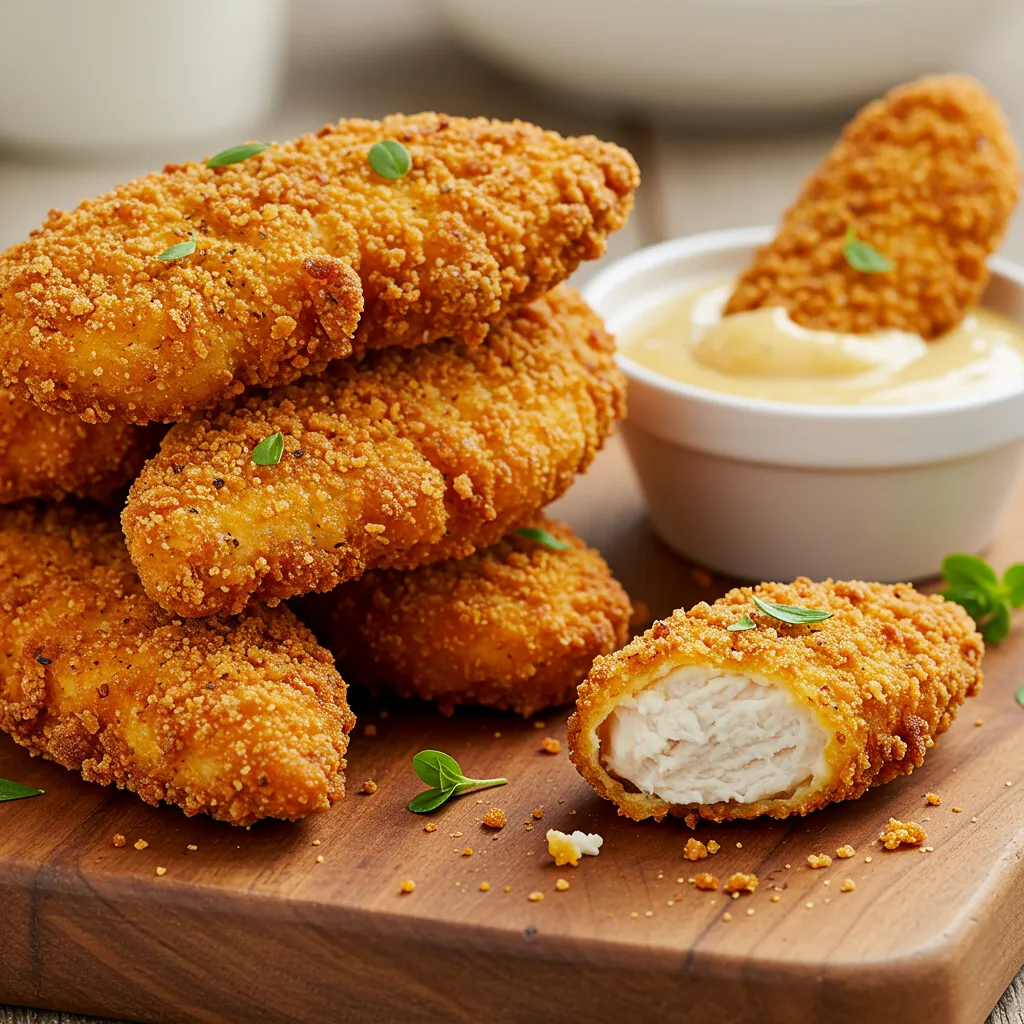
These irresistible Crack Chicken Tenders transform ordinary chicken strips into an addictively delicious meal that lives up to its playfully named reputation. Featuring juicy chicken breast coated in a seasoned buttermilk marinade, then double-dredged in a perfectly spiced breading that creates an extraordinarily crunchy exterior. What makes these tenders truly special is the signature “crack” seasoning blend—a mouthwatering combination of ranch flavors, garlic, onion, and a hint of heat that creates an irresistible flavor profile. Golden-fried to perfection, these tenders develop a beautifully craggy crust that shatters with each bite, revealing tender, succulent chicken inside. Served alongside a creamy honey mustard dipping sauce that balances sweet, tangy, and savory notes, these chicken tenders deliver restaurant-quality results with straightforward preparation. Perfect for family dinners, game day gatherings, or anytime you crave comfort food with a flavor-packed upgrade.
Why You’ll Love This Recipe
- Unmatched flavor: The signature “crack” seasoning blend creates an addictively delicious taste
- Perfect texture: Achieves the ideal balance of ultra-crispy exterior and juicy interior
- Buttermilk magic: Tenderizes the chicken while infusing it with flavor
- Double-dredge technique: Creates extra craggy, crunchy coating that stays crisp
- Make-ahead components: Chicken can marinate overnight for convenience and deeper flavor
- Crowd-pleasing: Appeals to both children and adults with its elevated take on a classic
- Versatile serving: Works as an appetizer, main dish, or party food
- Customizable heat level: Easily adjusted to suit mild or spicy preferences
- Restaurant quality: Achieves professional results without special equipment
- Dipping sauce pairing: Complemented perfectly by the homemade honey mustard sauce
Ingredients
For the Buttermilk Marinade
- Chicken tenders – Provide the perfect portion size with ideal meat-to-coating ratio
- Buttermilk – Tenderizes chicken while adding tanginess and helping coating adhere
- Hot sauce – Contributes subtle heat and depth without overwhelming spiciness
- Garlic powder – Infuses chicken with aromatic savory notes
- Onion powder – Adds sweet aromatic flavor that penetrates the meat
- Paprika – Provides mild, sweet pepper flavor and appealing color
- Salt – Enhances flavors and helps chicken retain moisture
- Black pepper – Delivers mild heat and classic peppery bite
For the “Crack” Seasoning Breading
- All-purpose flour – Creates foundation for crispy coating
- Cornstarch – Ensures extra crispiness that stays crunchy longer
- Baking powder – Creates lighter, airier texture in the coating
- Ranch seasoning mix – Provides the signature “crack” flavor base
- Garlic powder – Reinforces aromatic depth in the coating
- Onion powder – Complements the ranch flavors with savory sweetness
- Paprika – Adds color and mild pepper flavor
- Cayenne pepper – Delivers controlled heat that balances the richness
- Salt – Enhances all flavors in the breading mixture
- Black pepper – Adds traditional peppery bite and subtle heat
For the Honey Mustard Dipping Sauce
- Mayonnaise – Provides creamy base and rich mouthfeel
- Dijon mustard – Delivers sophisticated tang and depth
- Yellow mustard – Adds bright, classic mustard flavor
- Honey – Creates perfect sweetness to balance tangy mustard
- Apple cider vinegar – Brightens flavors with subtle acidity
- Garlic powder – Contributes savory notes that complement chicken
- Paprika – Adds color and subtle smoky notes
- Salt – Enhances and balances all flavors
- Black pepper – Provides gentle heat and complexity
Step-by-Step Instructions
Preparing the Chicken Marinade
Begin with selecting high-quality chicken tenders, approximately 1½ to 2 pounds. If using chicken breasts instead, slice them lengthwise into strips about ¾-inch thick to ensure even cooking.
Pat the chicken pieces dry with paper towels to remove excess moisture, which helps the marinade adhere better and prevents dilution of flavors.
In a large bowl, combine 2 cups of buttermilk with 2 tablespoons of hot sauce (such as Frank’s RedHot or Tabasco), 1 teaspoon garlic powder, 1 teaspoon onion powder, 1 teaspoon paprika, 1 teaspoon salt, and ½ teaspoon freshly ground black pepper.
Whisk the marinade ingredients thoroughly until completely combined and the spices are evenly distributed throughout the buttermilk mixture.
Add the chicken tenders to the marinade, ensuring each piece is fully submerged. Gently massage the marinade into the chicken to help the flavors penetrate.
Cover the bowl with plastic wrap or transfer everything to a large ziplock bag, pressing out excess air before sealing. Place in the refrigerator to marinate for at least 4 hours, preferably overnight. The longer marinating time allows the buttermilk to tenderize the chicken and infuse it with flavor.
If time is limited, even 1 hour of marinating will impart some flavor and tenderness, though results won’t be quite as remarkable as the longer marinade.
Occasionally turn the chicken pieces if they’re not fully submerged to ensure even flavor distribution.
Preparing the “Crack” Seasoning Breading
While the chicken is marinating, prepare the signature “crack” seasoning breading mixture that gives these tenders their addictive quality.
In a large, shallow dish (a pie plate works perfectly), combine 2 cups all-purpose flour, ¼ cup cornstarch, and 1 teaspoon baking powder. The cornstarch creates extra crispiness, while the baking powder helps the coating expand slightly during frying for added crunch.
Add 2 tablespoons of ranch seasoning mix (from a packet or homemade), 1 tablespoon garlic powder, 1 tablespoon onion powder, 2 teaspoons paprika, ½ to 1 teaspoon cayenne pepper (adjust according to heat preference), 1 teaspoon salt, and 1 teaspoon freshly ground black pepper.
Whisk all dry ingredients thoroughly to ensure even distribution of the seasonings throughout the flour mixture. This consistent distribution ensures every bite of chicken has the full “crack” flavor profile.
For even more flavor and texture, add 2 tablespoons of the buttermilk marinade to the flour mixture and work it in with your fingertips until small clumps form. These clumps will create extra craggy bits on the chicken that become exceptionally crispy when fried.
Set the breading mixture aside until ready to coat the chicken. If prepared far in advance, cover to prevent any moisture loss.
Preparing the Honey Mustard Dipping Sauce
In a medium bowl, combine ½ cup mayonnaise, 2 tablespoons Dijon mustard, 2 tablespoons yellow mustard, 3 tablespoons honey, 1 teaspoon apple cider vinegar, ¼ teaspoon garlic powder, ¼ teaspoon paprika, ⅛ teaspoon salt, and a pinch of freshly ground black pepper.
Whisk all ingredients until completely smooth and well blended. The consistency should be thick enough to cling to the chicken but still easily dippable.
Taste and adjust seasoning as needed – add more honey for sweetness, more mustard for tanginess, or a touch more vinegar for brightness.
Transfer the sauce to a serving bowl, cover, and refrigerate until ready to serve. This allows the flavors to meld and develop. The sauce can be made up to 3 days in advance and kept refrigerated in an airtight container.
Just before serving, give the sauce another quick stir to ensure smooth consistency.
Breading and Frying the Chicken
When ready to cook, remove the marinated chicken from the refrigerator and let it sit at room temperature for about 15 minutes. Extreme cold chicken directly into hot oil can lower the oil temperature too dramatically and result in uneven cooking.
Set up your breading station with the seasoned flour mixture in one shallow dish and a separate plate for the breaded chicken.
Pour vegetable or canola oil into a large, heavy-bottomed pan or Dutch oven to a depth of about 1½ inches. For even better results, use a deep fryer if available. Heat the oil to 350°F (175°C), using a candy or deep-fry thermometer for accuracy.
Working with one piece at a time, remove a chicken tender from the buttermilk marinade, allowing excess to drip off. The chicken should remain wet but not dripping.
Place the chicken in the seasoned flour mixture and press firmly to adhere the coating. Flip and repeat on the other side, ensuring complete coverage.
For an extra-crispy coating, dip the floured chicken back into the buttermilk marinade briefly, then return to the flour mixture for a second coating. Press gently to create a thick, textured crust that will fry up exceptionally crispy.
Place the breaded chicken on the clean plate and repeat with remaining pieces. Let the breaded chicken rest for about 5 minutes before frying; this helps the coating set for better adhesion during frying.
Carefully lower 3-4 chicken tenders into the hot oil, being careful not to overcrowd the pan, which would lower the oil temperature and result in soggy coating.
Fry the chicken for 3-4 minutes per side, or until golden brown and crispy, and the internal temperature reaches 165°F (74°C). The exact cooking time will depend on the thickness of your chicken pieces.
Using tongs or a slotted spoon, transfer the fried chicken to a wire rack set over a baking sheet, rather than paper towels, to maintain crispness. Sprinkle with a little additional salt while still hot if desired.
Allow the oil to return to 350°F before adding the next batch of chicken.
For optimal crispiness when serving a crowd, keep the first batches warm in a 200°F (95°C) oven while finishing the remaining pieces.
Serving the Crack Chicken Tenders
Arrange the freshly fried chicken tenders on a serving platter, garnished with chopped fresh parsley or chives for a pop of color if desired.
Serve immediately while hot and crispy, accompanied by individual ramekins of the honey mustard dipping sauce.
For a complete meal, pair with crispy french fries, a simple green salad, or coleslaw for textural contrast.
If serving as an appetizer, provide cocktail picks for easy handling and additional dipping sauce options like ranch, barbecue, or buffalo sauce for variety.
Pro Tips
- For the juiciest tenders, use chicken tenderloins rather than sliced breast meat
- Allow the buttermilk marinade to work its magic for at least 4 hours, preferably overnight
- Maintain oil temperature between 350-365°F for perfect crispiness without greasiness
- Use a deep-fry thermometer for precise temperature control
- Create extra craggy coating by adding a splash of buttermilk to the dry breading
- Let the breaded chicken rest for 5 minutes before frying to help the coating adhere
- Fry in small batches to maintain oil temperature and prevent overcrowding
- Drain on a wire rack rather than paper towels to maintain crispiness
- Season the tenders with a pinch of salt immediately after frying while still hot
- For best results, serve within 15 minutes of frying for optimal texture
- If reheating, use an air fryer or oven rather than microwave to maintain crispness
- Double the dipping sauce recipe if serving a crowd or if you prefer extra sauce
- Use a neutral oil with a high smoke point like canola, vegetable, or peanut oil
- For consistent size, trim any irregular chicken pieces to ensure even cooking
- Add a tablespoon of cornmeal to the breading for extra crunch
- Check for doneness with an instant-read thermometer (165°F is the safe temperature)
- Allow oil to return to proper temperature between batches
- For best flavor, bring the dipping sauce to room temperature before serving
- If serving at a party, keep warm in a 200°F oven on a wire rack
- Save used oil (after cooling and straining) for future frying projects
Variations and Creative Ideas
Flavor Variations
Nashville Hot Style: After frying, brush tenders with a mixture of hot oil, cayenne pepper, brown sugar, paprika, and garlic powder for a spicy kick inspired by Nashville hot chicken.
Lemon Pepper: Add 2 tablespoons of lemon pepper seasoning to the flour mixture and serve with a lemon-garlic aioli instead of honey mustard for a bright, zesty variation.
Garlic Parmesan: Mix ¼ cup grated Parmesan cheese and 1 additional tablespoon of garlic powder into the breading. After frying, toss in a mixture of melted butter, minced garlic, and more Parmesan.
Buffalo Ranch: Toss the freshly fried tenders in buffalo sauce and serve with ranch dressing for a classic spicy variation that’s perfect for game day.
Sweet and Spicy: Add 1 tablespoon of brown sugar to the breading mixture and increase the cayenne to 1½ teaspoons for a perfect balance of sweet heat.
Cooking Method Alternatives
Oven-Baked Version: For a lighter option, place breaded tenders on a wire rack set over a baking sheet. Spray with cooking oil and bake at 425°F for 15-18 minutes, turning halfway through.
Air Fryer Adaptation: Cook breaded tenders in an air fryer at 400°F for 10-12 minutes, flipping halfway through cooking time. Spray with oil beforehand for better browning.
Shallow Pan-Fry: Use just ¼ inch of oil in a skillet and fry 2-3 minutes per side for a less oil-intensive method.
Gluten-Free Option: Substitute all-purpose flour with a gluten-free flour blend and ensure your ranch seasoning is gluten-free certified.
Panko Variation: Replace half the flour with panko breadcrumbs for an even crunchier Japanese-inspired coating.
Serving Suggestions
Chicken and Waffles: Serve these crack chicken tenders atop fluffy Belgian waffles with maple syrup and a dash of hot sauce for a sweet-savory brunch option.
Crack Chicken Sliders: Place tenders on mini buns with pickle slices and a drizzle of honey mustard sauce for party-perfect sliders.
Chicken Caesar Wrap: Slice cooled tenders and wrap with Caesar salad ingredients in a flour tortilla for a delicious lunch option.
Chicken Parmesan Style: Top fried tenders with marinara sauce and mozzarella cheese, then broil until bubbly. Serve over pasta for an Italian-American inspired meal.
Salad Topper: Slice tenders and use to top a fresh garden salad with ranch dressing for a protein-packed lunch.
Storage and Make-Ahead Advice
Chicken Preparation:
- Chicken can marinate in buttermilk for up to 24 hours in the refrigerator.
- For meal prep, trim and cut chicken ahead of time, storing in airtight containers until ready to marinate.
- Chicken tenders can be breaded up to 2 hours ahead and kept uncovered in the refrigerator on a baking sheet lined with parchment paper.
- For longer storage, freeze breaded uncooked tenders on a baking sheet until solid, then transfer to freezer bags for up to 3 months.
Cooked Tenders Storage:
- Leftover cooked tenders will keep in the refrigerator for up to 3 days in an airtight container.
- For best texture, store in a single layer separated by parchment paper.
- Avoid stacking hot tenders, as this creates steam that softens the crispy coating.
- Cool completely before refrigerating to prevent condensation inside the container.
- Do not store tenders with sauce already applied, as this will make them soggy.
Dipping Sauce Storage:
- Honey mustard sauce keeps well in the refrigerator for up to 1 week in an airtight container.
- Make a double batch and use leftover sauce as a salad dressing or sandwich spread.
- If sauce separates during storage, simply whisk again before serving.
- For a party, portion sauce into small serving cups up to a day ahead and keep refrigerated.
Reheating Methods:
- Reheat refrigerated tenders in a 375°F oven for 10 minutes, or until heated through and crispy again.
- For the best results, reheat on a wire rack over a baking sheet to allow air circulation.
- Air fryer reheating works exceptionally well: 3-4 minutes at 375°F.
- Avoid microwaving if possible, as it makes the coating soggy.
- To reheat frozen cooked tenders, bake at 375°F for 15-20 minutes until heated through.
Freezing Instructions:
- Freeze cooked and cooled tenders in a single layer on a baking sheet, then transfer to freezer bags.
- Properly stored, frozen cooked tenders will maintain quality for up to 2 months.
- Label freezer bags with the date and contents for easy identification.
- Thaw overnight in the refrigerator before reheating for best results.
- Sauce can be frozen in ice cube trays, then transferred to freezer bags for portioned use.
Entertaining and Serving Ideas
DIY Chicken Tender Bar: Create a build-your-own tender experience with various dipping sauces, allowing guests to customize their flavor combinations.
Game Day Spread: Serve alongside loaded potato skins, mozzarella sticks, and vegetable platters for the ultimate sports-watching feast.
Kid-Friendly Party Option: Cut tenders into bite-sized nuggets before breading and serve with colorful dipping sauce options.
Movie Night Meal: Pair with homemade french fries and milkshakes for a cinema-inspired dinner experience at home.
Picnic Perfect: Pack cooled tenders in a container with compartments for various dipping sauces for an elevated picnic main course.
Family Style Service: Arrange on a large platter with dipping sauces in the center and various sides around the edges for a communal dining experience.
Appetizer Presentation: Serve standing upright in a cup or jar with sauce at the bottom for an elegant passed hors d’oeuvre.
Brunch Addition: Offer as a savory option alongside breakfast classics for a satisfying brunch spread.
Food Truck Style: Serve in paper boats with french fries and coleslaw for a trendy, casual presentation.
Southern Feast: Include as part of a southern-inspired meal with cornbread, mac and cheese, and collard greens.
Frequently Asked Questions
Why are they called “crack” chicken tenders? The name comes from the addictively delicious flavor profile that keeps people coming back for more—they’re so good they’re “like crack.” The combination of ranch seasoning with various spices creates a flavor that many find irresistible. The name is purely about their addictive taste quality and doesn’t reference anything illicit.
Can I use chicken breasts instead of tenders? Absolutely! Simply slice boneless, skinless chicken breasts into strips about ¾-inch thick. Try to make them uniform in size for even cooking. You may need to adjust cooking time slightly as cut chicken breast might be thicker than natural tenderloins.
What if I don’t have buttermilk? You can make a quick substitute by adding 1 tablespoon of lemon juice or white vinegar to 1 cup of regular milk. Let it sit for 5-10 minutes until slightly thickened before using. While not identical to real buttermilk, this will provide similar tenderizing properties and tanginess.
Is there a way to make these less spicy for children? Yes! Simply reduce or omit the cayenne pepper and hot sauce in the recipe. The ranch seasoning provides plenty of flavor without heat. You can also prepare two separate batches with different spice levels to accommodate various preferences.
What’s the best oil for frying chicken tenders? Use a neutral oil with a high smoke point such as vegetable, canola, peanut, or refined sunflower oil. These oils can withstand the high temperatures needed for frying without burning or adding unwanted flavors to your chicken.

Ingredients
For the Buttermilk Marinade:
- 1½-2 pounds chicken tenderloins (or boneless chicken breasts cut into strips)
- 2 cups buttermilk
- 2 tablespoons hot sauce (Frank's RedHot or Tabasco)
- 1 teaspoon garlic powder
- 1 teaspoon onion powder
- 1 teaspoon paprika
- 1 teaspoon salt
- ½ teaspoon black pepper
For the "Crack" Seasoning Breading:
- 2 cups all-purpose flour
- ¼ cup cornstarch
- 1 teaspoon baking powder
- 2 tablespoons ranch seasoning mix (from packet)
- 1 tablespoon garlic powder
- 1 tablespoon onion powder
- 2 teaspoons paprika
- ½ to 1 teaspoon cayenne pepper (adjust to taste)
- 1 teaspoon salt
- 1 teaspoon black pepper
For the Honey Mustard Dipping Sauce:
- ½ cup mayonnaise
- 2 tablespoons Dijon mustard
- 2 tablespoons yellow mustard
- 3 tablespoons honey
- 1 teaspoon apple cider vinegar
- ¼ teaspoon garlic powder
- ¼ teaspoon paprika
- ⅛ teaspoon salt
- Pinch of black pepper
For Frying:
- 4 cups vegetable or canola oil (amount needed will depend on your pot size)
- Optional garnish: chopped fresh parsley or chives
Instructions
- Mix buttermilk, hot sauce, and seasonings in a large bowl for the marinade.
- Add chicken tenders to marinade, cover, and refrigerate for 4-24 hours.
- Combine flour, cornstarch, baking powder, ranch seasoning, and all spices in a shallow dish.
- Whisk together all honey mustard sauce ingredients in a small bowl; refrigerate until serving.
- Heat oil to 350°F in a heavy pot or deep fryer.
- Remove chicken from marinade, allowing excess to drip off.
- Dredge chicken in seasoned flour mixture, pressing to adhere.
- Optional: Double-dredge by dipping back in marinade briefly, then coating again with flour mixture.
- Fry chicken in small batches for 3-4 minutes per side until golden brown and internal temperature reaches 165°F.
- Transfer to wire rack to drain and sprinkle with salt while hot.
- Serve immediately with honey mustard dipping sauce.
Notes
- Use an instant-read thermometer to ensure chicken reaches 165°F for food safety
- For extra-crunchy tenders, add 2 tablespoons of buttermilk to the flour mixture to create small clumps
- Keep oil between 350-365°F for optimal frying—too low makes greasy chicken, too high burns the coating
- Let the coating rest on the chicken for a few minutes before frying to help it adhere better
- Don't crowd the frying pot—cook in small batches for the crispiest results
- When breading, keep one hand for wet ingredients and one for dry to prevent "clumpy fingers"
- For consistent results, be sure chicken pieces are similar in size
- Taste the honey mustard sauce before serving and adjust sweetness or tanginess to your preference
- If sauce is too thick, add a teaspoon of water to reach desired consistency
- Make extra sauce—it's great as a salad dressing or sandwich spread
- For food safety, never reuse the marinade after raw chicken has been in it
- Let chicken rest at room temperature for 15 minutes before frying for more even cooking
- Season the chicken one last time with a pinch of salt as soon as it comes out of the fryer
- For maximum flavor, bring dipping sauce to room temperature before serving
- When reheating leftovers, use an oven or air fryer instead of microwave to maintain crispiness
- If the breading starts to darken too quickly, your oil is too hot—lower the temperature
- Save and strain used oil for future frying if it hasn't been overheated
- For easier cleanup, line your breading station with parchment paper
- Make a test piece first to check seasoning levels and cooking time
- Double-check that your ranch seasoning hasn't expired as old seasonings lose flavor