

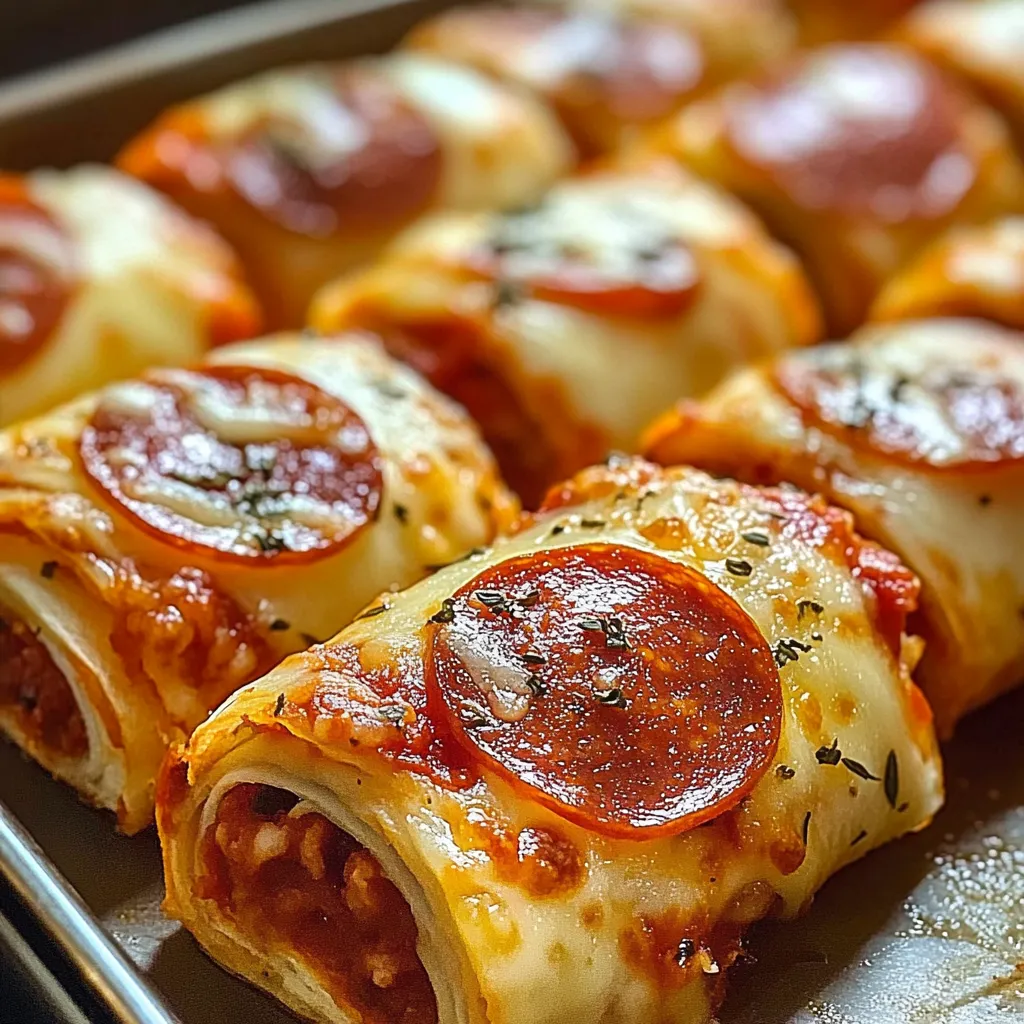
These golden-brown Cheesy Pepperoni Pizza Roll-Ups transform classic pizza flavors into an approachable, shareable delight with their perfect balance of savory ingredients and irresistible texture. The dish showcases rolled pizza dough enveloping zesty tomato sauce, premium pepperoni slices, and generous layers of melted mozzarella cheese, all baked to perfection with herbs sprinkled on top. Every bite delivers an exquisite combination of textures—from the satisfying crisp exterior of the dough to the gooey cheese and savory pepperoni inside, all enhanced by aromatic Italian herbs and tangy marinara sauce. This crowd-pleasing creation exemplifies casual comfort food at its finest—ideal for game days, family gatherings, after-school snacks, or whenever you crave the familiar flavors of pizza in a fun, handheld format.
Why You’ll Love This Recipe
- Classic flavor transformation: Enjoys all the signature pizza taste in a fun, roll-up format
- Make-ahead convenience: Perfect for busy hosts, can be prepped in advance
- Crowd-pleaser: Satisfies guests of all ages with minimal effort
- Visually impressive: Creates beautiful presentation with simple ingredients
- Versatile occasions: Perfect for game days, parties, weeknight dinners, and lunchboxes
- Textural delight: Offers crispy, chewy, and gooey elements in each bite
- Simple technique: Eliminates the challenge of homemade pizza dough
- Customizable: Easily adapts to different pizza toppings and flavor profiles
- Complete finger food: Delivers the entire pizza experience in one portable bite
- Stress-free entertaining: Allows hosts to enjoy guests rather than complex meal prep
Ingredients
For the Roll-Ups Base
- Refrigerated pizza dough – Creates the foundation with perfect chew and golden exterior
- Pizza sauce or marinara – Provides classic tomato flavor with Italian herbs
- Mozzarella cheese – Delivers signature pizza stretch and creamy texture
- Pepperoni slices – Adds savory, spicy meat flavor as the star ingredient
- Italian herbs – Enhances with aromatic basil, oregano, and thyme notes
For the Filling Enhancement
- Parmesan cheese – Contributes nutty, savory depth and umami
- Garlic powder – Adds aromatic dimension and classic pizza flavor
- Red pepper flakes – Provides optional heat for spice lovers
- Olive oil – Enhances browning and adds richness to exterior
- Italian seasoning – Creates aromatic herb blend throughout
For Serving
- Warm marinara sauce – Offers essential dipping experience
- Grated parmesan – Adds finishing salty, nutty notes
- Fresh basil – Provides bright color and aromatic freshness
- Garlic butter – Creates optional rich flavor enhancement
- Ranch dressing – Offers creamy alternative dipping option
Optional Enhancements
- Cooked Italian sausage – Adds hearty protein variation
- Bell peppers – Introduces sweet vegetable element and color
- Mushrooms – Provides earthy depth and meaty texture
- Caramelized onions – Delivers sweet depth and additional complexity
- Fresh herbs – Enhances with basil, oregano, or parsley notes
- Cherry tomatoes – Adds bright acidity and fresh element
- Bacon crumbles – Introduces smoky flavor and textural contrast
- Pineapple tidbits – Creates sweet and savory Hawaiian variation
- Ricotta cheese – Offers creamy texture alternative
- Black olives – Provides briny depth and Mediterranean touch
Step-by-Step Instructions
Preparing the Ingredients
Begin by preheating your oven to 375°F (190°C), ensuring it reaches the proper temperature for evenly baking the roll-ups to golden perfection. This initial temperature setting is crucial for creating the right balance between crisp exterior and tender interior.
Line a large baking sheet with parchment paper, ensuring complete coverage to prevent sticking and ease cleanup later. The parchment also helps the roll-ups develop a perfectly crisp bottom without burning.
Remove one tube of refrigerated pizza dough from packaging and allow it to come to room temperature for about 15 minutes. This brief warming period makes the dough more pliable and easier to roll without tearing or springing back.
Lightly flour a clean work surface and rolling pin, then carefully unroll or flatten the pizza dough into a large rectangle approximately 12×16 inches in size. Aim for uniform thickness throughout to ensure even baking and consistent roll-ups.
Using a spatula or the back of a spoon, spread ½ cup of pizza sauce evenly across the surface of the dough, leaving a ½-inch border around all edges. This border will help seal the rolls and prevent sauce from leaking during baking.
Sprinkle 1 teaspoon of garlic powder and 1 tablespoon of Italian seasoning evenly over the sauce layer, distributing the herbs for consistent flavor throughout each roll-up. This seasoning layer adds aromatic depth to complement the pizza sauce.
Creating the Roll-Ups
Evenly distribute 2 cups of shredded mozzarella cheese over the sauce and seasoning layer, covering the entire surface except for the border. The cheese creates the signature stretchy, gooey texture essential to the pizza experience.
Arrange approximately 30-40 pepperoni slices in rows across the cheese layer, slightly overlapping them to ensure every bite contains the savory meat flavor. For best results, use thin-sliced pepperoni rather than thick-cut to maintain proper roll shape.
Sprinkle ¼ cup grated Parmesan cheese over the pepperoni layer to add an extra dimension of savory flavor. The Parmesan adds a nutty, salty component that enhances the overall pizza profile.
For those who enjoy heat, evenly distribute ¼ teaspoon red pepper flakes across the surface. This optional step adds a pleasant warming sensation without overwhelming the classic pizza flavors.
Starting from the long edge of the rectangle, carefully roll the dough tightly into a log shape, similar to making cinnamon rolls. Maintain even pressure throughout to create a uniform spiral of ingredients inside the dough.
Once rolled, position the seam side down on your work surface and gently press to seal the edge. This prevents the roll from opening during baking and helps maintain the perfect spiral shape.
Using a sharp knife, cut the log into approximately 12 equal slices, each about 1-1½ inches thick. Clean the knife between cuts for the neatest presentation and most accurate sizing.
Transfer the slices to the prepared baking sheet, placing them cut-side up and allowing about 1 inch of space between each roll-up for expansion during baking. The spacing ensures proper heat circulation for even cooking.
Baking and Serving
Lightly brush the tops and sides of each roll-up with olive oil, which promotes beautiful golden browning and adds a subtle richness to the exterior. For extra flavor, mix the olive oil with a pinch of garlic powder and dried herbs.
If desired, sprinkle an additional ¼ cup of mozzarella cheese over the tops of the roll-ups to create an extra cheesy top layer that will melt and brown beautifully during baking.
Bake in the preheated oven for 15-18 minutes, until the dough is fully cooked through, the cheese is completely melted, and the tops are golden brown. The roll-ups should reach an internal temperature of at least 160°F (71°C) when fully baked.
While the roll-ups are baking, warm additional marinara sauce in a small saucepan or microwave-safe bowl for dipping. The warm sauce enhances the pizza experience and provides the perfect accompaniment to each bite.
Once baked, remove from the oven and allow the roll-ups to cool for 2-3 minutes before serving. This brief resting period allows the cheese to set slightly and makes handling the roll-ups easier without burning fingers.
Transfer to a serving platter and sprinkle with freshly chopped basil or parsley for a pop of color and fresh herbal aroma. The herbs add visual appeal and complement the rich flavors of the cheese and pepperoni.
Serve immediately while still warm, accompanied by small bowls of the heated marinara sauce for dipping. For variety, offer additional dipping options like ranch dressing or garlic butter sauce.
For casual entertaining, arrange the roll-ups in a circle around a central bowl of marinara sauce, creating an interactive and inviting presentation that encourages sharing and conversation.
Variations and Enhancements
For a supreme pizza version, add a layer of sautéed mushrooms, bell peppers, and onions (patted dry to remove excess moisture) before adding the pepperoni. These vegetables add texture, nutrition, and complex flavors.
Create a meat-lovers variation by replacing half the pepperoni with cooked and crumbled Italian sausage, bacon bits, and small pieces of Canadian bacon. This protein-rich variation satisfies hearty appetites.
For a vegetarian option, omit the pepperoni and instead layer thinly sliced mushrooms, diced bell peppers, chopped spinach (squeezed dry), and black olives. This creates a colorful garden variation with robust vegetable flavors.
Experiment with cheese blends by combining mozzarella with provolone, fontina, or smoked gouda for more complex flavor profiles. Different cheese combinations create distinct character in the final roll-ups.
For a spicy buffalo chicken variation, replace pepperoni with shredded chicken tossed in buffalo sauce, and add a layer of blue cheese crumbles. Serve with blue cheese dressing for dipping to complete the buffalo wing experience.
Adapt to Hawaiian pizza lovers by substituting half the pepperoni with small pineapple tidbits (well-drained and patted dry) and diced ham pieces. The sweet-savory combination creates a tropical twist on the classic roll-up.
Pro Tips
- Roll the dough tightly but not so tight that ingredients squeeze out
- Pat any added vegetables dry to prevent soggy roll-ups
- Use block mozzarella and shred it yourself for better melting properties
- Let refrigerated dough come to room temperature for easier handling
- Make clean cuts with a sharp knife dipped in warm water between slices
- Position roll-ups with adequate space between them on the baking sheet
- For crispier exterior, brush lightly with olive oil before baking
- Check for doneness by verifying the center is cooked through completely
- Allow roll-ups to cool slightly before serving to prevent burnt mouths
- For deeper flavor, use a combination of mozzarella and provolone
- Pre-cook any raw meat toppings before adding them to roll-ups
- Drain oil from pepperoni on paper towels to reduce greasiness
- Consider individual preferences when choosing addition ingredients
- Use parchment paper rather than foil for best bottom crust development
- Apply egg wash instead of oil for extra-golden, shiny exterior
- Place a water bath on the bottom oven rack for better rising
- Pre-bake the roll-ups for 5 minutes before adding additional cheese topping
- When using fresh herbs, add them after baking to preserve bright flavor
- Allow cheese to cool 2-3 minutes before serving to prevent “cheese burn”
- For easy cleanup, use disposable aluminum baking sheets at gatherings
Variations and Creative Ideas
Flavor Variations
Mediterranean Roll-Ups: Replace pepperoni with chopped artichoke hearts, feta cheese, kalamata olives, and a sprinkle of oregano for a Greek-inspired variation with bright Mediterranean flavors.
BBQ Chicken Roll-Ups: Substitute pizza sauce with BBQ sauce and pepperoni with shredded rotisserie chicken, red onions, and cilantro for a sweet-savory variation reminiscent of gourmet BBQ chicken pizza.
Margherita Roll-Ups: Create an elegant version with fresh mozzarella slices, thin tomato slices, and fresh basil leaves, then drizzle with olive oil and balsamic glaze after baking for classic Italian flavors.
Taco Pizza Roll-Ups: Blend Mexican and Italian cuisines by replacing pizza sauce with refried beans, adding seasoned ground beef, cheddar cheese, and serving with salsa and sour cream for dipping.
Dietary Adaptations
Gluten-Free Option: Substitute traditional pizza dough with pre-made gluten-free pizza dough or gluten-free crescent roll dough for those with wheat sensitivities or celiac disease.
Lower-Carb Version: Replace traditional pizza dough with a cauliflower-based pizza crust, carefully rolled thin and pre-baked slightly before adding toppings for a vegetable-forward alternative.
Vegetarian Delight: Create a meatless version packed with roasted vegetables like zucchini, eggplant, bell peppers, and mushrooms, adding smoked provolone for depth without meat.
Dairy-Free Alternative: Use dairy-free cheese alternatives and focus on flavorful ingredients like olive tapenade, sundried tomatoes, and fresh herbs to create satisfying roll-ups without traditional cheese.
Kid-Friendly Options
Mac and Cheese Pizza Roll-Ups: Combine two childhood favorites by adding a thin layer of prepared macaroni and cheese between the sauce and pepperoni for an extra cheesy, comforting version.
Mini Pizza Muffins: Adapt the roll-up concept to muffin tins for individual two-bite portions perfect for small hands and lunchboxes, with customizable toppings for each child.
Pizza Roll-Up Dippers: Cut roll-ups into smaller, more manageable pieces and serve with a variety of dipping sauces (marinara, ranch, garlic butter) for interactive eating that kids love.
PB&J Pizza Dessert Rolls: Create a sweet variation using cinnamon sugar on the dough, peanut butter instead of sauce, grape jelly instead of cheese, and mini chocolate chips instead of pepperoni for a delightful dessert version.
Entertaining Ideas
Build-Your-Own Roll-Up Bar: Set up a station with rolled-out dough pieces and various toppings, allowing guests to create personalized roll-ups for a fun, interactive party activity.
Game Day Spiral: Arrange baked roll-ups in a spiral pattern on a large round platter with dipping sauce in the center for an impressive game-watching party presentation.
Appetizer Trio: Serve three different roll-up variations in mini form alongside other finger foods for a diverse appetizer spread that offers something for everyone’s taste preferences.
Holiday Tree Formation: Arrange roll-ups in a Christmas tree shape on a large platter, using bell peppers as ornaments and a star-shaped cheese cutout on top for festive holiday gatherings.
Storage and Make-Ahead Advice
Short-Term Storage:
- Store completely cooled roll-ups in an airtight container in the refrigerator for up to 3 days.
- Separate layers with parchment paper to prevent sticking and maintain the integrity of the roll shape.
- Keep dipping sauce separate in its own container to prevent the roll-ups from becoming soggy during storage.
- For best results, allow refrigerated roll-ups to come to room temperature before reheating to ensure even warming.
- If storing unbaked roll-ups, keep tightly wrapped in plastic in the refrigerator for no more than 24 hours to maintain dough quality.
Reheating Guidelines:
- Reheat individual roll-ups in a microwave for 20-30 seconds until warmed through but not overheated or dried out.
- For superior texture, reheat in a 350°F (175°C) oven for 5-7 minutes until warmed throughout and the cheese is melted again.
- To restore crispness to the exterior, reheat in a toaster oven on medium setting for 3-4 minutes.
- Avoid reheating roll-ups with the sauce already applied as this can make them soggy; always reheat separately and add sauce after warming.
- If reheating multiple servings, place roll-ups in a single layer on a baking sheet rather than stacking to ensure even warming.
Make-Ahead Strategy:
- These roll-ups are ideal for make-ahead preparation, perfect for busy weeknights or entertaining.
- Prepare roll-ups completely up to the point of baking, then refrigerate covered for up to 24 hours.
- For best results when preparing ahead, let the assembled but unbaked roll-ups sit at room temperature for 15 minutes before baking.
- Increase baking time by approximately 3-5 minutes when cooking from refrigerated state to ensure the center is fully heated.
- Prepare and store the marinara dipping sauce up to 5 days in advance, then simply reheat when ready to serve.
- For ultimate convenience, bake roll-ups up to 6 hours ahead, then reheat just before serving.
Freezing Guidelines:
- These roll-ups freeze beautifully in both unbaked and baked states for convenient meal preparation.
- To freeze unbaked roll-ups, place on a parchment-lined baking sheet and freeze until solid, about 2 hours.
- Transfer frozen unbaked roll-ups to freezer-safe containers or bags and store for up to 1 month.
- When ready to bake from frozen, add approximately 5-7 minutes to the normal baking time, no thawing required.
- For baked roll-ups, cool completely, then freeze in single layers separated by parchment paper.
- Store frozen baked roll-ups in airtight containers for up to 2 months.
- Reheat frozen baked roll-ups in a 350°F (175°C) oven for 10-12 minutes until heated through.
- For best quality, freeze roll-ups without additional cheese toppings, adding fresh cheese during the reheating process.
Party Prep Tips:
- For large gatherings, prepare multiple batches with different fillings to accommodate various preferences.
- Color-code toothpicks to identify different varieties (plain, vegetarian, spicy) for guest convenience.
- Create a self-serve warming station with a chafing dish to keep roll-ups at optimal temperature throughout an event.
- Prepare dipping sauces in advance and keep warm in mini slow cookers or thermal containers.
- Offer a variety of dipping options including marinara, ranch, pesto, and garlic butter to please different palates.
- For outdoor gatherings, transport roll-ups in insulated containers and reheat on a grill in foil packets for 5-7 minutes.
- Create a timeline working backward from serving time, allowing for preparation, baking, cooling, and transport if necessary.
- Consider partially baking roll-ups at home (about 80% done), then finishing at the event location for freshest results.
Entertainment Value and Presentation
These delightful roll-ups offer numerous opportunities to enhance your entertaining presentation:
Serving Suggestions: Arrange in a circular pattern around a decorative bowl of warm marinara sauce.
Visual Enhancements: Thread the roll-ups on decorative skewers alternating with cherry tomatoes and mozzarella balls.
Garnish Options: Sprinkle with fresh microgreens, basil chiffonade, or parsley for vibrant color contrast.
Individual Portions: Serve two roll-ups per person on small plates with personalized dipping sauce cups.
Menu Pairings: Complement with a simple green salad dressed with Italian vinaigrette and a light Italian soda.
Theme Development: Create an Italian-inspired grazing table with roll-ups, antipasto skewers, and bruschetta.
Timing Perfection: Schedule baking to ensure roll-ups are served warm with cheese at ideal melting point.
Presentation Ware: Serve on rustic wooden boards with small bowls of various dipping sauces.
Color Enhancement: Add a sprinkle of paprika or dried herbs just before serving for visual pop.
Interactive Elements: Provide tongs and small plates for guests to help themselves to the communal platter.
Frequently Asked Questions
Why is my dough difficult to roll out? Refrigerated dough that’s too cold can be challenging to work with due to its elasticity. Always allow the dough to rest at room temperature for about 15-20 minutes before attempting to roll it out. This relaxes the gluten strands and makes the dough more pliable. If it still springs back when rolling, let it rest for another 5 minutes and try again. Additionally, ensure your work surface is lightly floured to prevent sticking, which can cause tearing. Finally, use gentle but firm pressure with your rolling pin, working from the center outward in all directions rather than just back and forth, which can cause the dough to become tough and resistant.
How can I prevent the roll-ups from becoming soggy? Excess moisture is the primary cause of soggy roll-ups. First, use a moderate amount of sauce—approximately ½ cup for a standard pizza dough rectangle is sufficient. Second, pre-cook and thoroughly drain any vegetables or high-moisture ingredients before adding them to the filling. For ingredients like fresh tomatoes or pineapple, place them on paper towels and gently press to remove excess liquid. Third, if using pepperoni or other fatty meats, consider briefly microwaving them between paper towels to remove some of the grease. Finally, ensure your oven is fully preheated before baking, as a hot oven immediately sets the crust exterior, creating a barrier against moisture. For extra insurance against sogginess, you can lightly brush the dough with olive oil before adding sauce.
Can I use homemade pizza dough instead of refrigerated? Absolutely! Homemade pizza dough can create exceptional roll-ups with better flavor and texture. For best results, prepare your favorite pizza dough recipe and allow it to complete its first rise. Then roll it out to the same dimensions as specified for store-bought dough (approximately 12×16 inches). Homemade dough typically has more flavor and a better chew than commercial options. However, be aware that homemade dough may be more hydrated than store-bought, so you might need to use additional flour when rolling to prevent sticking. Also, the baking time might vary slightly—look for golden brown color and an internal temperature of 190°F (88°C) to ensure it’s fully baked. For make-ahead convenience, prepare the dough a day in advance and let it slowly rise in the refrigerator overnight for enhanced flavor development.
What’s the best cheese to use for maximum meltability? While pre-shredded mozzarella is convenient, it contains anti-caking agents that can inhibit proper melting. For superior meltability, buy block mozzarella and shred it yourself just before using. Whole milk mozzarella melts better than part-skim varieties due to higher fat content. For even better results, use a combination of cheeses: mozzarella provides the stretch, provolone adds flavor complexity, and a touch of fontina or monterey jack contributes exceptional creaminess when melted. Avoid aged hard cheeses like parmesan as your primary cheese (though they work well as flavor enhancers). Finally, bring cheese to room temperature before baking for the most even melting. If you notice your cheese separating or becoming oily when melted, you’re likely overheating it—reduce your oven temperature slightly or decrease baking time.
How do I adapt this recipe for a large crowd? For serving crowds of 20 or more, strategic scaling and production planning are essential. Double or triple the recipe as needed, but prepare in separate batches rather than attempting to work with overly large pieces of dough. Consider setting up a production line: one person rolling dough, another applying toppings, and a third slicing and arranging on baking sheets. Prepare trays in advance and refrigerate until baking time, staggering the baking schedule to ensure fresh, warm servings throughout the event. Use multiple ovens if available, or consider renting commercial sheet pans that allow more roll-ups per batch. For self-serve settings, use chafing dishes with Sterno heating to keep roll-ups warm without drying out. Individual dipping cups prevent congestion around sauce bowls. For very large gatherings, consider making mini roll-ups (cut into 1-inch pieces) that require less baking time and allow guests to sample multiple varieties while reducing waste.
Are there any creative ways to use leftover roll-ups? Leftover roll-ups can be transformed into entirely new dishes. Cube them and toast in the oven to create pizza croutons for salads or soup toppers. Chop and use as the base for a savory bread pudding by mixing with additional beaten eggs and milk, then baking until set. Create a pizza roll-up casserole by layering sliced roll-ups with sauce, additional cheese, and fresh toppings, then baking until bubbly. For breakfast, slice leftover roll-ups into bite-sized pieces and add to a frittata with beaten eggs and fresh herbs. They also make excellent additions to lunchboxes when wrapped separately and kept cool. For an elevated approach, use leftover roll-ups as the base for a Benedict-style brunch by topping halved roll-ups with poached eggs and hollandaise sauce. Finally, pulse thoroughly chilled leftovers in a food processor to create seasoned breadcrumbs for coating chicken or topping casseroles.
How can I make these healthier without sacrificing flavor? Several thoughtful modifications can increase nutritional value while maintaining delicious flavor. Start with whole wheat or whole grain pizza dough for additional fiber and nutrients. Reduce cheese quantity by 25% but increase its impact by using stronger-flavored varieties like sharp provolone or smoked mozzarella. Boost vegetable content by finely chopping spinach, bell peppers, or mushrooms and mixing directly into the sauce where they’ll be less noticeable but add nutrition. Use turkey pepperoni which has approximately 70% less fat than traditional pepperoni. For added protein, incorporate white beans pureed with herbs as a partial cheese replacement. Brush the exterior with olive oil rather than butter for heart-healthier fats. Include herbs generously both in the filling and as garnish for flavor without calories—oregano, basil, and rosemary all complement pizza flavors beautifully. Finally, serve with a simple tomato sauce rather than creamy dips, and accompany with a large vegetable-based salad to create a more balanced meal.

Ingredients
For the Roll-Ups:
1 tube (13.8 oz) refrigerated pizza dough
½ cup pizza sauce or marinara
2 cups shredded mozzarella cheese
30-40 pepperoni slices
¼ cup grated Parmesan cheese
1 teaspoon garlic powder
1 tablespoon Italian seasoning
¼ teaspoon red pepper flakes (optional)
1 tablespoon olive oil
1 tablespoon fresh basil or parsley, chopped
For Serving:
1 cup warm marinara sauce
Additional grated Parmesan cheese
Fresh basil leaves, chopped
Ranch dressing (optional)
Garlic butter (optional)
Instructions
Preheat oven to 375°F (190°C) and line a baking sheet with parchment paper.
Allow pizza dough to rest at room temperature for 15 minutes.
Roll dough into a 12×16-inch rectangle on a lightly floured surface.
Spread pizza sauce evenly over dough, leaving a ½-inch border around the edges.
Sprinkle garlic powder and Italian seasoning over the sauce.
Cover with shredded mozzarella cheese.
Arrange pepperoni slices in rows over the cheese.
Sprinkle with Parmesan cheese and red pepper flakes (if using).
Starting from the long edge, tightly roll dough into a log.
Place seam side down and gently press to seal.
Cut into 12 equal slices, approximately 1-1½ inches thick.
Arrange slices cut-side up on prepared baking sheet, spacing 1 inch apart.
Brush tops and sides with olive oil.
Bake for 15-18 minutes until golden brown and cooked through.
While baking, heat marinara sauce for dipping.
Allow roll-ups to cool for 2-3 minutes after baking.
Sprinkle with fresh chopped basil or parsley.
Serve warm with marinara sauce for dipping.
Notes
Allow refrigerated dough to warm slightly for easier handling
Use block mozzarella shredded yourself for better melting
Pat pepperoni with paper towels to remove excess grease
Maintain a clean edge when spreading sauce to ensure proper sealing
Roll dough tight enough to prevent gaps but not so tight ingredients squeeze out
Use a sharp knife dipped in warm water between cuts for clean slices
Pre-cook any vegetables to remove excess moisture before adding to rolls
Don't overload with toppings which can make rolling difficult
For perfect sizing, trim dough edges with a pizza cutter to get a true rectangle
When using homemade dough, ensure it's not overly sticky before topping
Avoid stretching or squeezing the roll when transferring to baking sheet
Check for doneness by confirming bottom is golden and not doughy
For extra golden tops, apply an egg wash instead of olive oil
Watch carefully during final minutes of baking to prevent burning
Serve within 15 minutes of baking for optimal cheese stretch
Store leftover sauce separately from roll-ups to prevent sogginess
For more uniform sizes, use a ruler to mark cutting points before slicing
If mixture begins to slip while rolling, pause and gently readjust
Consider toasting roll-ups under broiler for 1 minute for extra golden tops
For mess-free cutting, refrigerate roll for 15 minutes before slicing