
")
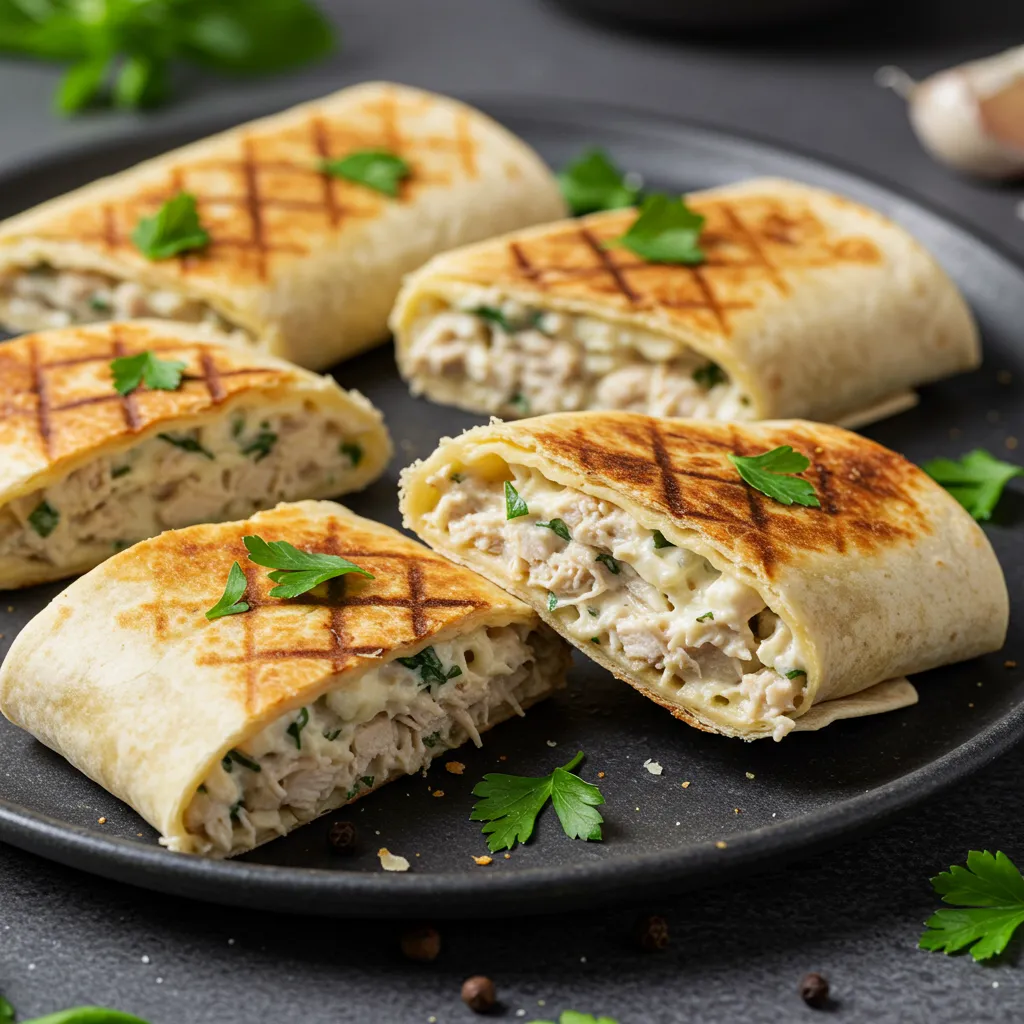
These irresistible Cheesy Garlic Chicken Wraps transform simple ingredients into a mouthwatering meal that’s perfect for lunch, dinner, or even as an appetizer when cut into smaller portions. Tender shredded chicken combines with creamy cheeses and aromatic garlic, all wrapped in a golden-brown tortilla that’s crispy on the outside while remaining soft and melty inside. Easy to prepare yet impressive enough for guests, these wraps offer the perfect balance of comfort and convenience.
Why You’ll Love This Recipe
- Quick and convenient: Uses pre-cooked chicken for a fast meal solution
- Customizable: Easily adapt with different fillings based on preferences
- Family-friendly: Appeals to both adults and children with its familiar flavors
- Make-ahead friendly: Can be assembled in advance and cooked when needed
- Great for leftovers: Perfect way to transform yesterday’s chicken into something new
Ingredients
For the Filling
- Cooked chicken – Provides tender protein that absorbs the creamy, garlicky flavors
- Mozzarella cheese – Creates that perfect melty, stretchy texture when heated
- Cream cheese – Adds richness and binds the filling together with velvety smoothness
- Fresh garlic – Delivers aromatic depth and distinctive flavor that defines these wraps
- Italian seasoning – Contributes an herb-forward flavor profile with minimal effort
- Salt and pepper – Enhances and balances all the other ingredients
- Fresh spinach or lettuce – Adds a nutritious element and fresh contrast to the creamy filling
For the Wraps
- Flour tortillas – Creates the perfect vessel for holding the filling and crisping up beautifully
- Olive oil – Helps achieve that golden-brown exterior when cooking the assembled wraps
Step-by-Step Instructions
Preparing the Filling
Begin with 2 cups of cooked chicken, either leftover from a previous meal or prepared specifically for this recipe. For the best texture and flavor absorption, shred or dice the chicken into small, bite-sized pieces. If using rotisserie chicken, this is an excellent opportunity to utilize both white and dark meat for maximum flavor.
In a large mixing bowl, combine the prepared chicken with 1 cup of shredded mozzarella cheese and 1/2 cup of softened cream cheese. The softened cream cheese is crucial for easy mixing – leave it at room temperature for about 30 minutes before preparation, or microwave for 15-20 seconds to soften if you’re short on time. Add 2 cloves of finely minced fresh garlic, ensuring it’s evenly distributed throughout the mixture for consistent flavor in every bite.
Season the mixture with 1 teaspoon of Italian seasoning, which typically includes a blend of basil, oregano, rosemary, thyme, and marjoram. This convenient ingredient adds complex herbal notes without requiring multiple separate herbs. Add salt and pepper to taste, being mindful that the cheeses already contribute some saltiness to the dish. Mix all these ingredients thoroughly until well combined, using a spatula to fold everything together gently but thoroughly.
For added nutrition and a fresh element, prepare 1 cup of fresh spinach by washing thoroughly and patting dry, then roughly chopping into smaller pieces for easier incorporation into the wraps. If you prefer a milder flavor or crunchier texture, substitute crisp lettuce for the spinach. This verdant addition not only enhances the nutritional profile but also provides a pleasant color contrast to the creamy white filling.
Assembling the Wraps
Lay out 4 large flour tortillas on a clean work surface. For best results, choose tortillas that are fresh and pliable, about 10 inches in diameter. If your tortillas seem stiff, briefly warm them in the microwave for 10-15 seconds wrapped in a damp paper towel to make them more flexible and prevent cracking during folding.
Place approximately 1/2 cup of the chicken mixture in the center of each tortilla, spreading it into an even rectangle while leaving about 2 inches of space around the edges. This careful portioning ensures that the filling will stay contained when the tortilla is folded and won’t spill out during cooking. Add a small handful of the prepared spinach or lettuce on top of the chicken mixture if desired.
To create neat wraps, fold in the sides of the tortilla first, then roll from the bottom up, enclosing the filling completely. The technique is similar to making a burrito – tuck the sides in first, then roll from the bottom, keeping the wrap tight as you go. Place the wraps seam-side down to prevent them from unraveling. If needed, secure them with toothpicks, though these should be removed before serving.
For best results, let the assembled wraps rest for about 5 minutes before cooking. This brief resting period allows the tortilla to slightly adhere to itself, making the wraps more secure when cooking. It’s also an excellent opportunity to clean up your preparation area before moving on to the cooking phase.
Cooking the Wraps
Heat a large non-stick skillet over medium heat and add a tablespoon of olive oil, swirling to coat the cooking surface evenly. The medium heat is crucial – too high, and the tortillas will burn before the cheese melts; too low, and they won’t develop the desirable golden-brown exterior.
Once the oil is hot but not smoking, carefully place the wraps seam-side down in the skillet. Depending on the size of your skillet, you may need to cook them in batches of two to avoid overcrowding, which would prevent proper browning. Allow the wraps to cook undisturbed for about 2-3 minutes until the bottom side is golden brown and crispy.
Using a wide spatula, carefully flip each wrap and cook for an additional 2-3 minutes on the second side. Press gently with the spatula to ensure even contact with the hot surface. The ideal result is a wrap that’s evenly golden brown on all sides, with the cheese inside melted to perfection. If needed, you can briefly cook the wraps on their edges as well to ensure all surfaces are crispy.
Transfer the cooked wraps to a cutting board and let them rest for 1-2 minutes before serving. This brief resting period allows the filling to set slightly, making the wraps easier to cut and helping to prevent the filling from spilling out. For an attractive presentation, slice each wrap diagonally in half just before serving, revealing the colorful and appetizing filling inside.
Serving Suggestions
Serve these delicious Cheesy Garlic Chicken Wraps warm, perhaps with a simple side salad to create a complete meal. They pair beautifully with a variety of accompaniments – try a small bowl of marinara sauce for dipping, a dollop of sour cream, or some fresh guacamole on the side. For added visual appeal and flavor, garnish the plates with a sprinkle of chopped fresh herbs such as parsley, basil, or chives.
These wraps are versatile enough to serve as a satisfying lunch, a quick dinner, or even as part of a casual entertaining spread. If serving as an appetizer, cut each wrap into 3-4 pieces instead of just halves, and arrange them on a serving platter with various dipping options for guests to enjoy.
Pro Tips
- Use rotisserie chicken for maximum convenience and flavor
- Warm your tortillas slightly before filling to make them more pliable
- Add a tablespoon of ranch dressing to the filling for extra tanginess
- For a spicy kick, mix in some red pepper flakes or diced jalapeños
- Substitute whole wheat tortillas for a healthier alternative
Storage and Make-Ahead Advice
These Cheesy Garlic Chicken Wraps are perfect for meal planning and can be prepared in various stages depending on your schedule. The chicken and cheese filling can be made up to 2 days in advance and stored in an airtight container in the refrigerator. When ready to use, allow the filling to come to room temperature for about 15 minutes to make it easier to spread.
For partially made-ahead meals, you can assemble the wraps completely, cover them tightly with plastic wrap, and refrigerate for up to 24 hours before cooking. This makes them perfect for preparing in the morning before work and cooking for a quick dinner in the evening.
Cooked wraps can be stored in the refrigerator for up to 3 days. To reheat, place them in a preheated 350°F (175°C) oven for about 10 minutes, or in a dry skillet over medium-low heat for 2-3 minutes per side. Avoid microwaving if possible, as this can make the once-crispy tortilla become soggy.
If you’d like to freeze these for longer storage, wrap each cooked and cooled wrap individually in aluminum foil, then place in a freezer-safe bag. They can be frozen for up to 1 month. To reheat from frozen, unwrap and bake in a 375°F (190°C) oven for 15-20 minutes until heated through.
Customization Ideas
The beauty of these wraps lies in their adaptability to various flavor profiles and dietary preferences. For a Mediterranean twist, add chopped sun-dried tomatoes, olives, and crumbled feta cheese to the filling, along with some fresh oregano in place of the Italian seasoning.
To create a southwestern variation, substitute pepper jack cheese for the mozzarella, add some diced green chilies, and mix in a teaspoon of cumin and chili powder to the filling. Serve with salsa and guacamole for dipping.
For a healthier version, use whole wheat tortillas, reduced-fat cream cheese, and part-skim mozzarella. Increase the vegetable content by adding finely diced bell peppers, grated carrots, or chopped broccoli to the filling alongside the spinach.
Vegetarians can enjoy a meatless version by replacing the chicken with sautéed mushrooms, which provide a satisfying umami flavor and meaty texture. Simply sauté 8 ounces of chopped mushrooms until golden and all liquid has evaporated, then cool before mixing with the cheeses and seasonings.
For a breakfast-inspired wrap, use the same basic technique but replace the Italian seasoning with breakfast sausage seasonings (sage, thyme, and a touch of maple syrup), and consider adding some scrambled eggs to the filling. These make a hearty and portable breakfast option.
Special Technique: Perfect Wrap Assembly
The key to truly exceptional wraps lies in the assembly technique. Professional chefs use a method that ensures the contents remain secure during cooking while achieving the ideal ratio of filling to tortilla in each bite.
Begin by warming the tortilla slightly – this makes it more pliable and less likely to crack when folded. Next, place the filling in a rectangular shape in the center, rather than in a round mound. This rectangular shape allows for more even distribution when the tortilla is folded.
For the folding technique, fold the bottom of the tortilla up over the filling first, then fold in both sides. Roll from the bottom up, keeping the wrap tight by pulling back gently on the filling as you roll. This pulling-back motion creates tension that results in a tighter, more secure wrap.
To ensure the wrap stays closed during cooking, place it seam-side down and let it rest for a few minutes before cooking. This allows the tortilla to slightly adhere to itself. The weight of the wrap during cooking will further seal the seam.
For the crispiest exterior, professional chefs brush the outside of the wrap with a light coating of olive oil or melted butter before placing it in the pan. This promotes even browning and adds a subtle richness to the finished wrap.
Finally, the cooking temperature is crucial – maintain a medium heat and resist the urge to increase the temperature for faster cooking. Patience results in the perfect balance of a golden-brown exterior and thoroughly melted interior, without burning the tortilla before the filling is heated through.
Frequently Asked Questions
Can I use raw chicken instead of cooked chicken? No, this recipe specifically calls for pre-cooked chicken. Using raw chicken would not cook properly inside the wrap and could pose food safety risks. If you only have raw chicken, cook it thoroughly before assembling the wraps.
What can I use instead of cream cheese? Ricotta cheese makes a good substitute, though the filling will be slightly less creamy. Greek yogurt can also work but may result in a tangier flavor and slightly different texture.
My wraps are falling apart during cooking. What am I doing wrong? This typically happens if the wraps are overfilled or not rolled tightly enough. Use slightly less filling and make sure to fold in the sides before rolling. Also, letting the assembled wraps rest for 5 minutes before cooking helps them stay together.
How can I make these gluten-free? Simply substitute gluten-free tortillas for the regular flour tortillas. The rest of the ingredients are naturally gluten-free, but always check packaging to be certain.
Can I bake these instead of cooking them in a skillet? Yes! Place the assembled wraps seam-side down on a baking sheet, brush with olive oil, and bake in a preheated 375°F (190°C) oven for 15-20 minutes until golden and crispy, flipping halfway through.
")
Ingredients
- 2 cups cooked chicken, shredded or diced
- 1 cup shredded mozzarella cheese
- 1/2 cup cream cheese, softened
- 2 cloves garlic, minced
- 1 teaspoon Italian seasoning
- Salt and pepper to taste
- 4 large flour tortillas
- 1 cup fresh spinach or lettuce, chopped (optional)
- 2 tablespoons olive oil for cooking
Instructions
- In a large bowl, combine shredded chicken, mozzarella cheese, softened cream cheese, minced garlic, Italian seasoning, salt, and pepper. Mix until well combined.
- Lay a flour tortilla flat and place approximately 1/2 cup of the chicken mixture in the center, spreading it into a rectangle while leaving about 2 inches around the edges.
- Add a small handful of chopped spinach or lettuce on top of the chicken mixture if desired.
- Fold in the sides of the tortilla, then roll from the bottom up, enclosing the filling completely. Place seam-side down and repeat with remaining tortillas.
- Heat olive oil in a large skillet over medium heat. Place the wraps seam-side down and cook for 2-3 minutes until golden brown.
- Carefully flip and cook for an additional 2-3 minutes until the second side is golden and crispy, and the cheese inside is melted.
- Transfer to a cutting board, let rest for 1-2 minutes, then slice diagonally and serve warm.
Notes
- If using rotisserie chicken, a combination of white and dark meat provides the best flavor
- For extra flavor, add a tablespoon of ranch seasoning to the filling mixture
- To save time, use pre-shredded cheese, though freshly shredded melts better
- For a firmer wrap that's easier to handle, refrigerate the assembled wraps for 15-30 minutes before cooking
- These wraps make excellent school or work lunches – just wrap in foil to keep them warm