

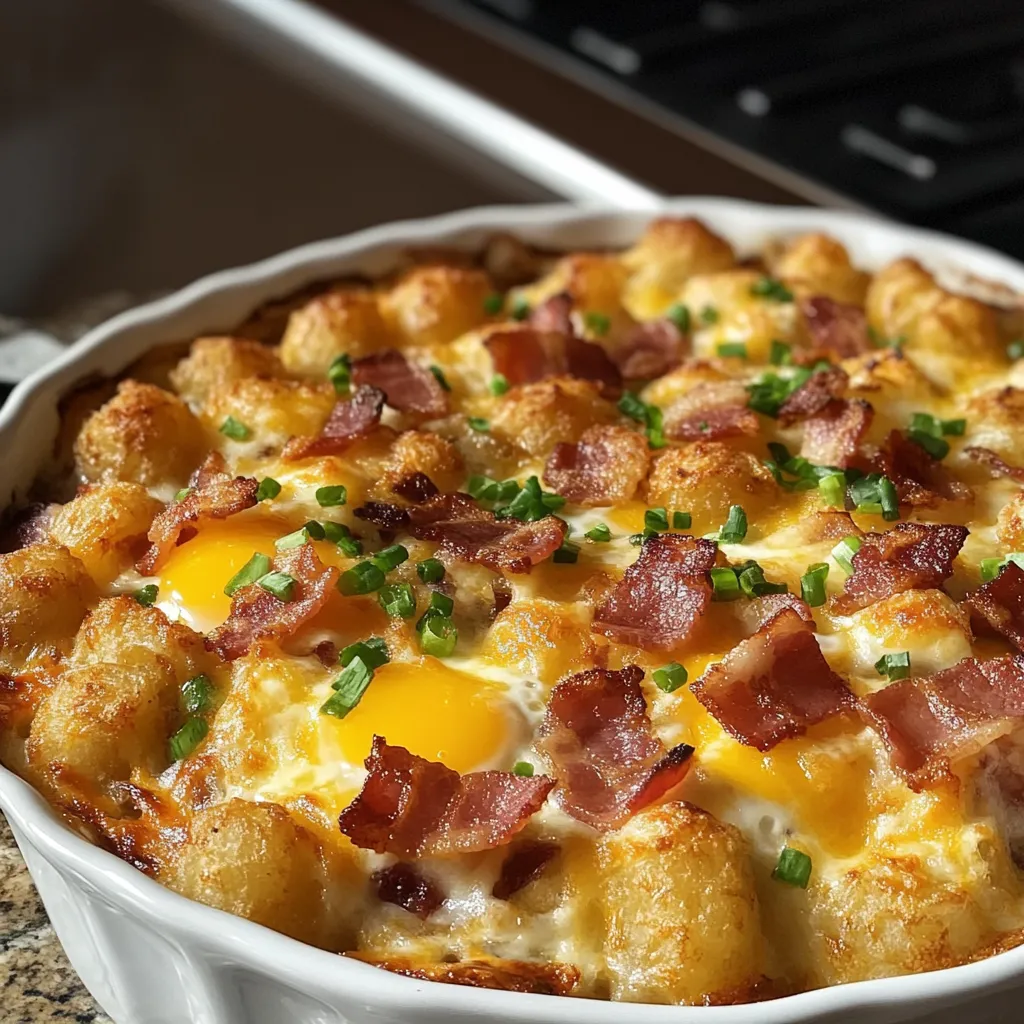
This irresistible Bacon, Egg, and Tater Tot Casserole transforms breakfast classics into an impressive, crowd-pleasing dish with its perfect balance of textures and savory flavors. The casserole showcases golden-brown, crispy tater tots creating a delightfully crunchy crown above a decadent layer of fluffy eggs, savory bacon, and melted cheese. Every forkful delivers an exquisite combination—the satisfying crunch of the tots giving way to the creamy egg mixture, punctuated by smoky bacon and the rich melted cheese, all brightened by fresh green onions. This versatile dish exemplifies elevated comfort food at its finest—ideal for weekend family brunches, holiday gatherings, meal prep, or anytime you crave a hearty, satisfying breakfast that effortlessly feeds a crowd while earning rave reviews for both its impressive presentation and nostalgic, crave-worthy flavors.
Why You’ll Love This Recipe
- Perfect texture contrast: Combines crispy tots with creamy eggs and gooey cheese
- Make-ahead convenience: Can be prepped the night before for effortless morning baking
- Crowd-feeding ease: Serves multiple guests with minimal active cooking time
- Customizable base: Easily adapts to different proteins, vegetables, and cheese varieties
- Universally appealing: Satisfies both picky eaters and culinary enthusiasts
- One-dish simplicity: Creates complete meal with protein, starch, and dairy
- Stress-free entertaining: Allows hosts to enjoy guests rather than cooking to order
- Meal-prep friendly: Portions beautifully for weekday breakfast planning
- Visually impressive: Presents beautifully with minimal styling effort
- Comfort food perfection: Delivers nostalgic flavors in sophisticated presentation
Ingredients
For the Casserole Base
- Frozen tater tots – Create the signature crispy crown and potato foundation
- Bacon – Provides smoky depth and savory protein
- Eggs – Form the custard-like structure while delivering protein
- Half-and-half – Creates silky texture and richness in egg mixture
- Cheddar cheese – Adds classic melty texture and sharp flavor
- Green onions – Provide fresh contrast and vibrant color accent
- Garlic powder – Contributes subtle aromatic depth
- Onion powder – Adds layered flavor without texture
- Smoked paprika – Enhances bacon notes with gentle warmth
- Salt and pepper – Balance and enhance all flavors
Optional Enhancements
- Sausage – Creates heartier variation with different savory notes
- Bell peppers – Add vegetal sweetness and color contrast
- Jalapeños – Introduce customizable heat level
- Mushrooms – Provide earthy depth and additional texture
- Spinach – Incorporates nutritional boost with mild flavor
- Monterey Jack cheese – Creates superior melting with mild flavor
- Hot sauce – Adds customizable heat with vinegar brightness
- Fresh herbs – Enhance with thyme, chives, or parsley notes
- Sour cream – Provides cooling garnish for serving
- Avocado slices – Add creamy richness and nutritional boost
Step-by-Step Instructions
Preparing the Components
- Begin by preheating your oven to 375°F (190°C) to ensure proper temperature for achieving the perfect balance of crispy exterior and tender interior in your tater tots while properly setting the egg mixture. Position an oven rack in the middle position for even heat distribution.
- Select a 9×13-inch baking dish that is at least 2 inches deep to accommodate all layers without overflow. Spray thoroughly with nonstick cooking spray, ensuring complete coverage to prevent sticking and ease serving later.
- Cook 12 ounces of bacon using your preferred method until just crisp. For optimal results, bake bacon on a parchment-lined sheet pan at 400°F for 15-18 minutes rather than frying, which allows for more consistent cooking and easier cleanup while rendering more fat.
- Once bacon is cooked, transfer to paper towels to drain excess fat, then chop into ½-inch pieces. Reserve 1 tablespoon of the bacon fat for adding depth of flavor to the egg mixture if desired.
- Slice 6-8 green onions, separating the white and light green parts from the darker green tops. The white portions will be added to the egg mixture for depth of flavor, while the greens will be reserved for final garnish, providing both flavor layering and visual appeal.
- In a large mixing bowl, crack 10 large eggs and whisk until well combined but not overly frothy. Over-beating can incorporate too much air, resulting in a less creamy final texture.
- Add 1 cup of half-and-half to the eggs, whisking to incorporate completely. The fat content in half-and-half creates the ideal richness without becoming too heavy, though whole milk can substitute in a pinch for a lighter version.
- Season the egg mixture with 1 teaspoon salt, ½ teaspoon freshly ground black pepper, ½ teaspoon garlic powder, ½ teaspoon onion powder, and ¼ teaspoon smoked paprika. Whisk thoroughly to ensure even distribution of seasonings throughout the custard base.
- Add the reserved tablespoon of bacon fat if using, the white and light green parts of the sliced green onions, and 1½ cups of the shredded cheddar cheese (reserving ½ cup for topping). Stir gently to combine all ingredients evenly in the egg mixture.
Assembling the Casserole
- Arrange 2 pounds of frozen tater tots (kept frozen for best results) in a single layer along the bottom and slightly up the sides of the prepared baking dish. The tots should be placed close together but not overcrowded, creating a solid base that will become crisp during baking.
- Pour the prepared egg, cheese, and bacon mixture evenly over the arranged tater tots, using a spatula to ensure complete coverage. The liquid should come up to just below the top level of the tots, allowing their tops to crisp during baking while their submerged portions absorb flavor.
- Sprinkle the chopped bacon pieces evenly across the surface of the casserole, distributing them for balanced flavor in every serving. This layering technique ensures bacon flavor throughout rather than concentrated in certain areas.
- Top with the reserved ½ cup of shredded cheddar cheese, distributing evenly for a golden, bubbling cheese crust that will brown beautifully during the final stages of baking.
Baking the Casserole
- For immediate baking, cover the baking dish with aluminum foil, crimping the edges to seal. This initial covered baking period allows the eggs to set without the top becoming too brown before the center is fully cooked.
- Place the covered casserole in the preheated oven and bake for 30 minutes. During this phase, the eggs will begin to set and the tots will start to cook through while being protected from over-browning.
- After 30 minutes, remove the foil and continue baking for an additional 20-25 minutes until the center reaches 160°F, the cheese is melted and beginning to brown, and the tater tots achieve a golden, crispy exterior.
- If additional browning is desired, switch oven to broil for the final 2-3 minutes, watching carefully to prevent burning. This creates a beautifully golden, slightly crispy top that adds textural contrast and visual appeal.
- Once baked, remove from oven and allow to rest for 5-10 minutes before serving. This resting period allows the eggs to fully set and makes for cleaner, more defined portions when cutting.
Make-Ahead Option
- To prepare this casserole the night before, follow all assembly instructions but do not bake. Cover the assembled casserole tightly with plastic wrap, then aluminum foil to prevent absorption of refrigerator odors.
- Refrigerate the assembled casserole for up to 12 hours. This resting time actually benefits the dish by allowing the tater tots to absorb some egg mixture, creating better cohesion.
- When ready to bake, remove casserole from refrigerator and let stand at room temperature for 30 minutes to take the chill off while preheating oven.
- Remove plastic wrap but replace the foil cover, then bake as directed, adding an additional 5-10 minutes to the covered baking time since the ingredients will be starting from a colder temperature.
Final Presentation and Serving
- Just before serving, sprinkle the reserved green onion tops across the casserole, providing a fresh, colorful garnish that brightens both the flavor and appearance.
- For additional visual appeal and flavor contrast, consider adding a light dusting of extra smoked paprika or a few grinds of fresh black pepper across the top.
- Cut the casserole into generous squares for serving, using a sharp knife that cleanly slices through the tater tot layer without dragging or tearing. For best presentation, clean the knife between cuts.
- Serve immediately while hot, offering optional toppings like sour cream, hot sauce, avocado slices, or additional bacon bits for guests to customize their portions.
- For brunch gatherings, pair with a simple green salad, fresh fruit, or breakfast breads to create a complete meal with balanced flavors and textures.
Pro Tips
- Keep tater tots frozen until ready to use for better structure
- Layer some tots around the edges for attractive presentation
- Cook bacon just to crisp stage, not overly crunchy
- Reserve some bacon fat to enhance egg mixture flavor
- Use freshly shredded cheese rather than pre-shredded for better melting
- Allow ingredients to reach room temperature before baking for even cooking
- Use a glass baking dish to monitor bottom browning
- For crispier tots, pre-bake them for 5 minutes before adding egg mixture
- Add eggs in stages if needed to prevent overflow
- Calibrate your oven with a thermometer for precise temperature
- Position rack in middle of oven for most even heat distribution
- Let casserole rest after baking for cleaner slices
- If making ahead, add an extra egg to account for absorption
- Use a combination of cheeses for more complex flavor
- Ensure proper seasoning as eggs need significant salt
- Consider a water bath for gentler cooking if concerned about overcooking
- Cut portions with a sharp knife, cleaning between slices
- For crispier top, broil for final 2 minutes, watching carefully
- Rest 5-10 minutes before cutting for neater portions
- Test doneness with thermometer—eggs should reach 160°F
Variations and Creative Ideas
Protein Variations
- Southwest Chorizo Version: Replace bacon with spicy Mexican chorizo, add diced poblano peppers, substitute pepper jack cheese, and incorporate a small can of diced green chiles for a bold Tex-Mex interpretation perfect for fans of spicier breakfast options.
- Vegetarian Adaptation: Omit bacon, double the vegetables by adding sautéed mushrooms, bell peppers, spinach, and onions, then incorporate smoked paprika and a touch of liquid smoke to maintain the smoky depth traditionally provided by bacon.
- Italian Sausage Twist: Substitute crumbled Italian sausage for bacon, add diced red bell peppers and Italian herbs (basil, oregano, thyme), and use a combination of mozzarella and provolone cheeses for a Mediterranean-inspired variation.
- Smoked Salmon Luxury: Create an upscale brunch version by replacing bacon with chopped smoked salmon added after baking, incorporating capers, dill, and thinly sliced red onion, and using Swiss or Gruyère cheese for sophisticated flavor profile.
Regional Inspirations
- Southern Comfort: Add crumbled breakfast sausage alongside the bacon, incorporate diced pimentos and a dash of hot sauce into the egg mixture, and top with pimento cheese instead of cheddar for a distinctly Southern flavor profile.
- Denver Omelet Style: Include diced ham in addition to or instead of bacon, add sautéed bell peppers and onions, and use a combination of American and cheddar cheeses to mimic the flavors of the classic Denver omelet in casserole form.
- New Mexico Green Chile: Incorporate roasted, chopped Hatch green chiles, substitute part of the half-and-half with Mexican crema, add ground cumin to the egg mixture, and top with queso fresco for the final 10 minutes of baking for authentic southwestern flavor.
- Philly Cheesesteak Inspired: Add thinly sliced sautéed ribeye steak pieces, caramelized onions, and bell peppers to the egg mixture, then top with provolone or cheese whiz for a breakfast interpretation of Philadelphia’s famous sandwich.
Dietary Adaptations
- Lower Carb Option: Reduce tater tot quantity by half and increase egg mixture, incorporating more vegetables like cauliflower florets, bell peppers, and spinach for a dish with reduced carbohydrates but satisfying volume.
- Dairy-Free Version: Substitute unsweetened almond milk or coconut milk for the half-and-half and use dairy-free cheese alternatives that are designed to melt properly for those with lactose intolerance or dairy restrictions.
- Gluten-Free Confirmation: Double-check that chosen tater tot brand is certified gluten-free (most are, but not all), and ensure any additional seasonings or pre-packaged ingredients are verified gluten-free for those with celiac disease or gluten sensitivity.
- Higher Protein Adaptation: Increase egg quantity to 12-14, add ¼ cup of unflavored whey protein powder to the egg mixture, and incorporate additional lean protein sources like turkey bacon or diced chicken breast for those focusing on protein intake.
Seasonal Specialties
- Summer Garden Harvest: During peak growing season, incorporate fresh cherry tomatoes, zucchini, corn kernels, and basil into the egg mixture for a celebration of summer produce that brightens the rich base with fresh flavors.
- Autumn Comfort: Add diced apple, sage, and breakfast sausage instead of bacon for a fall-inspired variation that complements harvest-time brunches and holiday gatherings with warming seasonal flavors.
- Holiday Morning Special: Incorporate diced ham instead of bacon, add cranberry-studded cheese, and include a subtle touch of nutmeg and rosemary in the egg mixture for Christmas morning or other winter holiday celebrations.
- Spring Celebration: Lighten the dish for warmer weather by adding asparagus pieces, fresh peas, dill, and goat cheese, creating a spring-inspired version that pairs beautifully with Easter or Mother’s Day brunch gatherings.
Storage and Make-Ahead Advice
Short-Term Storage
- Store leftover casserole covered in the refrigerator for up to 3 days.
- Use glass storage containers with airtight lids rather than keeping in the original baking dish for better preservation of flavors and textures.
- Place a paper towel under the lid to absorb excess moisture that could make the tots soggy during storage.
- Keep refrigerated at 40°F (4°C) or below at all times to maintain food safety with egg-based dishes.
- For best quality, consume within 1-2 days, though the casserole remains safe to eat for up to 3 days when properly refrigerated.
Reheating Guidelines
- Reheat individual portions in the microwave at 70% power for 1-2 minutes until heated through but not overcooked, which can make the eggs rubbery.
- For better texture retention, reheat in a 325°F (165°C) oven for 15-20 minutes until the center reaches 165°F (74°C).
- To restore crispness to the top layer of tater tots, finish reheating uncovered for the final 5 minutes or place under the broiler briefly.
- Add a sprinkle of fresh cheese on top when reheating to refresh the melty, gooey texture that makes the casserole so appealing.
- If the casserole seems dry when reheating, add a light sprinkling of water or a few dots of butter before covering for the initial heating phase.
Freezing Instructions
- This casserole can be frozen either before or after baking, though freezing before baking yields the best quality upon reheating.
- To freeze before baking, assemble the casserole through all layering steps, but do not bake. Cover tightly with plastic wrap, then aluminum foil, and freeze for up to 2 months.
- Label clearly with contents and date, including baking instructions for ease of preparation later.
- When ready to bake from frozen, thaw in refrigerator overnight, then proceed with standard baking instructions, adding 10-15 minutes to the covered baking time.
- For freezing after baking, cool completely, portion into individual servings for easier reheating, and freeze in airtight containers for up to 1 month.
- Thaw frozen portions overnight in the refrigerator before reheating according to the reheating guidelines above.
Make-Ahead Strategy
- This casserole is perfect for make-ahead preparation, with the egg-soaked base actually improving with 8-12 hours of refrigeration before baking.
- For best results, assemble the entire casserole up to 24 hours before baking, cover tightly, and refrigerate.
- Keep tater tots frozen until assembly to prevent them from getting soggy during overnight refrigeration.
- Remove from refrigerator 30 minutes before baking to take the chill off for more even cooking.
- If making more than 12 hours ahead, consider adding an extra egg to the mixture as the tots will absorb more liquid during extended refrigeration.
- For meal prep, bake a full casserole, cool completely, then portion into individual containers and refrigerate for quick breakfasts throughout the week.
Entertainment Value and Presentation
This hearty casserole offers many opportunities to enhance your brunch presentation:
- Serving Strategy: Present in a colorful ceramic baking dish that transitions from oven to table beautifully, accompanied by a unique, substantial serving spatula.
- Visual Enhancement: Create a deliberate border of extra-crispy tots around the edge for textural contrast and visual framing of the bubbly, cheesy center.
- Garnish Variations: Arrange thin strips of fresh chives, microgreens, or edible flowers across the top for elegant color contrast against the golden background.
- Individual Portions: For upscale brunch service, bake in individual ramekins or small cast iron skillets for personalized presentation that maintains hot temperature longer.
- Topping Bar: Create a “build your own” experience by offering bowls of additional toppings like avocado, salsa, sour cream, hot sauce, and extra bacon for guests to customize their portions.
- Menu Pairing: Serve alongside lighter accompaniments like fruit skewers, simple green salad, or breakfast breads to create a balanced meal with contrasting flavors and textures.
- Beverage Coordination: Pair with appropriate morning beverages served in premium glassware—mimosas, Bloody Marys, or a coffee station with flavored creamers and syrups.
- Themed Service: Use seasonal decorative elements around the serving area that complement the occasion—spring flowers for Easter brunch, evergreen accents for holiday gatherings.
- Plating Design: For seated service, plate individual portions atop a swoosh of crème fraîche or herb oil, garnishing with a perfect small piece of bacon and fresh herbs.
- Temperature Retention: Keep the casserole warm for extended service using a warming tray or chafer set to low heat, refreshing the garnish periodically for continued visual appeal.
Frequently Asked Questions
Why are my tater tots soggy instead of crispy?
Soggy tater tots typically result from one of three issues: excess moisture, overcrowding, or temperature problems. First, ensure tots remain frozen until assembly—thawed tots contain more moisture and won’t crisp properly. Second, verify your oven temperature with a separate thermometer, as even a 25°F variance can significantly affect crispness. For makeahead preparation, consider partially pre-baking the tots for 5-7 minutes before adding the egg mixture. Another effective technique is placing tots in a single layer without overlapping, which allows air circulation for better crisping. Finally, don’t rush the uncovered baking period—this final stage is crucial for moisture evaporation and surface browning.
Can I prepare this casserole the night before?
This casserole is ideal for overnight preparation, with the flavor and texture actually improving from the rest period. When preparing ahead, keep the tater tots frozen until assembly, which helps them maintain structural integrity during refrigeration. Cover tightly with plastic wrap, then foil to prevent absorption of refrigerator odors. Consider adding one extra egg to the mixture, as the tots will absorb more liquid during extended refrigeration. Remove from refrigerator 30 minutes before baking to take the chill off, and expect to add 5-10 minutes to the covered baking time. The overnight method often creates better cohesion between the tots and egg mixture while significantly simplifying morning breakfast preparation.
What’s the best cheese to use for melting in this casserole?
The ideal cheese combines good melting properties with flavor that complements the bacon and eggs. Medium cheddar offers the perfect balance—sharp enough to contribute distinct flavor without overwhelming other ingredients, while melting beautifully. For best results, grate cheese yourself rather than using pre-shredded varieties, which contain anti-caking agents that can prevent smooth melting. If exploring alternatives, consider these excellent melting cheeses: Monterey Jack for milder flavor, pepper jack for gentle heat, Colby for kid-friendly option, or Gruyère for sophisticated nuttiness. For maximum melt quality, add cheese in two stages—mix some into the egg mixture for flavor throughout, then top with the remainder during the final baking stage for that perfect golden, bubbling crown.
How can I make this recipe healthier without sacrificing flavor?
Several strategic modifications can improve the nutritional profile while maintaining satisfying flavor and texture. Substitute turkey bacon or Canadian bacon for traditional pork bacon to reduce fat content while preserving smoky flavor. Replace half-and-half with whole milk or a mixture of milk and Greek yogurt for protein boost with reduced fat. Increase vegetable content by adding sautéed bell peppers, spinach, mushrooms, or broccoli to introduce fiber, vitamins, and volume with minimal calories. Consider reducing cheese by 25% while using stronger-flavored varieties for impact with less quantity. For the tots, either reduce quantity by 25% or look for brands offering reduced-fat or vegetable-based alternatives. Finally, enhance flavor complexity with herbs and spices rather than additional cheese or meat—rosemary, thyme, paprika, and hot sauce all contribute significant flavor without added calories.
Why does my casserole take longer to cook than the recipe states?
Variance in cooking time typically stems from four main factors. First, oven calibration—many home ovens run 25-50°F above or below the set temperature; verify with an oven thermometer. Second, baking dish material significantly impacts cooking time—glass and ceramic conduct heat more slowly than metal, potentially adding 5-10 minutes to baking time. Third, cold ingredients extend cooking time—if using ingredients straight from the refrigerator rather than at room temperature, expect longer baking. Finally, altitude affects cooking time—at elevations above 3,500 feet, reduce temperature by 25°F and extend baking time by 5-8 minutes per 30 minutes of cooking. For foolproof results, rely on visual cues and internal temperature rather than strict timing—the casserole is done when the center reaches 160°F, eggs are set, and the top is golden brown.

Ingredients
For the Casserole:
2 pounds frozen tater tots (approximately one 32-oz bag)
12 ounces bacon (about 10-12 strips)
10 large eggs
1 cup half-and-half
2 cups shredded cheddar cheese, divided (1½ cups for mixture, ½ cup for topping)
6-8 green onions, sliced (white and green parts separated)
½ teaspoon garlic powder
½ teaspoon onion powder
¼ teaspoon smoked paprika
1 teaspoon salt
½ teaspoon freshly ground black pepper
For Garnish and Serving:
Reserved green onion tops, sliced
Additional smoked paprika for dusting (optional)
Sour cream (optional)
Hot sauce (optional)
Avocado slices (optional)
Instructions
Preheat oven to 375°F (190°C). Spray a 9x13-inch baking dish with nonstick cooking spray.
Cook bacon until crisp, drain on paper towels, then chop into pieces. Reserve 1 tablespoon bacon fat if desired.
In a large bowl, whisk together eggs, half-and-half, salt, pepper, garlic powder, onion powder, and smoked paprika.
Stir in white and light green parts of sliced green onions, 1½ cups of cheese, and reserved bacon fat (if using).
Arrange frozen tater tots in a single layer in the prepared baking dish.
Pour the egg mixture evenly over the tater tots.
Sprinkle chopped bacon evenly over the top, then add remaining ½ cup cheese.
Cover with aluminum foil and bake for 30 minutes.
Remove foil and continue baking for 20-25 minutes until center is set and top is golden brown.
Let rest for 5-10 minutes before serving.
Garnish with reserved green onion tops and serve with optional toppings.
Notes
Keep tater tots frozen until ready to use
Cook bacon just until crisp—not overly crunchy
Use freshly shredded cheese for better melting
Allow eggs to come to room temperature for even cooking
Season well, as eggs need sufficient salt for flavor
For crispier tots, pre-bake them for 5 minutes before adding egg mixture
Let casserole rest before cutting for cleaner slices
Position rack in middle of oven for even heat distribution
Use a glass baking dish to monitor bottom browning
If making ahead, add an extra egg to account for absorption
Test doneness with thermometer—eggs should reach 160°F
For make-ahead preparation, assemble the night before and refrigerate
Add a splash of hot sauce to egg mixture for subtle heat
Balance the egg-to-tot ratio for optimal texture
Slice green onions at an angle for more elegant presentation
Consider a water bath for more gentle cooking if concerned about overcooking
Bring refrigerated casserole to room temperature before baking
For extra crispy top, broil for final 2 minutes, watching carefully
Customize with additional vegetables or proteins as desired
Serve with a light side salad or fruit for a complete meal
Cut with a sharp knife, cleaning between slices for neat presentation