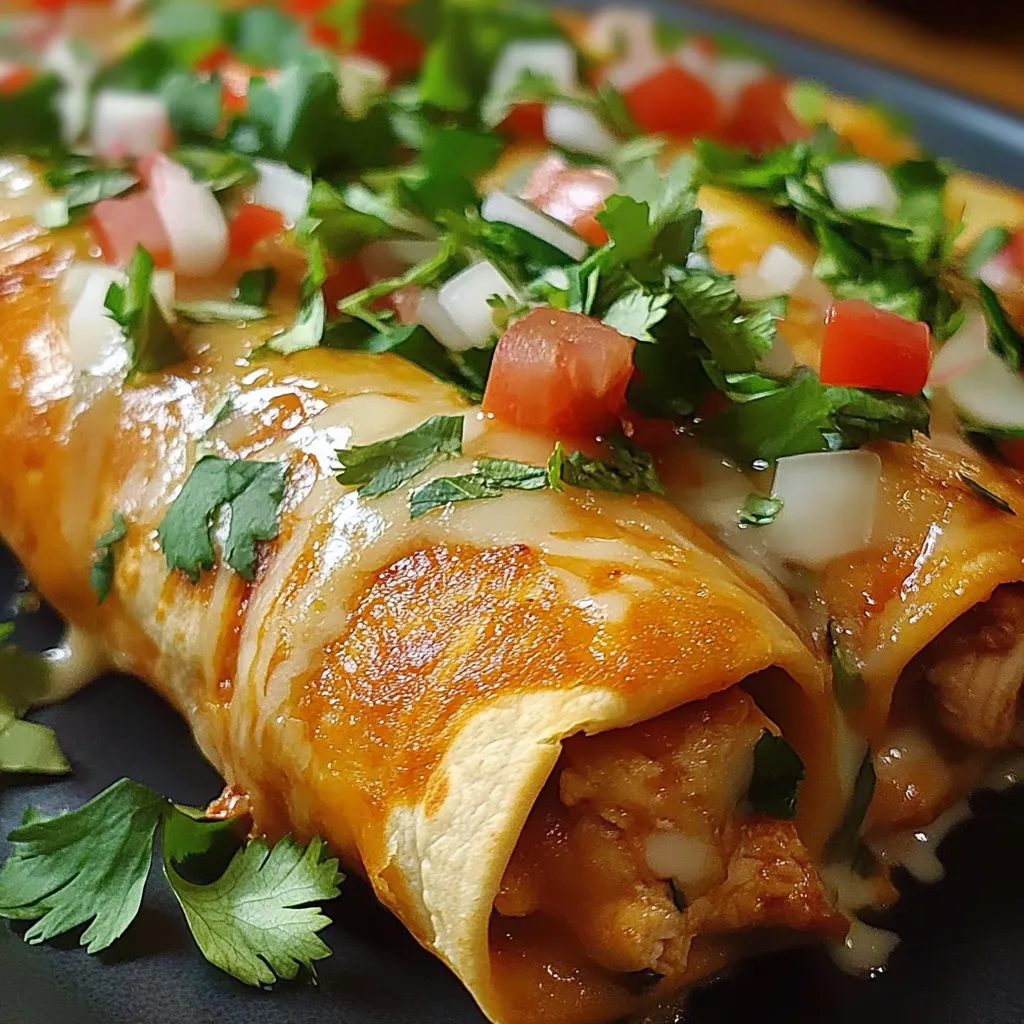
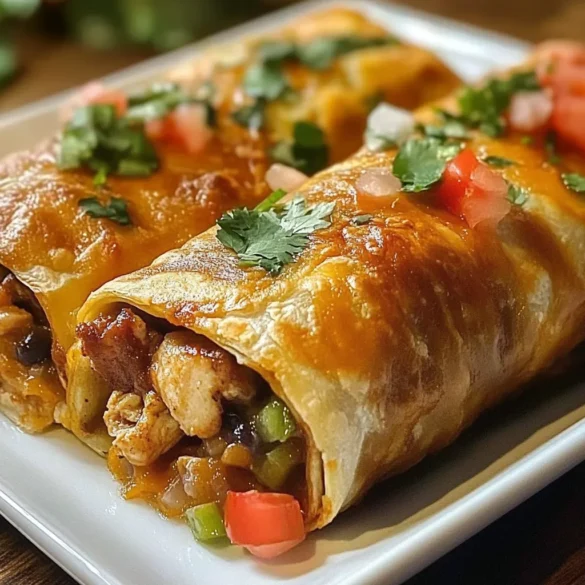
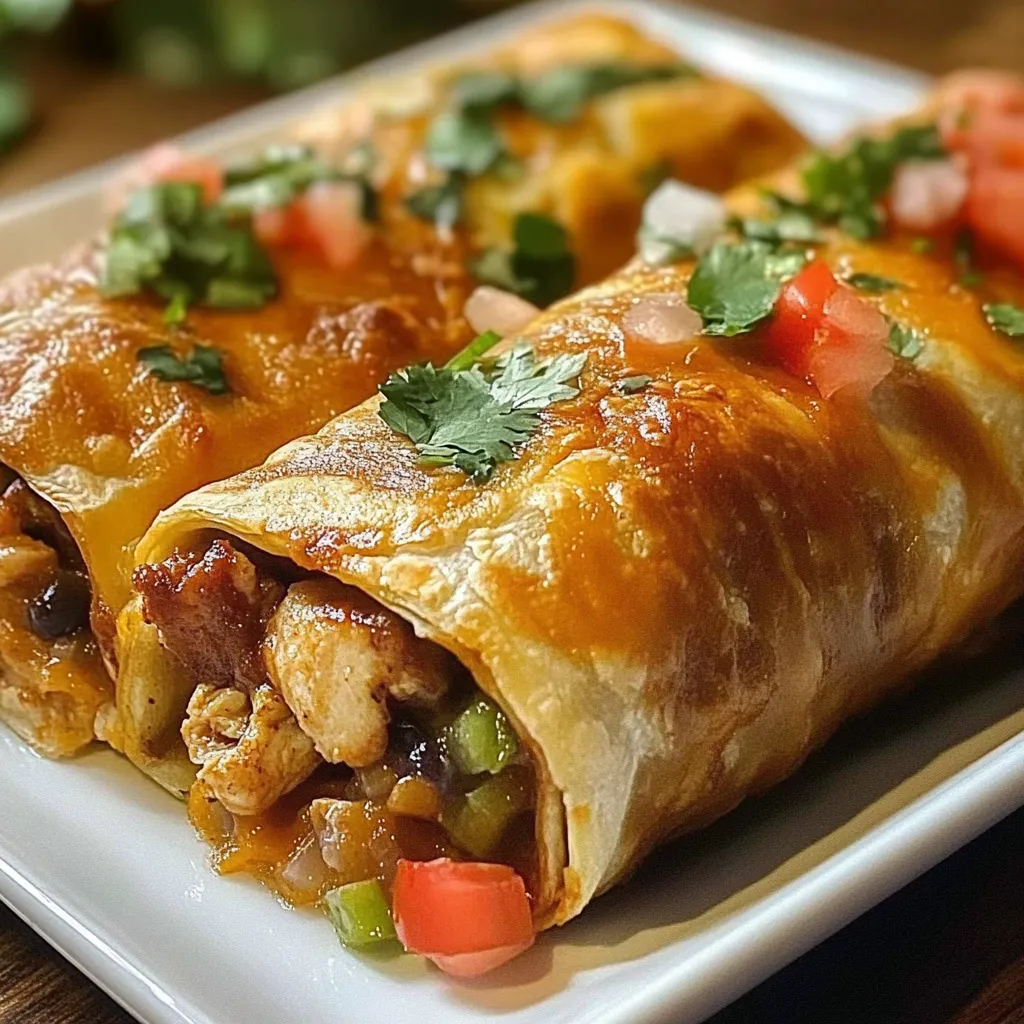
These legendary Chi-Chi’s Baked Chicken Chimichangas represent the pinnacle of Mexican-American comfort food at its most satisfying, featuring tender seasoned chicken wrapped in perfectly golden flour tortillas that achieve restaurant-quality crispiness through the magic of oven-baking rather than deep frying, all while maintaining the authentic flavors that made Chi-Chi’s a beloved dining destination, creating a dish that combines the indulgent satisfaction of crispy fried textures with the wholesome appeal of baked preparation, resulting in chimichangas that deliver maximum flavor impact with every single bite while honoring the traditional techniques and bold seasonings that define truly exceptional Mexican cuisine at its most craveable and crowd-pleasing best.
Why You’ll Love This Recipe
- Restaurant-quality results: Recreates the famous Chi-Chi’s experience at home
- Healthier preparation: Oven-baked instead of deep-fried for guilt-free indulgence
- Crispy exterior perfection: Golden tortillas with satisfying crunch in every bite
- Tender chicken filling: Perfectly seasoned protein that’s juicy and flavorful
- Make-ahead convenience: Prep components in advance for easy weeknight dinners
- Crowd-pleasing appeal: Family-friendly flavors that satisfy all taste preferences
- Customizable heat levels: Adjustable spice to accommodate different palates
- Budget-friendly ingredients: Affordable pantry staples create gourmet results
- Freezer-friendly storage: Batch preparation for convenient future meals
- Authentic Mexican flavors: Traditional seasonings and techniques for genuine taste
Ingredients
For the Seasoned Chicken Foundation
- Boneless chicken breasts – Premium protein that provides lean meat and tender texture
- Chicken thighs – Flavorful option that offers richness and stays moist during cooking
- Rotisserie chicken – Convenient choice that saves time while maintaining quality
- Grilled chicken strips – Pre-cooked option that reduces preparation time significantly
- Poached chicken breast – Gentle cooking method that ensures maximum tenderness
- Slow-cooked chicken – Fork-tender preparation that develops deep flavor complexity
- Smoked chicken – Intense flavor option that adds barbecue notes and aromatic appeal
- Leftover roasted chicken – Economical choice that transforms yesterday’s dinner into today’s feast
For the Authentic Seasoning Blend
- Chili powder – Essential spice that provides warmth and authentic Mexican flavor
- Ground cumin – Earthy addition that adds depth and traditional southwestern taste
- Paprika – Sweet spice that contributes color and mild pepper flavor enhancement
- Garlic powder – Aromatic element that provides savory depth without fresh preparation
- Onion powder – Concentrated flavor that adds sweetness and umami complexity
- Oregano – Herbal note that brings Mediterranean influence and fragrant appeal
- Cayenne pepper – Heat element that provides adjustable spice level control
- Smoked paprika – Intense option that adds barbecue flavor and smoky depth
For the Creamy Cheese Selection
- Monterey Jack cheese – Mild choice that melts beautifully and provides creamy texture
- Cheddar cheese – Sharp option that adds tangy flavor and classic appeal
- Mexican cheese blend – Authentic mixture that combines multiple varieties for complexity
- Pepper Jack cheese – Spicy alternative that provides heat and creamy richness
- Colby cheese – Smooth option that offers mild flavor and excellent melting properties
- Queso blanco – Traditional choice that provides authentic Mexican flavor profile
- Cream cheese – Rich addition that creates extra creaminess and binding properties
- Oaxaca cheese – Premium option that offers authentic flavor and superior melting
For the Fresh Vegetable Additions
- Yellow onions – Sweet base that provides aromatic foundation and caramelized flavor
- Bell peppers – Crisp addition that adds color contrast and sweet crunch
- Jalapeño peppers – Heat element that provides adjustable spice and fresh flavor
- Green chiles – Mild option that adds southwestern flair without overwhelming heat
- Roma tomatoes – Meaty choice that contributes acidity and fresh flavor balance
- Green onions – Mild bite that offers both color and gentle onion flavor
- Fresh cilantro – Bright herb that enhances Mexican flavors and adds freshness
- Corn kernels – Sweet element that provides texture contrast and natural sweetness
For the Perfect Tortilla Wrapper
- Large flour tortillas – Essential base that provides structure and golden exterior
- Burrito-size tortillas – Generous option that allows for substantial filling portions
- Whole wheat tortillas – Healthier choice that adds nutty flavor and fiber content
- Spinach tortillas – Colorful alternative that provides visual interest and mild flavor
- Homemade tortillas – Premium option that offers superior texture and authentic taste
- Soft taco tortillas – Smaller size perfect for individual portion control
- Low-carb tortillas – Diet-friendly option that reduces calories while maintaining structure
- Gluten-free tortillas – Inclusive choice that accommodates dietary restrictions
For the Rich Sauce Components
- Chicken broth – Flavorful liquid that adds depth and helps bind ingredients
- Sour cream – Tangy addition that provides richness and cooling properties
- Salsa verde – Green sauce that adds brightness and authentic Mexican flavor
- Enchilada sauce – Traditional choice that provides rich tomato-based flavor
- Hot sauce – Heat element that allows for customizable spice level adjustment
- Lime juice – Acid component that brightens flavors and adds citrus freshness
- Heavy cream – Rich option that creates luxurious texture and binding properties
- Tomato sauce – Base element that provides color and mild tomato flavor
For the Crispy Golden Coating
- Vegetable oil – Neutral option that promotes browning and crispy texture
- Olive oil – Flavorful choice that adds richness and Mediterranean notes
- Melted butter – Rich addition that provides flavor and promotes golden color
- Cooking spray – Convenient option that ensures even coating and prevents sticking
- Avocado oil – High-heat choice that provides neutral flavor and healthy fats
- Canola oil – Light option that allows tortillas to crisp without interference
- Coconut oil – Alternative choice that adds subtle flavor and promotes browning
- Ghee – Premium option that provides rich flavor and superior browning properties
For the Flavorful Garnish Selection
- Fresh salsa – Bright accompaniment that adds freshness and acidic contrast
- Guacamole – Creamy addition that provides richness and authentic Mexican appeal
- Sour cream – Cool garnish that balances heat and adds luxurious texture
- Shredded lettuce – Fresh crunch that adds color and cooling properties
- Diced tomatoes – Bright addition that provides acidity and fresh flavor
- Pickled jalapeños – Tangy heat that adds complexity and authentic flavor
- Mexican crema – Premium option that offers authentic flavor and smooth texture
- Cotija cheese – Traditional garnish that provides salty flavor and authentic appeal
For the Essential Equipment Collection
- Large mixing bowl – Spacious container for combining filling ingredients thoroughly
- Sharp chef’s knife – Precision tool for clean vegetable preparation and chicken cutting
- Cutting board – Stable surface that provides safe and efficient ingredient preparation
- Large skillet – Essential pan for cooking chicken and sautéing vegetables
- Baking sheet – Flat surface that promotes even cooking and golden browning
- Parchment paper – Non-stick surface that prevents sticking and ensures easy cleanup
- Pastry brush – Precision tool for applying oil coating evenly across tortillas
- Meat thermometer – Safety device that ensures proper internal cooking temperature
For the Professional Presentation Elements
- Individual serving plates – Personal portions that create restaurant-style presentation
- Garnish bowls – Small containers that hold accompaniments for self-service
- Serving spoons – Appropriate utensils for sauce and garnish application
- Lime wedges – Citrus accompaniment that allows guests to adjust acidity preference
- Fresh herb sprigs – Aromatic garnish that adds final color and fragrant appeal
- Decorative napkins – Quality linens that enhance the dining experience
- Warming tray – Temperature maintenance that keeps chimichangas hot during service
- Recipe cards – Accompanying information that shares preparation secrets with guests
Step-by-Step Instructions
Preparing the Seasoned Chicken Filling
- Season 2 pounds chicken breasts with salt, pepper, and Mexican spices thoroughly.
- Heat oil in large skillet over medium-high heat until shimmering.
- Cook chicken 6-7 minutes per side until golden and cooked through.
- Remove chicken and let rest 5 minutes before shredding into bite-sized pieces.
- Return shredded chicken to skillet with reserved juices for maximum flavor.
- Add diced onions and peppers, cooking until softened and fragrant.
Creating the Flavorful Vegetable Base
- Dice 1 large onion and 2 bell peppers into uniform small pieces.
- Sauté vegetables in same skillet until tender and lightly caramelized.
- Add minced garlic and cook 1 minute until fragrant and aromatic.
- Season with cumin, chili powder, and oregano for authentic flavor.
- Stir in diced tomatoes and green chiles for additional texture.
- Cook mixture until liquid evaporates and flavors concentrate.
Assembling the Cheese and Binding Elements
- Combine shredded Monterey Jack and cheddar cheeses in separate bowl.
- Add softened cream cheese to chicken mixture for creamy binding.
- Stir in half of shredded cheese blend while mixture is still warm.
- Add chicken broth gradually to achieve desired consistency and moisture.
- Season filling with salt, pepper, and lime juice to taste.
- Let filling cool slightly before assembling chimichangas for easier handling.
Mastering the Tortilla Wrapping Technique
- Warm large flour tortillas in microwave for 30 seconds to increase flexibility.
- Place ¾ cup filling in center of each tortilla, leaving border space.
- Fold bottom edge over filling, then fold in both sides securely.
- Roll tightly from bottom to top, ensuring seam side faces down.
- Secure with toothpicks if needed to prevent unrolling during baking.
- Brush all surfaces with oil or melted butter for golden browning.
Achieving Perfect Oven-Baked Crispiness
- Preheat oven to 425°F and line baking sheet with parchment paper.
- Place chimichangas seam-side down on prepared baking sheet.
- Brush tops and sides with oil for even browning and crispiness.
- Bake 15-20 minutes until golden brown and heated through.
- Flip carefully halfway through for even browning on all sides.
- Internal temperature should reach 165°F for food safety.
Creating the Authentic Presentation
- Let chimichangas rest 5 minutes before serving to prevent filling spillage.
- Remove toothpicks carefully and transfer to individual serving plates.
- Garnish with fresh salsa, guacamole, and sour cream dollops.
- Sprinkle with fresh cilantro and serve with lime wedges.
- Offer additional hot sauce for those who prefer extra heat.
- Serve immediately while tortillas are crispy and filling is hot.

Pro Tips
- Use rotisserie chicken for quick preparation without sacrificing flavor
- Warm tortillas before filling to prevent cracking during rolling
- Don’t overfill chimichangas as this makes sealing difficult
- Brush with oil or butter for restaurant-quality golden color
- Let filling cool slightly to prevent tortillas from becoming soggy
- Place seam-side down on baking sheet to maintain closure
- Flip halfway through baking for even browning on all sides
- Check internal temperature reaches 165°F for food safety
- Let rest before serving to prevent filling from spilling out
- Prepare components ahead and assemble just before baking
- Use parchment paper to prevent sticking and ensure easy cleanup
- Keep extra tortillas handy in case of tears during assembly
- Adjust spice levels gradually to accommodate different preferences
- Store leftover filling separately for easy reheating later
- Freeze assembled chimichangas before baking for meal prep convenience
- Double recipe easily for larger gatherings without compromising quality
- Serve with authentic Mexican sides for complete meal experience
- Use wooden spoons to prevent scratching non-stick surfaces
- Plan timing so chimichangas are served at optimal temperature
- Keep garnishes chilled until serving time for food safety
Variations and Creative Ideas
International Fusion Flavors
- Asian-Inspired Version: Add soy sauce, ginger, and sesame oil to filling.
- Italian Chimichanga: Include marinara sauce, mozzarella, and Italian herbs.
- Greek Style Variation: Add feta cheese, olives, and Mediterranean seasonings.
- Indian Spiced Version: Include curry powder, garam masala, and yogurt.
Protein Alternative Options
- Beef Chimichanga: Substitute ground beef or shredded beef for chicken.
- Pork Carnitas Style: Use slow-cooked pork shoulder for authentic flavor.
- Seafood Version: Add cooked shrimp or crab for elegant variation.
- Vegetarian Bean Style: Include black beans and vegetables for plant-based option.
Seasonal Adaptation Versions
- Fall Harvest Style: Add roasted butternut squash and sage.
- Summer Fresh Version: Include corn, zucchini, and fresh herbs.
- Winter Comfort Style: Add root vegetables and warming spices.
- Spring Garden Version: Include fresh peas and asparagus pieces.
Heat Level Variation Options
- Mild Family Style: Reduce spices and use mild peppers only.
- Medium Heat Version: Balance jalapeños with cooling ingredients.
- Spicy Fire Style: Add habaneros and extra cayenne pepper.
- Smoky Chipotle Version: Include chipotle peppers in adobo sauce.
Sauce and Topping Alternatives
- Green Chile Sauce: Top with roasted green chile sauce.
- Mole Style: Serve with rich chocolate-spiced mole sauce.
- Queso Blanco: Top with warm white cheese sauce.
- Salsa Verde: Serve with tangy tomatillo-based green salsa.
Frequently Asked Questions
Can I make these ahead of time?
Yes, assemble chimichangas completely and refrigerate up to 24 hours before baking. You can also freeze them for up to 3 months. Add 5-10 minutes to baking time if cooking from frozen.
How do I keep the tortillas from cracking?
Warm tortillas in the microwave for 20-30 seconds before filling to make them more pliable. You can also wrap them in damp paper towels while warming for extra flexibility.
Can I use corn tortillas instead of flour?
Flour tortillas work best for chimichangas because they’re more flexible and hold together better during baking. Corn tortillas tend to crack and don’t achieve the same crispy texture.
What’s the best way to reheat leftovers?
Reheat in a 350°F oven for 10-15 minutes to restore crispiness. Avoid microwaving as this will make the tortillas soggy rather than crispy.

Ingredients
For the Seasoned Chicken Filling:
- 2 pounds boneless, skinless chicken breasts
- 1 large yellow onion, diced
- 2 bell peppers, diced
- 3 cloves garlic, minced
- 1 can (4 oz) diced green chiles
- 2 tablespoons chili powder
- 1 tablespoon ground cumin
- 2 teaspoons paprika
- 1 teaspoon oregano
- ½ teaspoon cayenne pepper
- Salt and black pepper to taste
For the Creamy Cheese Mixture:
- 8 oz cream cheese, softened
- 2 cups shredded Monterey Jack cheese
- 1 cup shredded cheddar cheese
- ½ cup chicken broth
- 2 tablespoons fresh lime juice
- ¼ cup fresh cilantro, chopped
For the Assembly Components:
- 8 large flour tortillas (burrito size)
- ¼ cup vegetable oil or melted butter
- Toothpicks for securing (if needed)
For the Authentic Garnishes:
- 1 cup fresh salsa
- 1 cup guacamole
- ½ cup sour cream
- ¼ cup fresh cilantro, chopped
- Lime wedges for serving
- Shredded lettuce (optional)
Instructions
- Preheat oven to 425°F and line large baking sheet with parchment paper.
- Season chicken breasts with salt, pepper, and half of the spice mixture.
- Heat oil in large skillet over medium-high heat and cook chicken 6-7 minutes per side.
- Remove chicken, let rest 5 minutes, then shred into bite-sized pieces.
- In same skillet, sauté diced onion and bell peppers until softened.
- Add minced garlic and remaining spices, cooking 1 minute until fragrant.
- Return shredded chicken to skillet and add green chiles.
- Stir in softened cream cheese and half of shredded cheese blend.
- Add chicken broth gradually to achieve desired consistency.
- Season with lime juice, salt, and pepper to taste.
- Warm tortillas in microwave for 30 seconds to make pliable.
- Place ¾ cup filling in center of each tortilla.
- Fold bottom edge over filling, fold in sides, then roll tightly.
- Place seam-side down on prepared baking sheet.
- Brush all surfaces with oil or melted butter.
- Bake 15-20 minutes until golden brown, flipping halfway through.
- Let rest 5 minutes before serving.
- Garnish with salsa, guacamole, sour cream, and fresh cilantro.
- Serve immediately with lime wedges on the side.
- Store leftovers covered in refrigerator for up to 3 days.
Notes
- Use rotisserie chicken for quick preparation without sacrificing flavor
- Warm tortillas before filling to prevent cracking during rolling
- Don't overfill chimichangas as this makes sealing difficult
- Brush with oil or butter for restaurant-quality golden color
- Let filling cool slightly to prevent tortillas from becoming soggy
- Place seam-side down on baking sheet to maintain closure
- Flip halfway through baking for even browning on all sides
- Check internal temperature reaches 165°F for food safety
- Let rest before serving to prevent filling from spilling out
- Prepare components ahead and assemble just before baking
- Use parchment paper to prevent sticking and ensure easy cleanup
- Keep extra tortillas handy in case of tears during assembly
- Adjust spice levels gradually to accommodate different preferences
- Store leftover filling separately for easy reheating later
- Freeze assembled chimichangas before baking for meal prep convenience
- Double recipe easily for larger gatherings without compromising quality
- Serve with authentic Mexican sides for complete meal experience
- Use wooden spoons to prevent scratching non-stick surfaces
- Plan timing so chimichangas are served at optimal temperature
- Keep garnishes chilled until serving time for food safety

