

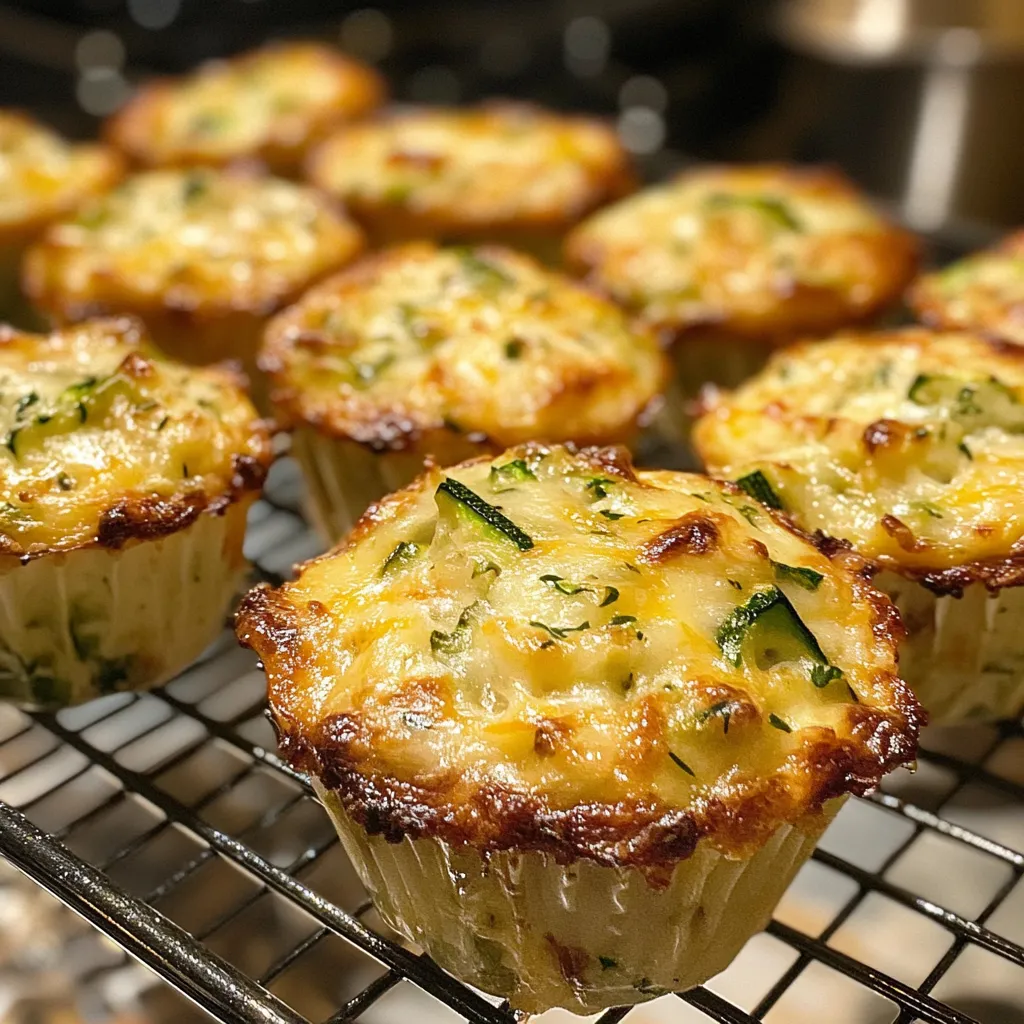
These golden-brown Chicken, Cheese, and Zucchini Muffins transform simple ingredients into an approachable, nutritious treat with their perfect balance of protein-rich chicken, fresh vegetables, and melted cheese. The dish showcases tender shredded chicken enveloped in a moist savory batter studded with grated zucchini and generous pockets of melted cheese, all baked to perfection with herbs sprinkled on top. Every bite delivers an exquisite combination of textures—from the satisfying crisp exterior to the fluffy interior packed with moist chicken and vegetables, all enhanced by aromatic herbs and savory cheese. This versatile creation exemplifies wholesome comfort food at its finest—ideal for breakfast on-the-go, packed lunches, post-workout snacks, or whenever you crave a protein-packed, vegetable-rich handheld treat.
Why You’ll Love This Recipe
- Nutritional powerhouse: Combines lean protein, vegetables, and dairy in one convenient package
- Make-ahead convenience: Perfect for busy professionals, can be prepped and frozen in advance
- Family-pleaser: Appeals to picky eaters while sneaking in vegetables
- Portable perfection: Creates mess-free, hand-held nutrition ideal for on-the-go eating
- Meal prep essential: Perfect for batch cooking and weekly meal planning
- Textural delight: Offers crispy exterior and moist, fluffy interior in each bite
- Simple technique: Eliminates the challenge of complicated cooking methods
- Customizable: Easily adapts to different flavor profiles and dietary preferences
- Complete nutrition: Delivers protein, vegetables, and complex carbs in one satisfying bite
- Freezer-friendly: Allows for long-term storage without sacrificing quality or taste
Ingredients
For the Muffin Base
- All-purpose flour – Creates the foundation with perfect structure and tender crumb
- Baking powder – Provides essential lift and light texture throughout
- Eggs – Binds ingredients while adding protein and richness
- Milk – Contributes moisture and creates perfect batter consistency
- Olive oil – Enhances moisture retention and adds subtle flavor depth
For the Filling
- Cooked shredded chicken – Delivers satisfying protein and savory base flavor
- Zucchini, grated – Adds moisture, nutrition, and subtle vegetable sweetness
- Cheddar cheese – Provides rich, melty pockets of flavor throughout
- Mozzarella cheese – Creates signature cheese pulls and creamy texture
- Parmesan cheese – Contributes nutty, savory depth and umami
For the Seasoning
- Garlic powder – Adds aromatic dimension and classic savory profile
- Onion powder – Enhances depth of flavor without texture interruption
- Italian seasoning – Creates aromatic herb blend throughout
- Salt and pepper – Balances and enhances all flavors
- Red pepper flakes – Provides optional heat for spice lovers
For Serving
- Sour cream – Offers creamy, tangy topping option
- Fresh herbs – Provides bright color and aromatic freshness
- Salsa – Creates zesty, fresh accompaniment
- Greek yogurt – Offers protein-rich alternative topping
- Hot sauce – Adds customizable heat level
Optional Enhancements
- Spinach, chopped – Introduces additional vegetables and nutrients
- Bell peppers, diced – Provides sweet crunch and vibrant color
- Sun-dried tomatoes – Delivers concentrated umami and tangy notes
- Green onions – Adds mild onion flavor and bright color contrast
- Fresh herbs – Enhances with basil, chives, or parsley notes
- Feta cheese – Offers tangy alternative to traditional cheeses
- Bacon crumbles – Introduces smoky flavor and textural contrast
- Jalapeños – Creates spicy kick and southwestern flair
- Greek yogurt – Replaces some fat while maintaining moisture
- Whole wheat flour – Provides nutritional boost and nutty texture
Step-by-Step Instructions
Preparing the Ingredients
Begin by preheating your oven to 375°F (190°C), ensuring it reaches the proper temperature for evenly baking the muffins to golden perfection. This initial temperature setting is crucial for creating the right balance between crisp exterior and moist interior.
Line a standard 12-cup muffin tin with paper liners or spray generously with non-stick cooking spray, ensuring complete coverage to prevent sticking and ease removal later. For best results, use high-quality liners with non-stick properties.
Prepare the zucchini by washing thoroughly, trimming the ends, and grating on the medium holes of a box grater. Place the grated zucchini in a clean kitchen towel and squeeze firmly to remove excess moisture. This crucial step prevents soggy muffins and concentrates the zucchini flavor.
In a large mixing bowl, whisk together 2 cups all-purpose flour, 1 tablespoon baking powder, 1 teaspoon salt, 1 teaspoon garlic powder, 1 teaspoon onion powder, and 2 teaspoons Italian seasoning until well combined. The thorough mixing of dry ingredients ensures even distribution of leavening and seasonings.
In a separate medium bowl, beat 3 large eggs until lightly frothy, then add 1 cup milk and ¼ cup olive oil, whisking until completely incorporated. This wet mixture provides the perfect liquid ratio for moist, tender muffins.
Creating the Muffin Batter
Add 2 cups of finely shredded cooked chicken to the wet ingredients, stirring gently to incorporate evenly. For best flavor and texture, use a combination of white and dark meat chicken that has been seasoned while cooking.
Fold in the squeezed zucchini (approximately 2 cups before squeezing, 1 cup after) to the wet mixture, distributing evenly throughout the batter. The zucchini adds essential moisture and nutritional value while remaining subtle in flavor.
Gently combine 1 cup shredded cheddar cheese, ½ cup shredded mozzarella, and ¼ cup grated Parmesan into the chicken-zucchini mixture. This cheese blend provides the perfect balance of flavor and meltability for pockets of cheesy goodness.
Pour the wet ingredients into the dry ingredients, using a spatula to fold just until combined. Avoid overmixing, which can develop gluten and result in tough muffins. Some small lumps are preferable to overmixing.
If using additional mix-ins like bell peppers, sun-dried tomatoes, or bacon, fold them in now with minimal stirring to maintain batter tenderness. Limit additional mix-ins to a total of ½ cup to maintain proper batter consistency.
Baking and Serving
Using an ice cream scoop or large spoon, fill each muffin cup approximately ¾ full with batter. This measurement ensures proper rising without overflow and creates perfectly domed tops.
If desired, sprinkle an additional ¼ cup of shredded cheese over the tops of the muffins to create a beautiful golden-brown cheesy crust during baking. This extra step adds visual appeal and textural contrast.
Bake in the preheated oven for 20-22 minutes, until the muffins are golden brown and a toothpick inserted into the center comes out clean with a few moist crumbs. The internal temperature should reach 205°F (96°C) when fully baked.
Allow the muffins to cool in the tin for 5 minutes to set their structure, then transfer to a wire rack to cool for an additional 10 minutes. This cooling period allows the texture to stabilize and prevents gumminess when eating.
Serve warm for the best flavor and texture, when the cheese is still slightly melty. These muffins pair beautifully with a side salad for a complete meal or can be enjoyed on their own as a protein-rich snack.
Store completely cooled muffins in an airtight container in the refrigerator for up to 4 days. For longer storage, wrap individually in plastic wrap and freeze for up to 3 months, with minimal loss of quality.
Reheat refrigerated muffins in a microwave for 20-30 seconds or in a 350°F (175°C) oven for 5-7 minutes until warmed through. From frozen, microwave for 45-60 seconds or bake for 10-12 minutes.
Variations and Enhancements
Flavor Variations
Mediterranean Muffins: Incorporate chopped Kalamata olives, crumbled feta cheese, dried oregano, and a touch of lemon zest for a Greek-inspired variation that pairs beautifully with a simple cucumber salad.
Buffalo Chicken Muffins: Mix shredded chicken with buffalo sauce before adding to the batter, then use blue cheese instead of Parmesan, adding celery seed for an authentic wing-inspired flavor profile. Serve with blue cheese dressing for dipping.
Ranch-Style Muffins: Add a packet of ranch seasoning mix to the dry ingredients, then incorporate bacon bits and chopped fresh dill for a crowd-pleasing flavor reminiscent of popular ranch snacks with an elevated homemade touch.
Tex-Mex Muffins: Replace Italian seasoning with taco seasoning, add diced green chiles, use pepper jack cheese, and mix in chopped cilantro. Serve with salsa, guacamole, and sour cream for a Mexican-inspired variation.
Dietary Adaptations
Gluten-Free Option: Substitute traditional all-purpose flour with a high-quality gluten-free flour blend that contains xanthan gum. Add an additional egg to improve binding and structure for those with wheat sensitivities or celiac disease.
Lower-Carb Version: Reduce flour to 1 cup and add ½ cup almond flour plus ¼ cup coconut flour for a lower-carbohydrate option that maintains satisfying texture while reducing the glycemic impact.
Dairy-Free Alternative: Use unsweetened almond milk instead of regular milk and substitute dairy-free cheese alternatives. Focus on enhancing flavor with additional herbs and seasonings to compensate for the missing dairy richness.
Extra Protein Boost: Add ¼ cup unflavored protein powder to the dry ingredients and increase milk by 2 tablespoons to maintain moisture while significantly increasing the protein content for athletes or fitness enthusiasts.
Kid-Friendly Options
Mini Muffins: Adapt the recipe to mini muffin tins for two-bite portions perfect for small hands and lunchboxes. Reduce baking time to 12-15 minutes and consider adding small cheese cubes in the center for a fun melty surprise.
Pizza Muffins: Create a familiar flavor profile by adding pepperoni pieces, using pizza sauce instead of some of the oil, and topping with a combination of mozzarella and a sprinkle of oregano before baking for kid-approved pizza flavor.
Cheesy Chicken Nugget Muffins: Reduce the zucchini and add small cubes of cheese scattered throughout the batter to create pockets of melted cheese similar to chicken nuggets, appealing to children while maintaining nutritional value.
Hidden Veggie Version: Process the zucchini plus additional vegetables like carrots, cauliflower, or spinach in a food processor until very fine, then incorporate into the batter for maximum nutrition with minimal detectable vegetable presence.
Entertaining Ideas
Muffin Flight: Prepare mini versions of several different variations and serve as a muffin tasting flight with coordinating dipping sauces for an impressive brunch or appetizer presentation.
Brunch Centerpiece: Arrange full-sized muffins in a spiral pattern on a large round platter with small bowls of various accompaniments in the center for a beautiful self-serve brunch display.
Party Platter: Cut regular-sized muffins in half and arrange on a large platter with decorative toothpicks for easy finger-food at cocktail parties or receptions. Garnish with fresh herb sprigs for visual appeal.
Holiday Brunch Tree: Arrange muffins in a Christmas tree formation on a large rectangular platter, using fresh herb sprigs as “branches” between layers and a star-shaped piece of cheese on top for festive holiday gatherings.
Storage and Make-Ahead Advice
Short-Term Storage
Store completely cooled muffins in an airtight container lined with paper towels to absorb any excess moisture in the refrigerator for up to 4 days.
Separate layers with parchment paper to prevent sticking and maintain the integrity of the muffin tops if stacking is necessary.
For optimal freshness, avoid storing with strong-smelling foods as the muffins can absorb odors from the refrigerator environment.
Allow refrigerated muffins to come to room temperature before reheating to ensure even warming and prevent soggy exteriors.
If storing unbaked batter, keep tightly covered in the refrigerator for no more than 24 hours to maintain leavening effectiveness.
Reheating Guidelines
Reheat individual muffins in a microwave for 20-30 seconds on medium power until just warmed through but not overheated or dried out.
For superior texture restoration, reheat in a 350°F (175°C) oven for 5-7 minutes until warmed throughout with a slightly crisp exterior.
To maintain moisture during reheating, place a small heat-safe cup of water in the microwave alongside the muffin or cover with a damp paper towel.
Avoid reheating multiple times as this diminishes quality and can lead to food safety concerns; only reheat what will be immediately consumed.
For best results when serving a crowd, reheat multiple muffins in a single layer on a baking sheet rather than stacking to ensure even warming.
Make-Ahead Strategy
These muffins are ideal for meal prep, perfect for busy weekdays or advance party preparation.
Prepare muffin batter up to the point of baking, then refrigerate in a covered bowl for up to 24 hours before baking fresh.
For best results when preparing batter ahead, bring the mixture to room temperature for 15-20 minutes before filling muffin cups and baking.
Increase baking time by approximately 2-3 minutes when cooking from refrigerated batter to ensure the center is fully heated.
Consider partially baking muffins (about 80% done) earlier in the day, then finishing just before serving for the freshest result with minimal last-minute work.
Freezing Guidelines
These muffins freeze beautifully in both unbaked and baked states for convenient meal preparation.
To freeze unbaked portioned batter, line muffin cups with paper liners, fill with batter, and freeze until solid. Transfer frozen batter cups to freezer bags and store for up to 1 month.
When ready to bake from frozen unbaked batter, place in muffin tins and bake directly from frozen, adding approximately 5-7 minutes to the normal baking time.
For baked muffins, cool completely, then freeze in single layers on a baking sheet before transferring to freezer-safe containers or bags.
Store frozen baked muffins for up to 3 months without significant quality loss when properly wrapped to prevent freezer burn.
Thaw frozen muffins overnight in the refrigerator for best texture, or defrost at room temperature for approximately 1 hour.
For emergency defrosting, use the defrost setting on a microwave for 1-2 minutes until thawed but not hot, then warm according to reheating guidelines.
Lunchbox and Meal Prep Tips
For meal prep, make a double batch on Sunday for easy grab-and-go breakfasts and lunches throughout the week.
Pair with cut fruit and yogurt for a balanced breakfast or with a side salad for a complete lunch.
Package individual muffins with complementary sides in compartmentalized containers for ready-to-grab complete meals.
For children’s lunchboxes, wrap muffins in parchment paper or foil to protect from being crushed and to help retain moisture.
Keep muffins cold in lunchboxes by including a small ice pack, especially important for food safety with the chicken and cheese ingredients.
Entertainment Value and Presentation
These versatile muffins offer numerous opportunities to enhance your entertaining presentation:
Serving Suggestions: Present on a rustic wooden board with small bowls of complementary dipping sauces like herb-infused sour cream or spicy aioli.
Visual Enhancements: Cut muffins in half and arrange cut-side up to showcase the beautiful interior texture and colorful ingredients.
Garnish Options: Top with tiny sprigs of fresh herbs, a small slice of zucchini, or a light dusting of paprika for color contrast and visual appeal.
Individual Portions: Serve one muffin per person on small plates with a coordinating side salad dressed with complementary vinaigrette.
Menu Pairings: Complement with a light soup for lunch gatherings or a fruit salad for brunch events to create a balanced meal.
Theme Development: Create a savory muffin bar with several varieties and accompanying sauces for an interactive brunch experience.
Timing Perfection: Schedule baking to ensure muffins are served warm with cheese at ideal melting point, about 10-15 minutes after removal from oven.
Presentation Ware: Serve in a cloth-lined basket with the cloth folded over to keep muffins warm until serving time.
Color Enhancement: Choose colorful muffin liners that complement your table setting or event theme for added visual interest.
Interactive Elements: Provide flavor-infused butters or spreads to allow guests to customize their muffin experience.
Frequently Asked Questions
Why did my muffins turn out dense instead of fluffy?
Dense muffins typically result from one of several causes: overmixing the batter, which develops too much gluten; inadequate leavening due to expired baking powder; or incorrect measurement of dry ingredients. For perfect texture, mix the batter only until ingredients are just combined, with some small lumps remaining. Ensure your baking powder is fresh (replace every 6-12 months) and use the proper measurement technique for flour—spoon it lightly into measuring cups and level with a knife rather than scooping directly with the measuring cup, which compacts the flour. Additionally, too much zucchini moisture can create density, so don’t skip the step of squeezing excess water from the grated zucchini. Finally, overfilling the muffin cups beyond ¾ full can cause improper rising and dense results.
How can I prevent my zucchini muffins from becoming soggy?
Excess moisture is the primary cause of soggy muffins. The most crucial step is properly preparing the zucchini by thoroughly squeezing out excess moisture after grating. Place grated zucchini in a clean kitchen towel, cheesecloth, or several layers of paper towels and squeeze firmly until no more liquid can be extracted. Second, ensure your oven is fully preheated before baking, as a hot oven immediately sets the exterior, creating a barrier against interior moisture. Third, avoid overmixing the batter, which can break down the structure needed to absorb moisture. Fourth, allow muffins to cool in the tin for only 5 minutes before transferring to a wire rack—cooling too long in the pan causes condensation and sogginess. Finally, store completely cooled muffins with paper towels in the container to absorb any moisture released during storage.
Can I use leftover rotisserie chicken in this recipe?
Rotisserie chicken is an excellent choice for these muffins! It provides convenient, pre-cooked meat with exceptional flavor that enhances the final result. For best results, remove the skin (which can create greasy spots in the muffins) and shred the meat finely using two forks or pulse briefly in a food processor. A combination of both white and dark meat creates the best flavor and moisture balance. If your rotisserie chicken is heavily seasoned, you might adjust the added seasonings in the recipe accordingly. To maximize taste and texture, bring the shredded chicken to room temperature before incorporating it into the batter. Rotisserie chicken typically yields about 3-4 cups of shredded meat, so one chicken should provide enough for a double batch of muffins. Leftover rotisserie chicken can be frozen for future batches if properly wrapped and stored.
What’s the best way to ensure even distribution of ingredients throughout the muffins?
Achieving even distribution requires attention to several details. First, chop or shred all ingredients to similarly small sizes—large chunks of any single ingredient can sink or create uneven texture. For chicken, shred finely rather than chunk for more consistent distribution. Second, toss zucchini and chicken with a tablespoon of the dry flour mixture before adding to the wet ingredients; this coating helps prevent ingredients from sinking during baking. Third, use a folding technique rather than stirring when combining ingredients, using a wide rubber spatula to gently lift from the bottom and fold over the top. Fourth, avoid excessive mixing once all ingredients are combined, as this can cause heavier elements to sink. Finally, if adding cheese internally rather than just on top, use freshly grated cheese rather than pre-shredded, as the anti-caking agents in pre-shredded varieties can affect how they incorporate into the batter.
How can I adapt this recipe for dietary restrictions?
These muffins can be modified for various dietary needs while maintaining excellent flavor and texture. For gluten-free requirements, substitute a high-quality 1:1 gluten-free flour blend (those containing xanthan gum work best) and add an extra egg for binding. For dairy-free needs, replace milk with unsweetened almond, oat, or coconut milk, and use dairy-free cheese alternatives designed for melting. For lower-carb or keto adaptations, reduce flour to ¾ cup and add 1 cup of almond flour plus ¼ cup coconut flour, increasing eggs to 4 for proper binding. To reduce fat content, replace half the oil with unsweetened applesauce or Greek yogurt, and use reduced-fat cheese (though this will affect meltability). For egg allergies, substitute each egg with either ¼ cup unsweetened applesauce plus ½ teaspoon additional baking powder, or a commercial egg replacer following package directions. Always note that while adaptations can accommodate restrictions, texture and flavor will vary somewhat from the original recipe.

Ingredients
For the Muffins:
2 cups all-purpose flour
1 tablespoon baking powder
1 teaspoon salt
1 teaspoon garlic powder
1 teaspoon onion powder
2 teaspoons Italian seasoning
¼ teaspoon black pepper
3 large eggs
1 cup milk
¼ cup olive oil
2 cups cooked chicken, finely shredded
2 cups zucchini, grated and excess moisture squeezed out (yields about 1 cup after squeezing)
1 cup cheddar cheese, shredded
½ cup mozzarella cheese, shredded
¼ cup Parmesan cheese, grated
¼ teaspoon red pepper flakes (optional)
For Serving:
Sour cream
Fresh herbs (chives, parsley, dill)
Salsa
Hot sauce
Greek yogurt
Instructions
Preheat oven to 375°F (190°C) and line a muffin tin with paper liners or spray with cooking spray.
Grate zucchini and squeeze out excess moisture using a clean kitchen towel.
In a large bowl, combine flour, baking powder, salt, garlic powder, onion powder, Italian seasoning, and black pepper.
In a separate bowl, whisk eggs, milk, and olive oil until well combined.
Add shredded chicken and squeezed zucchini to the wet ingredients and mix well.
Fold in cheddar, mozzarella, and Parmesan cheeses, reserving some for topping if desired.
Add wet ingredients to dry ingredients and fold gently until just combined. Do not overmix.
Fill muffin cups about ¾ full with batter.
Sprinkle reserved cheese on top if desired.
Bake for 20-22 minutes until golden brown and a toothpick inserted comes out clean.
Cool in the tin for 5 minutes, then transfer to a wire rack to cool for another 10 minutes.
Serve warm with desired accompaniments.
Notes
Squeeze zucchini thoroughly to prevent soggy muffins
Use rotisserie chicken for convenience and added flavor
Bring refrigerated ingredients to room temperature for best results
Shred your own cheese for better melting properties
Don't overmix the batter once wet and dry ingredients are combined
Test for doneness with a toothpick in the center of a muffin
Allow muffins to cool slightly before removing from tin
For extra savory flavor, add 1 teaspoon of Dijon mustard to wet ingredients
Store properly cooled muffins in a single layer initially to prevent crushing
When reheating, add a small drop of water to the microwave to maintain moisture
For meal prep, cool completely before storing to prevent condensation
Line storage containers with paper towels to absorb excess moisture
For extra protein, add 2 tablespoons of hemp or chia seeds to the batter
Allow batter to rest for 10 minutes before baking for more tender muffins
For best flavor, use a combination of white and dark chicken meat
Experiment with cheese combinations based on what needs to be used up
For special occasions, top with a small dollop of herbed cream cheese before serving
Taste batter (before adding raw eggs) to adjust seasonings to your preference
When doubling the recipe, mix each batch separately for best texture
Freeze individual portions for grab-and-go breakfasts and lunches