
")
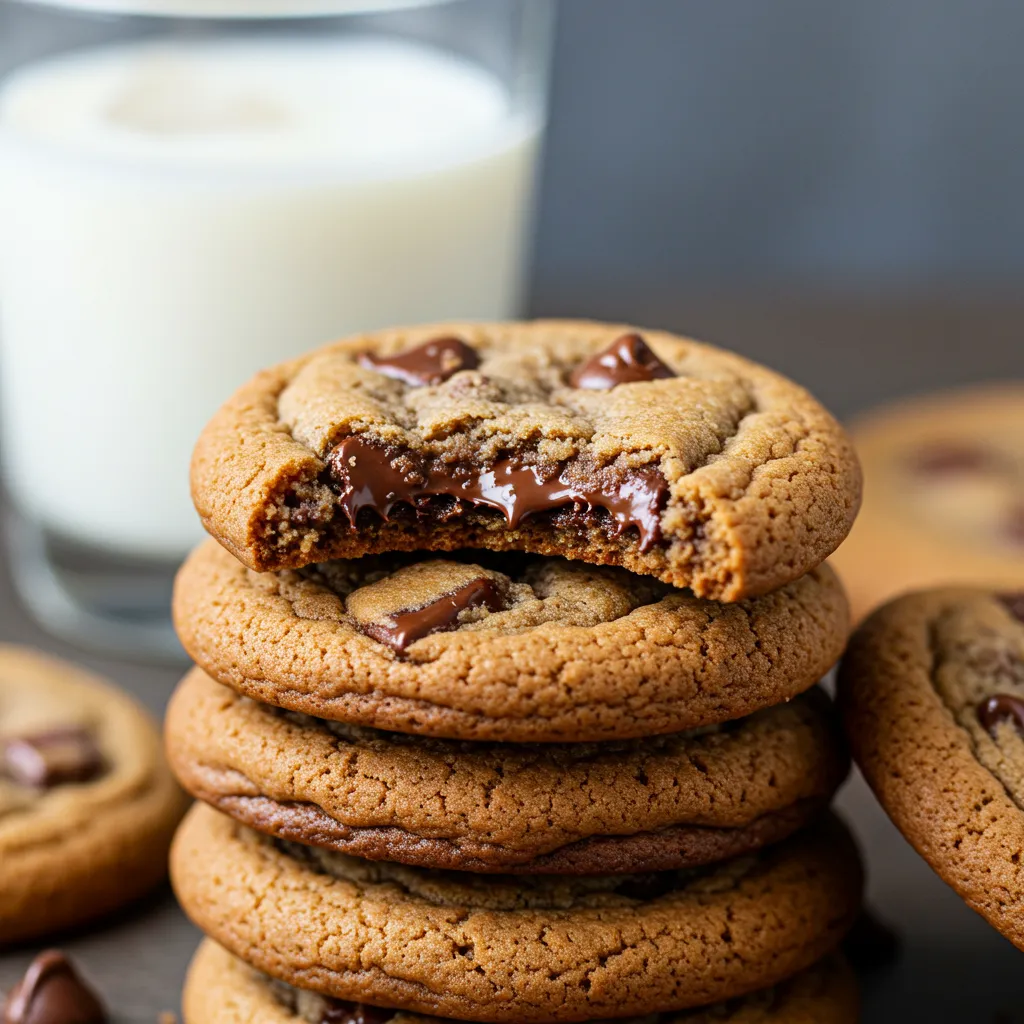
This timeless Classic Chocolate Chip Cookie recipe creates perfectly balanced cookies with crisp edges and soft, chewy centers. Loaded with melty chocolate chips and featuring that distinctive butterscotch-like flavor from brown sugar, these homemade cookies are far superior to anything store-bought. Whether you’re making them for an after-school treat, holiday cookie exchange, or midnight snack, this foolproof recipe delivers consistent, crowd-pleasing results every time.
Why You’ll Love This Recipe
- Perfect texture balance: Crispy edges with a soft, chewy center that stays that way for days
- Customizable: Easy to adapt with different mix-ins or dietary substitutions
- No special equipment needed: Makes great cookies with just basic kitchen tools
- Make-ahead friendly: Dough can be refrigerated or frozen for convenience
- Crowd-pleaser: Appeals to chocolate lovers of all ages
- Versatile treat: Ideal for everything from lunch boxes to elegant dessert platters
- Consistent results: Reliable recipe that works every time, even for beginners
Ingredients
For the Cookie Dough
- All-purpose flour – Provides structure and helps cookies hold their shape
- Baking soda – Leavening agent that helps cookies rise and brown properly
- Salt – Enhances flavors and balances sweetness
- Unsalted butter – Creates tender texture and rich flavor
- Brown sugar – Adds moisture and a deep caramel flavor
- Granulated sugar – Helps create crisp edges and proper spread
- Eggs – Bind ingredients and add structure
- Vanilla extract – Enhances flavor and complements chocolate
- Chocolate chips – The star ingredient that provides melty chocolate pockets
- Chopped nuts (optional) – Adds texture and complementary flavor
Step-by-Step Instructions
Preparing the Cookie Dough
Begin by measuring all ingredients accurately using measuring cups and spoons or, ideally, a kitchen scale for precision. Room temperature ingredients, especially butter and eggs, incorporate more evenly and create a better cookie texture.
Preheat your oven to 375°F (190°C) and line baking sheets with parchment paper or silicone baking mats. This prevents sticking and makes cleanup easier.
In a medium bowl, whisk together 2¼ cups all-purpose flour, 1 teaspoon baking soda, and 1 teaspoon salt. Whisking dry ingredients separately ensures they’re evenly distributed throughout the dough, preventing pockets of salt or baking soda in the finished cookies.
In a large bowl using a hand mixer (or in the bowl of a stand mixer fitted with the paddle attachment), cream 1 cup (2 sticks) of softened unsalted butter with ¾ cup granulated sugar and ¾ cup packed brown sugar until light and fluffy, about 2-3 minutes. This step is crucial as it creates tiny air pockets in the dough that help the cookies rise properly.
Add 2 large eggs, one at a time, beating well after each addition. Mix in 2 teaspoons of vanilla extract. Scrape down the sides of the bowl as needed to ensure everything is well incorporated.
With the mixer on low speed, gradually add the dry ingredients to the wet ingredients, mixing just until combined. Overmixing at this stage can develop too much gluten, resulting in tough cookies.
Gently fold in 2 cups of chocolate chips and 1 cup of chopped nuts (if using) with a rubber spatula until evenly distributed throughout the dough. For the best flavor and texture, use high-quality chocolate chips or chunks, or even chop your favorite chocolate bar into pieces.
Baking the Cookies
For conventional drop cookies, use a cookie scoop or spoon to portion dough into 2-tablespoon mounds, placing them about 2 inches apart on the prepared baking sheets. This spacing allows room for the cookies to spread as they bake.
For more even cooking and professional-looking cookies, lightly roll each scoop of dough between your palms to create smooth balls. This extra step takes just seconds but creates more uniform cookies.
For thicker, chewier cookies, refrigerate the dough for at least 30 minutes (or up to 72 hours) before baking. This allows the flour to hydrate fully and prevents excessive spreading during baking.
Bake in the preheated oven for 9-11 minutes, or until the edges are golden but the centers still look slightly underbaked. For perfect cookies, rotate the baking sheet halfway through baking to ensure even browning.
Remove from the oven when cookies still look slightly underdone in the middle, as they will continue cooking on the hot baking sheet. Cookies that look completely done in the oven often become overbaked and crisp once cooled.
Allow cookies to cool on the baking sheet for 5 minutes before transferring to a wire rack to cool completely. This brief rest on the hot sheet allows them to set up without breaking when moved.
For a professional touch and enhanced appearance, press a few additional chocolate chips into the tops of the cookies immediately after removing from the oven, while they’re still soft.
Storing and Serving
Once completely cooled, store cookies in an airtight container at room temperature for up to 5 days. Adding a slice of bread to the container helps keep cookies soft longer.
For the most impressive presentation, serve cookies while still slightly warm, when the chocolate chips are melty and the aroma is most enticing.
Pair these classic cookies with:
- A cold glass of milk for the traditional experience
- Coffee or hot chocolate for a cozy treat
- Vanilla ice cream for an elevated dessert
- Fresh berries for a touch of brightness
Pro Tips
- Use a combination of chocolate chip types (milk, semi-sweet, dark) for more complex flavor
- For perfectly round cookies, use a round cookie cutter slightly larger than the baked cookie to gently swirl around each hot cookie immediately after baking
- Add 1/4 teaspoon of espresso powder to intensify the chocolate flavor without adding coffee taste
- Brown the butter before using for a deeper, nutty flavor profile
- Allow baking sheets to cool completely between batches, or run them under cold water and dry thoroughly
- Sprinkle cookies with flaky sea salt just before baking for a gourmet sweet-salty contrast
- For a softer cookie, increase brown sugar and decrease white sugar proportionally
- For a crispier cookie, do the opposite: increase white sugar and decrease brown sugar
Variations and Creative Ideas
Flavor Variations
Triple Chocolate Chip Cookies: Add ¼ cup cocoa powder to the dry ingredients and use a mix of milk, semi-sweet, and white chocolate chips for the ultimate chocolate experience.
Brown Butter Chocolate Chip Cookies: Brown the butter before creaming with sugars for a nutty, toffee-like flavor that elevates the classic cookie to gourmet status.
Chocolate Chip Cookie Bars: Press the dough into a 9×13-inch baking pan and bake for 20-25 minutes for easy cookie bars perfect for potlucks and bake sales.
Salted Caramel Chocolate Chip Cookies: Fold in bits of soft caramel candy with the chocolate chips and top each cookie with a sprinkle of flaky sea salt before baking.
Dietary Adaptations
Gluten-Free Version: Substitute a high-quality gluten-free flour blend in equal measure to the all-purpose flour. Adding ¼ teaspoon xanthan gum helps improve texture if your blend doesn’t include it.
Vegan Option: Replace butter with plant-based butter alternative, use flax eggs (1 tablespoon ground flaxseed mixed with 3 tablespoons water per egg), and select dairy-free chocolate chips.
Reduced Sugar Version: Reduce both sugars by up to ¼ cup total and consider using mini chocolate chips which distribute more evenly, giving the perception of sweetness in every bite with less actual chocolate.
Mix-In Ideas
Get creative with these easy add-ins (use about ½ cup unless noted):
- Dried cranberries for tartness
- Shredded coconut for tropical flavor
- Butterscotch chips for extra sweetness
- Chopped pretzels for a salty crunch
- Orange or lemon zest (1-2 teaspoons) for citrus notes
- Cinnamon chips for warmth
- Toffee bits for buttery caramel notes
- Mint chocolate chips for a fresh twist
Storage and Make-Ahead Advice
Room Temperature Storage: Store baked cookies in an airtight container at room temperature for up to 5 days. Place a piece of bread in the container to help keep cookies soft.
Freezer Storage:
- Baked cookies can be frozen for up to 3 months. Place in layers separated by parchment paper in an airtight container.
- Cookie dough balls can be frozen on a baking sheet, then transferred to a freezer bag for up to 3 months. Bake straight from frozen, adding 1-2 minutes to the baking time.
Make-Ahead Options:
- Prepare the dough up to 3 days ahead and refrigerate, covered tightly with plastic wrap.
- Portion the dough into balls, refrigerate for 1 hour, then freeze for longer storage.
- Make a double batch and freeze half for unexpected guests or late-night cravings.
Not Recommended: Storing baked cookies in the refrigerator, as this actually accelerates staleness.
Kid-Friendly Involvement
This classic recipe offers many opportunities for children to participate:
Measuring Ingredients: Let kids measure dry ingredients, practicing math skills and learning about fractions.
Mix-Ins Station: Create a mix-in bar where children can customize their own small batch of cookie dough with different chips, nuts, or candies.
Cookie Scooping: Children can use a cookie scoop or spoon to portion dough onto baking sheets, practicing coordination and learning about spacing.
Shape Variations: Show kids how to roll dough into balls or flatten slightly for different cookie textures.
Taste Testing: Involve children in the important job of quality control – sampling cookies once they’ve cooled enough to handle safely.
Frequently Asked Questions
Why did my cookies spread too much? Cookies spread excessively when butter is too soft, there’s too little flour, or the dough is too warm. Chill dough for at least 30 minutes before baking to prevent spreading.
Why are my cookies too cakey? Cakey texture usually results from too much egg or leavening. Make sure your measurements are accurate and avoid overbeating the eggs.
Can I reduce the sugar in this recipe? Sugar provides more than sweetness – it affects texture and spread. You can reduce by up to ¼ cup total, but more will significantly alter the cookie’s characteristics.
How do I keep cookies soft for days? Store with a piece of bread, slightly underbake them initially, use more brown sugar than white, and avoid overbaking.
Can I use salted butter instead of unsalted? Yes, but reduce the added salt in the recipe by about ¼ teaspoon per stick of butter used.
")
Ingredients
- 2¼ cups all-purpose flour
- 1 teaspoon baking soda
- 1 teaspoon salt
- 1 cup (2 sticks) unsalted butter, softened
- ¾ cup granulated sugar
- ¾ cup packed brown sugar
- 2 large eggs, room temperature
- 2 teaspoons vanilla extract
- 2 cups semi-sweet chocolate chips
- 1 cup chopped nuts (optional)
Instructions
- Preheat oven to 375°F (190°C) and line baking sheets with parchment paper.
- Whisk together flour, baking soda, and salt in a medium bowl.
- Cream butter and both sugars until light and fluffy, about 2-3 minutes.
- Add eggs one at a time, then vanilla, mixing well after each addition.
- Gradually add dry ingredients, mixing just until combined.
- Fold in chocolate chips and nuts if using.
- Drop by rounded tablespoons onto prepared baking sheets, 2 inches apart.
- Bake for 9-11 minutes until edges are golden but centers still look slightly underdone.
- Cool on baking sheets for 5 minutes, then transfer to wire racks.
- Store in airtight container once completely cooled.
Notes
- For consistent cookies, use a cookie scoop to portion the dough
- Line baking sheets with parchment or silicone mats for easy cleanup and even baking
- Allow baking sheets to cool completely between batches
- Avoid baking cookies on hot or warm baking sheets, which causes premature spreading
- For best flavor, use high-quality vanilla extract and chocolate
- Cookies should look slightly underdone when removed from the oven as they continue cooking on the hot baking sheet