
")
These rich, fudgy Brownie No Bake Bites deliver all the indulgent chocolate flavor of traditional brownies in a nutritious, bite-sized package. Made with just three simple ingredients, these treats are naturally paleo, vegan, low-carb, keto-friendly, and free from refined sugar. Perfect for satisfying chocolate cravings, pre-workout energy, or a quick afternoon pick-me-up, these brownie bites are as versatile as they are delicious. The best part? They come together in minutes without ever turning on your oven.
Why You’ll Love This Recipe
- Just 3 ingredients: Minimal ingredients means maximum simplicity
- No baking required: Perfect for hot days or busy schedules
- Multiple dietary needs: Satisfies paleo, vegan, keto, and low-carb requirements
- Nutrient-dense: Offers healthy fats and protein instead of empty calories
- Customizable: Easy to add personal touches with mix-ins and coatings
- Make-ahead friendly: Batch prep for grab-and-go snacks all week
Ingredients
Core Ingredients
- Almond flour – Creates a tender, cake-like texture while keeping carbs low
- Coconut oil – Provides healthy fats and helps bind the ingredients
- Unsweetened cocoa powder – Delivers rich chocolate flavor without added sugars
Optional Add-ins
- Sugar-free sweetener – Monk fruit, erythritol, or stevia for added sweetness
- Vanilla extract – Enhances the chocolate flavor with aromatic depth
- Sea salt – Balances and intensifies the chocolate experience
- Nut or seed butter – Adds protein and creates a more fudgy texture
Step-by-Step Instructions
Preparing the Brownie Mixture
Begin with high-quality ingredients for the best flavor and texture. In a medium mixing bowl, combine 1½ cups of fine almond flour, ½ cup of unsweetened cocoa powder (Dutch-processed offers a richer taste), and a pinch of sea salt if desired. The salt is optional but highly recommended, as it enhances the chocolate flavor significantly without making the bites taste salty.
Whisk these dry ingredients together until well combined and no lumps remain. This step ensures even distribution of the cocoa powder throughout the mixture, preventing any bitter pockets in your finished bites.
Next, add 1/3 cup of melted coconut oil to the dry ingredients. The coconut oil should be just melted but not hot – if it’s too warm, it can make the mixture difficult to work with. If you prefer a neutral flavor, use refined coconut oil, which has the tropical taste removed. For those who enjoy a subtle coconut note that complements the chocolate, unrefined virgin coconut oil works beautifully.
Using a spatula or wooden spoon, mix the ingredients thoroughly until they form a thick, somewhat crumbly dough. The mixture should hold together when pressed between your fingers. If it seems too dry, add an additional tablespoon of coconut oil. Conversely, if it feels too wet or oily, incorporate a tablespoon of almond flour at a time until the desired consistency is reached.
For those who prefer a sweeter treat, this is the stage to add your preferred sugar-free sweetener. Start with 2-3 tablespoons of powdered erythritol, monk fruit sweetener, or 5-10 drops of liquid stevia, adjusting to your taste preferences. Remember that unsweetened cocoa powder is quite bitter on its own, so some sweetener may be necessary depending on your palate.
A teaspoon of vanilla extract can also be added at this point for additional flavor depth. For a more complex chocolate profile, consider incorporating ½ teaspoon of espresso powder, which intensifies the chocolate flavor without adding a coffee taste.
Forming the Bites
Once your mixture has reached the proper consistency, allow it to rest for 5 minutes. This brief resting period helps the almond flour absorb some of the oil, making the dough easier to handle.
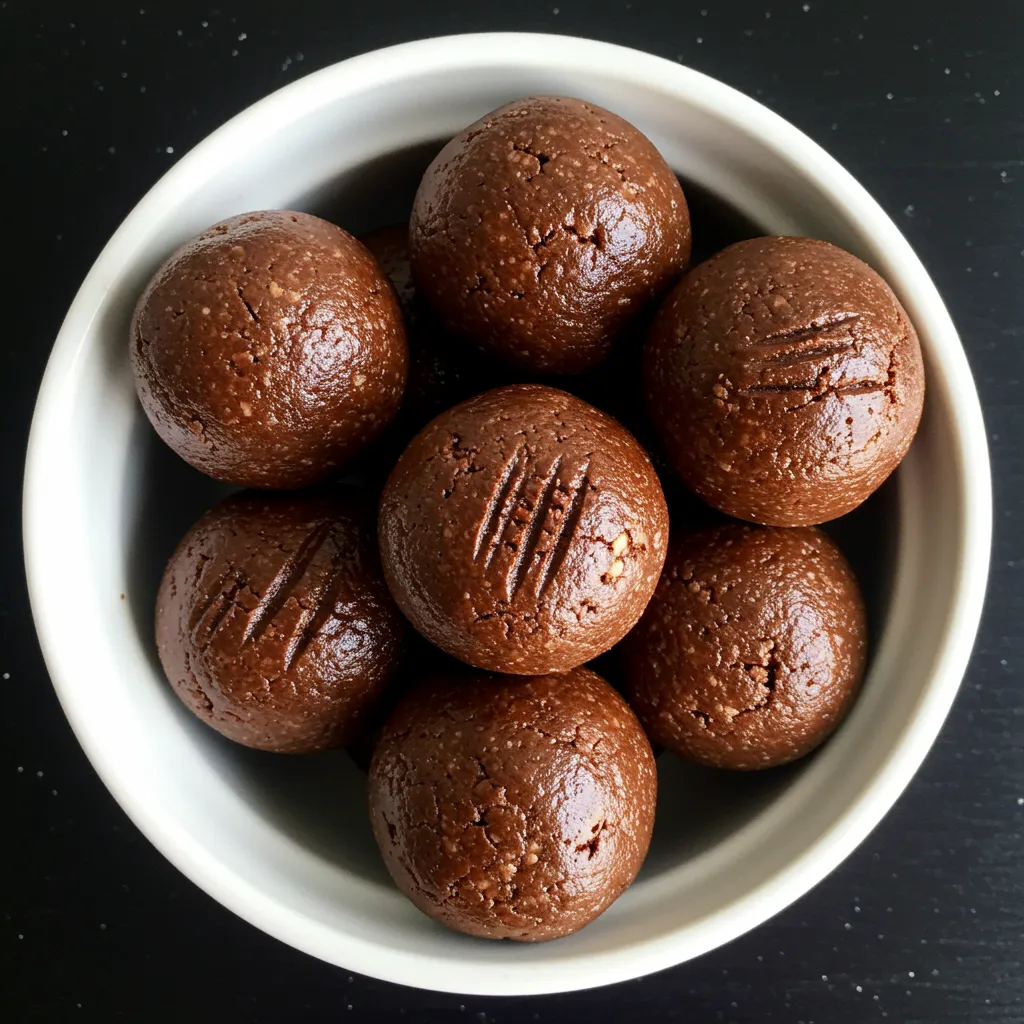
Using a tablespoon measure or a small cookie scoop for consistency, portion out the mixture. Roll each portion between your palms to form smooth, round balls approximately 1-inch in diameter. If the mixture is sticking to your hands, lightly dampen your palms with water or coat them with a tiny amount of coconut oil.
For a more truffle-like appearance, you can gently press patterns into the tops using a fork, the back of a spoon, or by rolling them in additional cocoa powder, finely chopped nuts, or unsweetened shredded coconut.
Place the formed bites on a parchment-lined tray or plate as you work. This recipe typically yields about 12-15 bites, depending on the size you make them.
Chilling and Storing
For the best texture and flavor development, these brownie bites benefit from chilling. Place the tray in the refrigerator for at least 30 minutes to allow them to firm up. During this time, the coconut oil will solidify, creating a more fudgy, truffle-like consistency.
After chilling, transfer the brownie bites to an airtight container. They can be stored in the refrigerator for up to 1 week, though they’re unlikely to last that long! If you prefer a softer texture, similar to a traditional brownie, allow them to sit at room temperature for about 5-10 minutes before enjoying.
For longer storage, these bites freeze exceptionally well. Place them in a single layer on a tray until frozen solid, then transfer to a freezer-safe container or bag. They’ll keep in the freezer for up to 3 months. Thaw in the refrigerator or enjoy them slightly frozen for a different textural experience.
These brownie bites are perfect for meal prep, as they maintain their quality throughout the week and can be grabbed on the go for a quick energy boost or chocolate fix without derailing dietary goals.
Pro Tips
- Use room temperature coconut oil for easier mixing
- Chill the mixture for 10 minutes if it’s too soft to roll
- For extra richness, use dark cocoa powder instead of regular
- Add a tablespoon of ground flaxseed for omega-3 fatty acids
- Roll the bites in cacao nibs for added texture and antioxidants
Nutritional Benefits
These Brownie No Bake Bites aren’t just delicious – they’re also packed with nutritional benefits that make them a smarter choice than traditional brownies:
Almond Flour: Provides protein, healthy fats, vitamin E, and manganese while keeping the carbohydrate content low. Unlike refined wheat flour, almond flour has a lower glycemic index, helping to maintain stable blood sugar levels.
Coconut Oil: Contains medium-chain triglycerides (MCTs), which are more easily digested and less likely to be stored as fat compared to other fats. These MCTs also provide quick energy, making these bites perfect for a pre-workout boost.
Cocoa Powder: Rich in flavanols, which have antioxidant properties and may support heart health. It also contains small amounts of iron, manganese, and magnesium. Raw cacao powder offers even higher levels of these beneficial compounds if you want to boost the nutritional profile further.
For those following specific dietary approaches, these bites fit seamlessly into multiple plans:
Keto: With approximately 2g net carbs per bite, they’re perfect for maintaining ketosis while satisfying chocolate cravings.
Paleo: All ingredients are paleo-compliant, focusing on whole foods rather than processed ingredients.
Vegan: Contains no animal products or byproducts, making them suitable for plant-based diets.
Low Carb: The high fat content and minimal carbohydrates make these an excellent option for those monitoring their carb intake.
Variations and Creative Ideas
The simplicity of this recipe makes it an ideal canvas for customization. Here are some delicious variations to try:
Flavor Enhancements
Mint Chocolate: Add ¼ teaspoon of peppermint extract to the base mixture for a refreshing twist that pairs beautifully with the rich chocolate.
Orange Chocolate: Incorporate 1 teaspoon of orange zest or ¼ teaspoon of orange extract for a bright, citrusy note that complements the depth of the cocoa.
Mocha: Mix in 1 teaspoon of instant espresso powder or finely ground coffee to create a sophisticated coffee-chocolate flavor profile.
Almond Joy: Fold in 2 tablespoons of unsweetened shredded coconut and press a whole almond into the center of each bite for a treat reminiscent of the popular candy bar.
Texture Additions
For added texture and nutritional benefits, consider mixing in:
- 2 tablespoons of hemp seeds for omega fatty acids
- ¼ cup of finely chopped walnuts for brain-healthy fats
- 2 tablespoons of chia seeds for fiber and omega-3s
- ¼ cup of sugar-free chocolate chips for double chocolate impact
Coating Options
Transform the appearance and add flavor dimension by rolling the finished bites in:
- Unsweetened shredded coconut
- Finely chopped nuts
- Additional cocoa powder (or raw cacao)
- A light dusting of cinnamon mixed with cocoa
- Ground freeze-dried raspberries for a fruity tang
Shape Variations
While balls are the most common shape, you can also:
- Press the mixture into a small parchment-lined container and refrigerate, then cut into squares for a more traditional brownie look
- Form into cylinders and dust with cocoa for a truffle-like appearance
- Make smaller, bite-sized “brownie pearls” for elegant presentation
Special Technique: Perfect Texture Balance
The key to exceptional no-bake brownie bites lies in achieving the ideal texture – not too dry and crumbly, not too soft and sticky. Professional chefs use a specific technique to test this balance before forming the bites.
Take a small amount of the mixture and press it firmly between your thumb and forefinger. When released, it should hold its shape completely but still feel slightly malleable. If it crumbles, the mixture is too dry – add coconut oil, a teaspoon at a time. If it’s too sticky or soft, incorporate additional almond flour.
The temperature of your ingredients matters significantly. All components should be around room temperature when mixing, creating a more cohesive dough. However, if your kitchen is particularly warm, you might need to chill the mixture briefly before rolling to prevent the coconut oil from becoming too soft.
The rolling technique also impacts the final texture. Roll each portion quickly between your palms with just enough pressure to create a smooth surface without compacting the mixture too densely. This creates a brownie bite with a slightly tender interior surrounded by a more set exterior, mimicking the textural contrast of a perfectly baked brownie.
For those who prefer a fudgier consistency throughout, press and shape the bites rather than rolling them, applying less pressure and creating a more rustic appearance. This gentle handling preserves the air pockets within the mixture, resulting in a lighter mouthfeel.
Frequently Asked Questions
Can I substitute the almond flour with another flour? Yes, other nut flours like hazelnut or walnut flour work well as 1:1 substitutes. For a nut-free version, sunflower seed flour can be used in the same amount, though it may impart a slightly different flavor.
My mixture is too dry and won’t hold together. What should I do? Add additional coconut oil, one teaspoon at a time, until the mixture holds together when pressed. Alternatively, adding 1-2 tablespoons of nut butter can help bind the ingredients.
Can I use something other than coconut oil? Melted butter (for non-vegan versions) or a neutral-tasting oil like avocado oil can work, though they may alter the final texture and flavor. Coconut oil has the advantage of solidifying when chilled, which helps these bites hold their shape.
How can I make these sweeter without adding carbs? Incorporate monk fruit sweetener, erythritol, or stevia to taste. Start with small amounts, as these sweeteners can be potent. You can also add a few drops of liquid stevia specifically formulated for chocolate recipes.
Why did my brownie bites turn out bitter? Unsweetened cocoa powder is naturally bitter. If your bites taste too bitter, try adding a bit more sweetener, a pinch of salt to balance the flavor, or using Dutch-processed cocoa, which has a milder flavor than natural cocoa powder.
")
Ingredients
- 1½ cups almond flour
- ½ cup unsweetened cocoa powder
- ⅓ cup coconut oil, melted
- Pinch of sea salt (optional)
- 2-3 tablespoons sugar-free sweetener (optional, adjust to taste)
- 1 teaspoon vanilla extract (optional)
Instructions
- In a medium bowl, whisk together almond flour, cocoa powder, and salt (if using) until well combined and no lumps remain.
- Add melted coconut oil to the dry ingredients. If using, add sweetener and vanilla extract as well.
- Mix thoroughly until the ingredients form a thick, slightly crumbly dough that holds together when pressed.
- Allow the mixture to rest for 5 minutes to let the almond flour absorb some of the oil.
- Using a tablespoon measure or small cookie scoop, portion the mixture and roll between your palms to form 1-inch balls.
- Place the formed bites on a parchment-lined tray or plate.
- Refrigerate for at least 30 minutes until firm.
- Transfer to an airtight container and store in the refrigerator for up to 1 week, or in the freezer for up to 3 months.
Notes
- If the mixture sticks to your hands while rolling, lightly dampen your palms with water
- For a more intense chocolate flavor, use Dutch-processed cocoa powder
- These bites can be enjoyed straight from the refrigerator or allowed to soften slightly at room temperature
- Keep these in the freezer for a longer-lasting chocolate emergency stash
- For portion control, use a small cookie scoop to ensure uniform size